Explore Dimension's Hasp in Bravely Default! This guide details each floor, revealing powerful items like the Yatagarasu and Demon's Staff, and offering strategies to overcome its challenges.
Walkthrough
- 1Floor 1: This floor is a copy of Vestment Cave's bottom floor with added stairs. It is devoid of monsters. The Adventurer and his companion are here, and they inform you that Teleport magic is unusable within the dungeon.
- 2Floor 2: This floor resembles the last floor of Harena Ruins. Equip the Dungeon Master ability to avoid status ailments from gas-spewing statues. From the entrance, go down and keep right. At the middle junction, go right for a Megalixir. At the south-most part, find a chest with a Longinus (strong against Aquatic) in the bottom-left corner. Continue left for a blue chest containing the Yatagarasu (strongest knife). The exit is to the right from the south-most junction.
- 3Floor 3: This floor is a copy of the Temple of Wind's basement. In the bottom-left corner, find a blue chest with the Demon’s Staff (best staff). Near the north, the path branches; go down towards the center for a chest with a second Megalixir. Head to the top-left corner for a chest with Lordly Robes (raises Mind). The exit is in the bottom-right corner, reached by heading to the top-left, then south, ignoring the first passageway.
- 4Floor 4: This floor resembles Mount Fragmentum. Head left from the entrance to find a blue chest containing the Earthbreaker (best axe; does Earth damage). Follow the path right; along the way, find a chest with a Death Axe. Towards the right side, turn right at the junction for a chest with a Wonder Rod, then continue past for the exit.
- 5Floor 5: This floor is a replica of the final area of the Witherwood. At the first junction, go down for a chest with a Gale Staff (amplifies Wind). Continue down and keep left at the next junction. In the bottom-left corner, find a blue chest containing the Demon’s Rod (best rod). From the blue chest, follow the path right, then up towards the center. Here, the path up leads to a chest with a Brave Suit, and the path down leads to the exit.
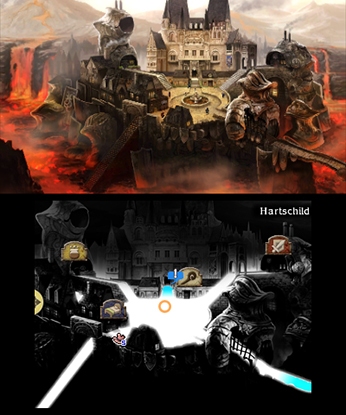
- 6Floor 6: This floor is a copy of the final part of Florem Gardens. Dungeon Master is recommended to avoid silence from purple flower beds. Standard chests are in the bottom-left corner (Yoichi’s Bow) and center (Air Knife). The blue chest, containing the Artemis’s Bow (best bow), is in the bottom-right corner. The exit is to the north from the entrance.
- 7Floor 7: This floor is a man-made construct, the first floor of... (The source text cuts off here).
Tips
- Equip the Dungeon Master (Freelancer ability) to mitigate status ailments like blindness from gas traps on Floors 2 and 6.
- Since Teleport magic is disabled and there's no easy exit, allocate ample time for exploring this dungeon.
- The dungeon contains monsters and humans that can no longer be found from Chapter 5 onwards, offering a second chance to complete your bestiary and acquire missed Genome Abilities.
- All encountered monsters have buffed stats compared to their original appearances.
- Floor 2: Megalixir, Longinus, Yatagarasu
- Floor 3: Demon’s Staff, Megalixir, Lordly Robes
- Floor 4: Earthbreaker, Death Axe, Wonder Rod
- Floor 5: Gale Staff, Demon’s Rod, Brave Suit
- Floor 6: Yoichi’s Bow, Air Knife, Artemis’s Bow
100% Human-Written. AI Fact-Checked. Community Verified. Learn how AntMag verifies content