Walkthrough for bravely default's Central Command Gauntlet Part 1, detailing strategies to defeat Profiteur, Einheria, The Jackal, Holly, Kamiizumi, Kikyo, Heinkel, Praline, Barras, Alternis, and Barbarossa.
- Flame Moths in Eisenberg’s Underflow for Firestorm.
- Giant Axes (5 from Gigas Lich) or similarly powerful axes.
- Monster Ability 10% Up, Pirate’s Physical Attack 20% Up (Level 9), Ninja’s Dual Wield (Level 11).
- For alternative Dark Knight strategy: Spiritmaster’s Adaptation (Level 7).
- For Knight strategy: Dual Shields.
- Dark Shield for Praline, Barras, Alternis, Barbarossa fight.
Walkthrough
- 1General Strategy: Utilize 3 Pirates and 1 Performer, all with the Vampirism Job Command. On the first turn, have the Performer buff everyone’s attack twice. Then, have everyone use Firestorm. With the right buffs and equipment (Pirate’s Physical Attack 20% Up, Ninja’s Dual Wield, powerful axes), you can defeat enemies on the first turn. Ensure your Performer is fast enough to act first.
- 2Alternative General Strategy: Use three Dark Knights with Dark Nebula (Level 11). This ability damages all on the field, so ensure a speedy character casts the Spiritmaster’s Adaptation (Level 7) on your team to prevent self-inflicted KOs.
- 3Boss Group 1: Profiteur, Einheria, and The Jackal
- Location: Before the elevator on the first floor.
- 4Profiteur uses Large BP Drink to increase his or allies' BP by 3.
- 5Einheria uses Crescent Moon.
- 6The Jackal uses Godspeed Strike.
- 7Profiteur can Brave up to 3 times and attack with Takeover four times.
- 8Strategy: Focus attacks on Profiteur first to stop BP supply. Use Pirate’s Amped Strike preceded by Swordmaster’s Free Lunch for a swift kill. Buff party defense, raise Rampart, and lower Einheria’s attack (Pirate’s Defang, Vampire’s Absorb Stats or Curse) and The Jackal’s speed (Pirate’s Shin Smash).
- 9Stats: Profiteur (Level 70, 95,000 HP), Einheria (Level 70, 105,000 HP), The Jackal (Level 70, 99,999 HP). Weaknesses: None.
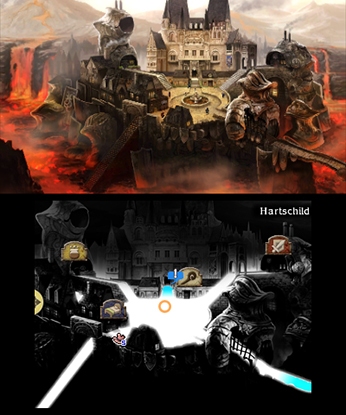
- 10Boss Group 2: Holly, Kamiizumi, Kikyo, and Heinkel
- Location: Middle of the 47th floor.
- 11Kamiizumi counters attacks.
- 12Kikyo uses Shippujinrai.
- 13Heinkel uses Protect Ally.
- 14Holly uses Reflect to negate magic.
- 15Strategy: Field a Knight with Dual Shields and have a Ninja use Kairai on the Knight to create a defensive wall. Use powerful group-hitting moves to bypass Heinkel’s Protect Ally. Summon magic is not affected by Reflect. Alternatively, defeat Heinkel first with single-hitting attacks, then focus on Holly to stop healing and Reflect. If Reflect is active, use Potions, Vampire’s White Wind, or Blood Thirst for healing instead of magic.
- 16Stats: Holly (Level 70, 85,000 HP), Kamiizumi (Level 70, 99,999 HP), Kikyo (Level 70, 90,000 HP), Heinkel (Level 70, 95,000 HP). Weaknesses: Lightning (Heinkel), None (Others).
- 17Boss Group 3: Praline, Barras, Alternis, and Barbarossa
- Location: Far north of the 48th floor.
- 18Praline uses My Hero to increase everyone’s BP by one each turn.
- 19Barras, Alternis, and Barbarossa each dish out two powerful attacks per turn.
- 20Alternis uses special moves that can be shrugged off with the Dark Shield.
- 21Strategy: Use a Knight with Dual Shields and Ninja’s Kairai. Maximize Defense and use the Dark Shield. Lower enemy Attack (especially Barbarossa’s) with Pirate’s Defang or Vampire’s Absorb Stats.
- 22Stats: Praline (Level 70, 85,000 HP), Barras (Level 70, 99,999 HP), Alternis (Level 70, 80,000 HP), Barbarossa (Level 70, 95,000 HP). Weaknesses: Lightning (Barbarossa), None (Others).
Tips
- Bosses in this section generally cannot survive 4 hits of 9999 damage from 3 characters.
- If your Performer is not fast enough for the general strategy, you may need to retry until they act first.
- Be aware that Dark Nebula hurts the user; Adaptation is crucial if using this strategy.
- When facing Holly, Kamiizumi, Kikyo, and Heinkel, avoid magical healing if Reflect is active.
- The battle against Praline, Barras, Alternis, and Barbarossa is described as a nightmare if not using extreme tactics.
- Defeating these bosses progresses the bravely default story. Specific item or ability rewards are not detailed in the source.
100% Human-Written. AI Fact-Checked. Community Verified. Learn how AntMag verifies content