Complete walkthrough for The Demon's Bargain quest in Dragon Age: The Veilguard. Includes boss strategies, item locations, and puzzle solutions.
Walkthrough
- 1Begin the quest in the Floating Archive Temple area after obtaining it from Bellara. Head south and go through the ominous portal to reach the Floating Island.
- 2Continue south and battle two Greater Sentinels (vulnerable to electricity, resist cold). A Greater Pride Demon will appear (resistant to electricity, vulnerable to Necrosis). Potions are available.
- 3Pick up the power crystal from the relic device to the south to dispel the blue barrier. Place it on the relic device on the broken bridge to the south.
- 4Cross the new bridge, open the small chest, and continue south across the log to reach Balcony Path. Slide down to the bottom.
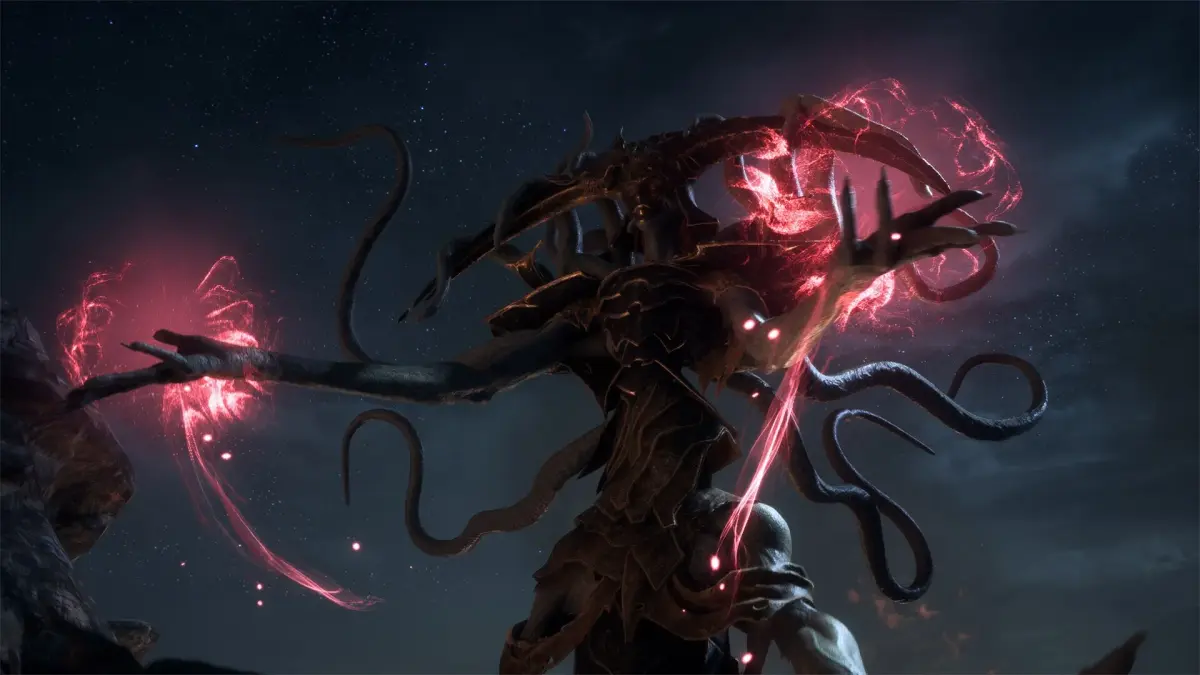
- 5Encounter more Greater Sentinels and Greater Spellwights. Defeat them, then face the Rage Demon, Burning Anger.
- 6Burning Anger primarily uses fire dash attacks and fire waves. Avoid its path or jump over waves. Charged attacks can stun it. It also leaps and slams down, and can hurl fireballs.
- 7Burning Anger has an armor bar that must be broken with detonations before it can be damaged. It is vulnerable to cold attacks and resistant to fire. Neve and Bellara's skills are recommended.
- 8Loot Burning Anger's corpse for the Veil Quartz Sample trinket for Bellara.
- 9To find a chest on Balcony Path, go through the archway to the east, pick up a power crystal, and place it on a relic device after fixing it with Bellara. Cross the new bridge, head south, and follow the path southwest to a ladder. Search the camp near the waterfall for loot and a lore note before climbing the ladder to find the chest.
- 10Head back to the bridge created with the power crystal and go east. A Frenzied Shade (stronger demon, vulnerable to cold, resistant to necrosis) will appear near the barrier. Defeat it.
- 11Pick up the Memento opposite the barrier and examine the backpack next to it. Use Bellara's power on the broken device near the barrier and pick up the power crystal.
- 12Place the power crystal on the relic device past the barrier and cross the new bridge to find loot, including a small chest with the Death Mask appearance.
- 13Continue northeast to the balcony, follow the path north, collecting potions, and prepare for a battle after a cutscene.
- 14Defeat many Voltaic Shades before destroying the blue crystal.
Tips
- Make sure to select the Elven Ruins to travel to, not Arlathan Forest, as they are different places.
- When fighting Burning Anger, focus on taking out smaller enemies first.
- Avoid Burning Anger's fire wave attacks by getting as far away as possible or jumping over them. A charged attack can stun it out of the attack.
- Use Sundered detonations or any detonation to break Burning Anger's armor bar.
- Neve is particularly useful in the Burning Anger battle, especially in combination with Bellara.
- If you've fought rage demons before, this one is similar.
- The Veil Quartz Sample trinket is obtained after defeating Burning Anger.
- The Memento and a backpack are found near the barrier on Balcony Path.
- The Death Mask appearance is found in a chest in the Elven Temple.
- Veil Quartz Sample trinket for Bellara (after defeating Burning Anger).
- Death Mask appearance (in a chest in the Elven Temple).
100% Human-Written. AI Fact-Checked. Community Verified. Learn how AntMag verifies content