Dominate Theory of Everything 2, a Demon-difficulty Geometry Dash level. Master intricate wave sections and deceptive fake-outs for victory.
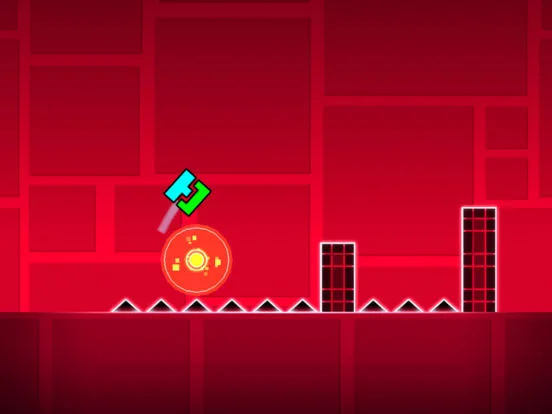
Theory of Everything 2, often abbreviated as TOE2, stands as the second official Demon-difficulty level in Geometry Dash. Released as part of Update 1.9, it significantly ramps up the challenge from its predecessor, "Theory of Everything." This level is renowned for its relentless pace, intricate wave sections, and deceptive fake-outs, demanding exceptional precision and memorization from players. Successfully conquering TOE2 is a significant milestone for any Geometry Dash enthusiast, solidifying their mastery of advanced mechanics.
Objectives:
- Complete the level from start to finish.
- Collect all 3 hidden Secret Coins.
Strategy Overview:
TOE2 is a masterclass in rhythm-based platforming, characterized by its high-speed transitions and a constant need for precise input. Unlike earlier levels that might allow for some improvisation, TOE2 heavily relies on memorization of its numerous fake-outs and specific timings. expect a steep learning curve, particularly in the notorious wave and ship sections. Practice mode is not just recommended; it's essential for breaking down the level into manageable segments and mastering each challenging sequence.
Key Challenges & Mechanics:
- Intense Wave Sections: The wave game mode is heavily featured and often requires incredibly tight maneuvers through narrow corridors and rapidly shifting gravity. Mastering the subtle taps and holds for precise wave control is paramount.
- Rapid Transitions: The level frequently switches between game modes (cube, ship, ball, UFO, wave, robot) with little warning, demanding quick adaptation and muscle memory for each mode's unique controls.
- Deceptive Fake-outs: TOE2 is infamous for its visual trickery. Invisible blocks, misleading pathways, and sudden changes in direction are common. Learning to anticipate these and react accordingly is crucial.
- Mini-Modes: Several sections feature "mini" versions of game modes, which alter You icon's size and physics, requiring even finer control.
- Gravity Portals: Frequent use of gravity portals, often in quick succession, can disorient players. Pay close attention to the direction of gravity to avoid unexpected deaths.
Step-by-Step Walkthrough & Common Pitfalls:
0-10% (Cube & Ship Introduction)
- Cube: The level begins with a straightforward cube section, introducing the aesthetic. Focus on consistent timing.
- Ship: Transitions into a relatively simple ship segment. Maintain a steady flight path, but be prepared for a sudden gravity flip.
- Pitfall: Overconfidence in the initial easy sections can lead to sloppy play later. Treat every segment with respect.
11-25% (Wave & First Coin)
- Wave: This is where the difficulty truly begins. The first wave section is fast-paced with tight corridors. Practice short, controlled taps.
- Coin 1 (25%): During a mini-wave section, after navigating a series of diagonal movements through a tunnel, you'll encounter a path of three yellow jump orbs. The trick here is to hit the first two orbs as normal, but then intentionally miss the third orb. This will cause your icon to fall onto a lower, hidden platform where the first Secret Coin is located. Immediately after collecting it, be prepared to tap to recover and continue the wave section.
- Pitfall: Missing the precise timing for Coin 1 can lead to a quick death or missing the coin entirely, requiring a restart of the section.
26-40% (Ball & UFO)
- Ball: A challenging ball section follows, featuring numerous gravity changes and precise timing over spikes.
- UFO: A brief but tricky UFO segment requires careful tapping to navigate small gaps.
- Pitfall: The ball section's rapid gravity shifts often catch players off guard. Memorize the sequence of gravity portals.
41-55% (Dual Cube & Second Coin)
- Dual Cube: This section introduces a dual cube mechanic, where two icons move simultaneously. The challenge lies in managing both icons' movements through synchronized jumps.
- Coin 2 (55%): Similar to the first coin, during a dual cube section, you'll see a path of three yellow jump orbs for both icons. Hit the first two orbs with both icons. For the third orb, intentionally miss it with the primary (lower) cube. This will cause the primary cube to fall onto a lower platform, collecting the second Secret Coin, while the secondary (upper) cube continues its path. Immediately after collecting, be ready to re-synchronize your jumps.
- Pitfall: Failing to properly desynchronize for Coin 2 will result in missing it. Re-synchronizing after collecting can also be tricky.
56-70% (Robot & Mini-Ship)
- Robot: A challenging robot section demands precise jumps and holds to clear gaps and avoid spikes.
- Mini-Ship: A short, intense mini-ship segment requires very fine control to navigate extremely tight spaces.
- Pitfall: The robot's jump mechanics can be unforgiving. Practice the exact timing for short and long jumps.
71-85% (Final Wave & Third Coin)
- Final Wave: This is arguably the most difficult section of the level. It's a prolonged, high-speed wave segment with extremely narrow passages, numerous fake-outs, and sudden gravity changes. This section demands near-perfect execution.
- Coin 3 (80%): During the final ship section, which is incredibly fast-paced, you'll encounter a series of three yellow jump rings. Instead of flying through them normally, you need to fly slightly above the first two rings. As you approach the third ring, drop down precisely to enter a hidden, very narrow tunnel located directly below the third ring. This tunnel leads to the third Secret Coin. Immediately after entering the tunnel and collecting the coin, you must quickly ascend to avoid crashing into the ground.
- Pitfall: The final wave section is a run-ender for many. Focus on muscle memory and anticipating the fake-outs. Missing Coin 3 is common due to the speed and precision required.
86-100% (Cube & Completion)
- Cube: The level concludes with a final, relatively straightforward cube section. Don't let your guard down, as a single mistake here can be devastating.
- Pitfall: Dying at the very end due to complacency is a common and frustrating experience. Maintain focus until the "Level Complete" screen.
Rewards:
| Reward Type | Quantity/Details | Unlock Condition |
|---|---|---|
| Stars | 14 Stars | Completing the level |
| Secret Coin | 1 Secret Coin (per coin collected) | Collecting each individual Secret Coin |
| Demon Icon | New Demon Icon (specific to TOE2) | Completing the level |
| Achievement | "Theory of Everything 2" | Completing the level |
Recommended Loadout/Settings:
- Practice Mode: use practice mode extensively. Break down the level into 10-15% segments and master each one before attempting full runs.
- Start Positions: Use start positions in practice mode to repeatedly attempt difficult sections.
- Icon Choice: While cosmetic, some players find certain icons visually less distracting or easier to track. Experiment to find what works best for you.
- Audio Cues: Pay close attention to the level's music. Many jumps and actions are synchronized with the beat, providing crucial audio cues.
- Screen Refresh Rate: Playing on a device with a higher refresh rate (e.g., 144Hz) can provide a smoother experience and potentially improve reaction times, though it's not strictly necessary.
Common Missables & Tips:
- Secret Coins: All three coins are easily missable due to their deceptive placement and the high speed of the level. Refer to the detailed instructions above and practice those specific segments.
- Patience: TOE2 is a test of patience. Don't get discouraged by repeated deaths. Every attempt builds muscle memory and understanding of the level's flow.
- Focus: Maintain intense focus throughout the entire level. A momentary lapse can lead to a quick demise.
- Community Guides: If you're truly stuck, watching video walkthroughs of players collecting the coins or demonstrating difficult sections can provide valuable visual guidance.
100% Human-Written. AI Fact-Checked. Community Verified. Learn how AntMag verifies content