Conquer every official Geometry Dash level with walkthroughs, coin locations, and strategic advice for Stereo Madness and beyond. Master RobTop's challenges an.
Welcome to the comprehensive guide for Geometry Dash's official levels! This section provides detailed walkthroughs, coin locations, and strategic advice to help you conquer every challenge RobTop has thrown your way. Whether you're a newcomer struggling with Stereo Madness or a seasoned player hunting for those elusive secret coins, you'll find everything you need right here.
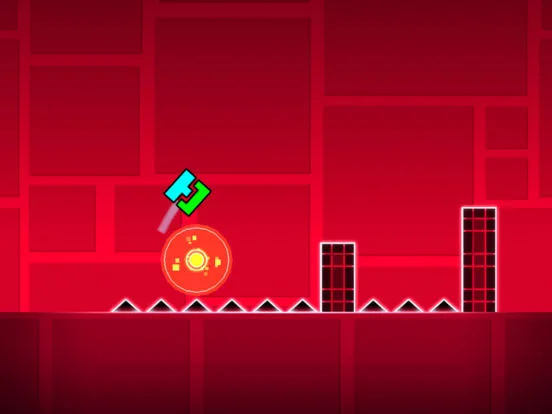
Stereo Madness (Easy)
The very first level, designed to introduce you to the core mechanics. Don't let its "Easy" rating fool you; mastering the timing is crucial for future levels.
- 0-10% (Cube): This opening section is straightforward. Focus on timing your jumps over the single and double spikes. The rhythm here is very basic.
- 11-25% (Ship): Your first encounter with the ship! Hold to fly up, release to fall. Navigate through the narrow gaps. Practice short taps for minor adjustments and longer holds for sustained ascent.
- 26-40% (Cube): Back to the cube. You'll encounter triple spikes and small platforms. Pay attention to the visual cues for when to jump.
- 41-55% (Ship): Another ship segment, slightly more challenging with tighter spaces. Remember to anticipate upcoming obstacles.
- 56-70% (Cube): This section introduces jump pads (yellow pads that launch you higher). Use them to clear larger gaps.
- 71-85% (Ship): The final ship sequence. This one requires precise control. Don't panic if you hit a wall; learn from your mistakes.
- 86-100% (Cube): The grand finale! A series of well-timed jumps over various spike configurations. The final jump is a large gap, often requiring a full-height jump.
Secret Coin Locations: Stereo Madness
- Coin 1 (25%): During the first ship segment, after navigating a few obstacles, you'll see a path leading upwards. Instead of staying on the main path, fly up into a hidden tunnel above the main route. The coin is located at the end of this short, elevated passage.
- Coin 2 (50%): In the second cube section, after a series of jumps over triple spikes, you'll encounter a yellow jump pad. Instead of using the jump pad to go high, perform a small, precise jump *before* the pad to land on a hidden platform above the main path. The coin is on this platform.
- Coin 3 (75%): During the final ship segment, after a series of tight vertical movements, you'll see a small gap in the ceiling that looks too small to fit. Carefully tap to ascend into this tiny opening. The coin is hidden just above the main flight path, requiring a very controlled upward movement.
Back on Track (Easy)
This level builds upon the fundamentals of Stereo Madness, introducing more complex jump sequences and slightly faster pacing.
- 0-15% (Cube): Starts with a series of quick jumps over single and double spikes. The rhythm is key here.
- 16-30% (Ship): A longer ship segment with more varied obstacle patterns. You'll need to weave through both horizontal and vertical spike formations.
- 31-45% (Cube): This section features more frequent use of jump pads and jump rings (yellow rings that launch you when you tap them). Timing your taps on the rings is crucial.
- 46-60% (Ship): Another ship sequence, introducing some moving obstacles. Anticipate their movement to avoid collision.
- 61-75% (Cube): A challenging cube part with a combination of jump pads, rings, and tight spike formations. Precision is paramount.
- 76-100% (Cube): The final stretch is a rapid-fire sequence of jumps, often requiring quick reflexes. Don't rush; maintain your rhythm.
Secret Coin Locations: Back on Track
- Coin 1 (20%): In the first ship section, after flying through a few standard obstacles, you'll see a small, almost hidden opening in the floor. Carefully descend into this gap to collect the coin. It requires a quick drop and ascent.
- Coin 2 (48%): During the second cube section, after using a few jump pads, you'll come across a series of platforms. Instead of jumping directly onto the next platform, perform a slightly delayed jump to land on a tiny, almost invisible platform above the main route. The coin is located on this elevated spot.
- Coin 3 (85%): In the final cube segment, shortly after a series of jump rings, you'll encounter a section with a few blocks and a single spike. Instead of jumping over the spike normally, perform a very small, precise tap to land on the block *before* the spike, then immediately jump again to hit a hidden jump pad that launches you into a secret area above, where the coin awaits.
Continue exploring the guide for more official levels, strategies, and all the secret coin locations!
100% Human-Written. AI Fact-Checked. Community Verified. Learn how AntMag verifies content