Master the challenging Wave game mode in Geometry Dash's Can't Let Go level. Collect 3 Secret Coins and hone your precise input management.
Objectives:
- Complete the level.
- Collect 3 Secret Coins.
Strategy:
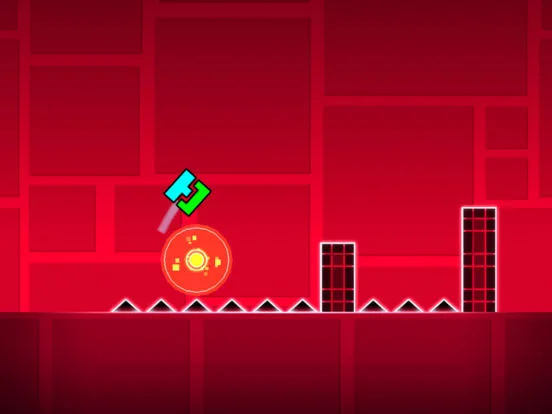
"Can't Let Go" marks a significant step up in difficulty, primarily due to the introduction of the Wave game mode. This mode demands constant, precise input management: holding down moves your icon diagonally upwards, while releasing allows it to fall diagonally downwards. Mastering the Wave is crucial, as you'll navigate tight, zigzagging tunnels and dodge numerous spikes.
Beyond the Wave, this level also features more complex Cube and Ship sections compared to previous levels. Expect faster speeds, tighter gaps, and more intricate spike arrangements. Pay close attention to the rhythm and timing, as many obstacles are designed to be cleared with specific, short taps or holds. Don't be afraid to practice individual sections in practice mode, especially the Wave parts and the areas leading to the Secret Coins.
Common Pitfalls:
- Over-holding in Wave sections: Many players hold for too long, crashing into the ceiling. Practice short, rhythmic taps.
- Underestimating speed changes: The level has several speed portals. Be prepared for sudden accelerations, which require quicker reactions, and decelerations, which might throw off your timing if you're not expecting them.
- Rushing the Ship sections: While seemingly straightforward, the ship sections have narrow corridors and spike formations that punish hasty movements. Maintain a steady flight path.
- Missing the Secret Coins: Unlike earlier levels, the coins in "Can't Let Go" require specific, often counter-intuitive maneuvers. Review the detailed coin strategies below.
Secret Coin Locations:
Collecting all three Secret Coins in "Can't Let Go" requires careful timing and specific deviations from the main path. Here's a detailed guide for each:
-
Coin 1 (Approx. 20% - First Wave Section):
This coin is found early in the level, during the very first Wave section.
- Location: After the initial Cube segment and the first speed portal (which speeds you up), you'll transition into the Wave. Navigate through the first few sets of spikes.
- Strategy: As you progress through this Wave section, you'll encounter a series of three yellow jump orbs arranged diagonally upwards. The key here is to ignore the first two yellow orbs completely. Instead of hitting them, you need to fly underneath the first two orbs.
- Execution: After passing under the second yellow orb, you'll see a small, open path leading downwards into a hidden tunnel. This tunnel contains the first Secret Coin. You'll need to briefly release your input to drop into this path. Once you collect the coin, continue flying through the tunnel to re-join the main path. Be careful not to hit the spikes on the floor or ceiling of this hidden passage.
- Visual Cue: Look for a small gap below the second yellow orb that seems to lead nowhere – that's your entry point.
-
Coin 2 (Approx. 50% - Cube Section):
The second coin is located in a Cube section around the halfway point, shortly after a brief Ship segment.
- Location: After the first Ship section and a subsequent speed portal (slowing you down), you'll be back in Cube mode. You'll encounter a series of blue jump pads and platforms.
- Strategy: As you navigate this Cube section, you'll come across a sequence where you need to jump over a set of three vertical spikes. Immediately after clearing these spikes, you'll see a single blue jump pad on a platform.
- Execution: Instead of using this blue jump pad to jump high, you need to perform a very short, precise tap on the blue jump pad. This will give you just enough height to land on a small, hidden platform directly above the blue pad. This hidden platform leads to a narrow passage containing the second Secret Coin. After collecting the coin, you'll drop back onto the main path.
- Common Mistake: Holding down the jump too long on the blue pad will send you too high, missing the hidden platform entirely. It requires a quick, almost instantaneous tap.
-
Coin 3 (Approx. 75% - Second Wave Section):
The final coin is found in the second, more challenging Wave section towards the end of the level.
- Location: This coin appears after the second Ship section and another speed increase. You'll enter a long, intricate Wave segment with many tight corridors and spikes.
- Strategy: As you navigate this Wave section, you'll reach a point where the path splits briefly. The main path continues upwards, but you'll notice a small, dark opening leading downwards.
- Execution: To get this coin, you must intentionally drop into this lower path. This means releasing your input at the precise moment to descend into the hidden tunnel. This tunnel is very narrow and filled with spikes, so you'll need extremely delicate Wave control to navigate it without crashing. The third Secret Coin is located within this challenging lower passage. After collecting it, you'll need to carefully maneuver back up to rejoin the main path.
- Difficulty: This is arguably the hardest coin to obtain due to the extreme precision required in the narrow, spike-filled Wave tunnel. Practice this section extensively in practice mode. Look for the split in the path; the main path goes over a small block, while the coin path goes under it.
Rewards:
- 4 Stars (upon level completion)
- 1 Secret Coin (per coin collected, contributes to unlocking The Vault)
- New Wave Icon (upon completion of the level)
100% Human-Written. AI Fact-Checked. Community Verified. Learn how AntMag verifies content