Follow the Metroid: Other M Cryosphere HARD walkthrough to defeat Gigafraug and Kyratian, and learn how to use Shinespark.
Walkthrough
- 1From the start, go right to the Navigation Booth to save. Avoid the Snomers by rolling and crossing platforms, and bypass the Fly Pod. Freeze and destroy the four Volfons with missiles.
- 2In the next room, use Charge Shot Boost, Jump Extend, or IBJ to cross the gap. If you fall, use the underwater platforms; standing on the far-right one allows you to shoot the switch. Avoid Joulions and the non-hostile Fumbleye.
- 3Run down the hall, avoiding Snomers and Joulions.
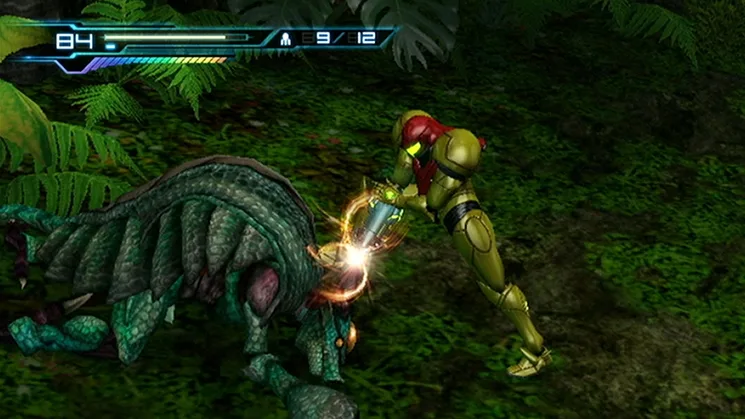
- 4In the next room, fall down to encounter the Gigafraug. Attack it with a missile, two overblasts, and a charge shot to enable Lethal Strike. Its plating must be fractured with a missile before certain attacks work. Be cautious of falling if attempting an Overblast near a wall. You can evade the Gigafraug on platforms to the right, but damaging it is difficult. Sense Move its fast stomping attack. Shatter the ice blocking the Navigation Booth with a missile if needed, then save.
- 5Enter the next room, jump into the tunnel on the left wall, and roll past the vent when it's not blowing. Roll to the back to enter a new room.
- 6Fight the Kyratian: Sense Move its first attack, then immediately fire a missile. Overblast it after it recovers, then missile it again when its armor charges. Missiles may deflect if it's still charging. Continue shooting, then use Lethal Strike. A faster method is a point-blank charge shot followed by an immediate Lethal Strike, but be aware they recover quickly and this can be unreliable. Enter the door.
- 7Ignore the Volfons and run ahead to face another Gigafraug. Fire a missile at the ice wall, climb the crack, and bomb it. Alternatively, crack the wall with a missile and let the Gigafraug smash it.
- 8Ignore Snomers and Morph Ball jump right. Kick climb to the top, then drop down the left side to avoid Dessgeegas. Kill both with missiles and enter the unlocked door.
- 9In the next room, fire missiles at the stalactites the Kyratian doesn't shoot. Do not shoot the Kyratian directly as it deflects attacks. If it tries to run, get close and shoot it as it jumps to make it fall into the water and explode. Otherwise, use charge shot and Lethal Strike on the other side. Repeat for the second Kyratian, using Jump Extend or Charge Shot Boost to reach the platform without knocking down the last stalactite. Overblasting this Kyratian is difficult. Save at the Navigation Booth.
- 10Avoid Snomers and Himellas. Discover a Gigafraug corpse and enter the door in the back. Kill Snomers and the Gigafraug. Sense Move to avoid Himellas' icicles. Destroy the Fly Pod behind the left fan by getting close, then freeze the other fan. Destroy ice on the left wall with missiles, including frozen machinery. Ride the machinery to the Terminal to unlock the next room.
- 11Jump down and head up the cliff. Use a missile and normal bomb to clear the ice pillar. Avoid Snomers and Joulions. In the Water Tank, fire a missile at the cracked wall on the left, then bomb it. Be aware of Skulteras. You will be sucked into the previous room. Go left, climb out of the water, and jump back to the Water Tank.
- 12Use the Morph Ball on the floor to avoid Kyratians' grabs. Jump to the other side and exit through the door.
- 13Notice ice patches on the floor. Walk down the hall, step on the third patch, and return to the first. Adam will contact you.
- 14-----SPEED BOOSTER AUTHORIZED-----
- 15-----SHINESPARK AUTHORIZED-----
- 16Run forward into the clearing. Attempt to Shinespark right, even if you hit a wall. Go to the room with the sleeping Fumbleye and try to jump across the gap again. Alternatively, run around the catwalk to the door. The awakened Fumbleye is less likely to hit you if you keep moving.
- 17Speed Boost down the hall and Shinespark across the chasm. Save at the Navigation Booth on the left.
- 18In the Generator Room, run to the right wall, hold down to get into the corner. Jump high, wall jump, and quickly press 1, Right, 2 to grab the ledge, skipping platforms. Alternatively, Speed Boost from the previous room; firing a beam over the stairs maintains the charge for a Shinespark upwards.
- 19Another method involves knocking Snomers off the wall. Climb the lowest rotating ledge and use Search View to shoot the switch. To reach the top: the easy way is to kick climb once, hang on as the ledge spins back, then jump across when Samus faces the wall. The hard way is to kick climb to the top at once, but this risks falling. Get to the platform.
Tips
- When fighting the Gigafraug, Sense Move is effective against its fast stomping attack.
- For the Kyratian, a point-blank charge shot followed by an immediate Lethal Strike is a faster kill method, but requires precise timing.
- To defeat the second Gigafraug, you can let it smash the ice wall after you crack it with a missile.
- When facing the Kyratian near the water, shooting it as it jumps can cause it to fall into the water and explode.
- The Shinespark can be used to cross the chasm in the Generator Room.
100% Human-Written. AI Fact-Checked. Community Verified. Learn how AntMag verifies content