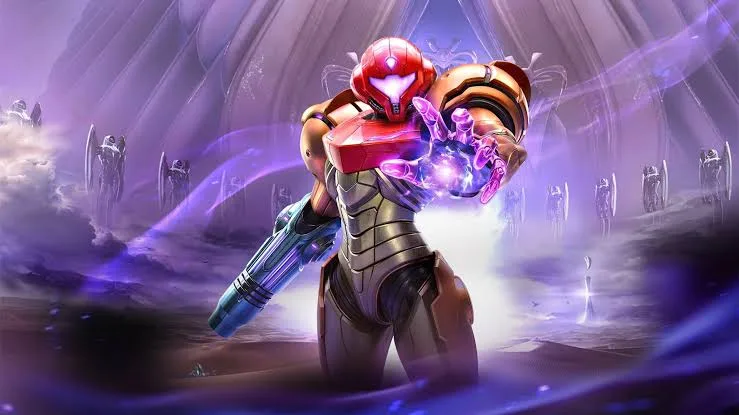
Welcome back, bounty hunter! Metroid Prime 4: Beyond drops you onto the alien world of Aetheria, where you'll need to master its threats and explore its environments to survive. As Samus Aran, you'll be unlocking vital upgrades like the Varia Suit and honing your combat skills against the daunting challenges that await you on Nintendo Switch.
This guide is here to help you navigate the intricacies of Aetheria. We'll cover everything from locating hidden collectibles and mastering challenging boss fights to understanding the game's progression and ensuring you don't miss any crucial items. Get ready to dive deep and uncover all the secrets Beyond has to offer.
Guide and Walkthrough (NS2) by CyricZ
Metroid Prime 4: Beyond walkthrough and guide by CyricZ, covering chapters, collectibles, logbook entries, and more.
- 1Chapter 1: The Front Lines (Tanamaar)
- 2Chapter 2: Into the Wilds (Fury Green)
- 3Chapter 3: The Factory Floor (Volt Forge)
- 4Chapter 4: The Expanse (Sol Valley, Flare Pool)
- 5Chapter 5: A Horrible Fate (Ice Belt)
- 6Chapter 6: Icy Reception (Fury Green, Volt Forge)
- 7Chapter 7: An Emerald Mystery (Flare Pool)
- 8Chapter 8: Full Amperage (Volt Forge, Ice Belt)
- 9Chapter 9: Digging Too Deep (Great Mines)
- 10Chapter 10: The Body Electric (Mech Assembly and Collection)
- 11Finale: A Battle of Wills (Chrono Tower)
Collectibles:
- Sol Valley Map and Shrines
- Energy Tanks
- Missile Expansions
- Shot Expansions
- Psychic Power Bomb Expansions
- Full List of Items
Logbook Entries:
- Biology
- Machines
- Lamorn Legacy
- Technology
- Notes on Missable Content
- Controls
- Menus/Displays (HUD (heads-up display — the on-screen icons showing health, ammo and the minimap))
- Tips/Tricks
Guide and Walkthrough (NS2) by CyricZ (2)
Full Metroid Prime 4: Beyond walkthrough covering all chapters from The Front Lines to the Finale, plus collectibles and logbook entries.
- 1Chapter 1: The Front Lines (Tanamaar)
- 2Chapter 2: Into the Wilds (Fury Green)
- 3Chapter 3: The Factory Floor (Volt Forge)
- 4Chapter 4: The Expanse (Sol Valley, Flare Pool)
- 5Chapter 5: A Horrible Fate (Ice Belt)
- 6Chapter 6: Icy Reception (Fury Green, Volt Forge)
- 7Chapter 7: An Emerald Mystery (Flare Pool)
- 8Chapter 8: Full Amperage (Volt Forge, Ice Belt)
- 9Chapter 9: Digging Too Deep (Great Mines)
- 10Chapter 10: The Body Electric (Mech Assembly and Collection)
- 11Finale: A Battle of Wills (Chrono Tower)
Collectibles:
- Sol Valley Map and Shrines
- Energy Tanks
- Missile Expansions
- Shot Expansions
- Psychic Power Bomb Expansions
- Full List of Items
Logbook Entries:
- Biology
- Machines
- Lamorn Legacy
- Technology
Additional Sections:
- Basics (Controls, Menus/Displays, Tips/Tricks)
- Samus Aran's Arsenal
- Notes on Missable Content
Controls
Explore the control schemes for Metroid Prime 4: Beyond, including Dual Sticks, Pointer, and Fusion options. Learn button mappings for FPS, Morph Ball, and Vi-O-La modes.
Metroid Prime 4: Beyond offers a variety of control schemes, building upon previous titles. The primary options are Dual Sticks, which mimics modern console FPS controls, and Pointer, which utilizes gyro aiming similar to the Wii iterations. The Nintendo Switch 2 version introduces "Fusion" options for both, allowing the Right Joy-Con's mouse function for aiming. Extensive fine-tuning options are available in the Setting Menu under Menus/Displays.
All controls, with the exception of the Minus Button for the Pause Menu, are remappable. Input types are fixed (sticks for stick functions, buttons for button functions).
FPS Controls
| Input | Dual Stick | Pointer |
|---|---|---|
| Movement | Up/Down: Walk forwards/backwards Left/Right: Strafe left/right | Up/Down: Walk forwards/backwards Left/Right: Strafe left/right |
| Camera | Move Camera | N/A |
| Jump/Dodge | Jump Dodge while Lock-On | Jump Dodge while Lock-On |
| Morph Ball | Enter Morph Ball Mode | Enter Morph Ball Mode |
| Primary Fire | Shoot Beam Hold for Charge Beam Interact | Shoot Beam Hold for Charge Beam Interact |
| Visors | Toggle Visors | Toggle Visors |
| Lock-On/Scan | Lock-On Grapple Beam Scan with Scan Visor | Lock-On Grapple Beam Scan with Scan Visor |
| Secondary Fire | Shoot Beam Hold for Charge Beam | Reset Camera or Cursor |
| Weapon Select | Jump Dodge while Lock-On | Jump Dodge while Lock-On |
| Weapon Select | Fire Secondary Weapon Hold to Charge Secondary Weapon | Fire Secondary Weapon Hold to Charge Secondary Weapon |
| Weapon Select | Select Ice Shot | Select Ice Shot |
| Weapon Select | Select Missile Launcher | Select Missile Launcher |
| Weapon Select | Select Thunder Shot | Select Thunder Shot |
| Weapon Select | Select Fire Shot | Select Fire Shot |
| Vehicle | Mount Vi-O-La | Mount Vi-O-La |
| Menu | Pause Menu | Pause Menu |
| Gyro | Free Aiming during Lock-On | Aim and Turn Free Aiming during Lock-On |
Morph Ball Controls
| Input | Dual Stick | Pointer |
|---|---|---|
| Movement | Roll (Up is away from camera) | Roll (Up is away from camera) |
| Bomb | Bomb | Bomb |
| Boost Ball | Boost Ball (Hold to charge, then release) | Boost Ball (Hold to charge, then release) |
| Exit | Exit Morph Ball Mode | Exit Morph Ball Mode |
| Spring Ball | Spring Ball | Spring Ball |
| Spider Ball | Spider Ball (Hold) | Spider Ball (Hold) |
| Reset/Bomb | Bomb | Reset Camera or Cursor |
| Boost Ball | Boost Ball (Hold to charge, then release) | Boost Ball (Hold to charge, then release) |
| Power Bomb | Power Bomb | Power Bomb |
| Vehicle | Mount Vi-O-La | Mount Vi-O-La |
| Menu | Pause Menu | Pause Menu |
| Gyro | Spring Ball | Spring Ball |
Vi-O-La Controls
| Input | Dual Stick | Pointer |
|---|---|---|
| Steering | Left/Right - Steer Up/Down - Move slowly forward/backward | Left/Right - Steer Up/Down - Move slowly forward/backward |
| Camera | Up/Down: Look down/up Left/Right: Look left/right | N/A |
| Boost | Engage Boost | Engage Boost |
| N/A | N/A | N/A |
| Fire | Fire Projectile | Accelerate |
| Visors | Toggle Visors | Toggle Visors |
| Lock-On/Scan | Lock-On Scan with Scan Visor | Lock-On Scan with Scan Visor |
| Accelerate/Reset | Accelerate | Reset Camera or Cursor |
| Brake | Brake | Brake |
| Accelerate/Fire | Accelerate | Fire Projectile |
| Radio | Radio: Play/Stop | Radio: Play/Stop |
| Radio | Radio: Next Track | Radio: Next Track |
| Radio | Radio: Previous Track | Radio: Previous Track |
| Minimap | Toggle Minimap | Toggle Minimap |
| Dismount | Dismount Vi-O-La | Dismount Vi-O-La |
| Menu | Pause Menu | Pause Menu |
Guide and Walkthrough (NS2) by CyricZ (3)
Complete Metroid Prime 4: Beyond walkthrough covering all chapters, collectibles, and logbook entries. Updated January 2026.
- 1Chapter 1: The Front Lines (Tanamaar)
- 2Chapter 2: Into the Wilds (Fury Green)
- 3Chapter 3: The Factory Floor (Volt Forge)
- 4Chapter 4: The Expanse (Sol Valley, Flare Pool)
- 5Chapter 5: A Horrible Fate (Ice Belt)
- 6Chapter 6: Icy Reception (Fury Green, Volt Forge)
- 7Chapter 7: An Emerald Mystery (Flare Pool)
- 8Chapter 8: Full Amperage (Volt Forge, Ice Belt)
- 9Chapter 9: Digging Too Deep (Great Mines)
- 10Chapter 10: The Body Electric (Mech Assembly and Collection)
- 11Finale: A Battle of Wills (Chrono Tower)
- Refer to the FAQ section for notes on missable content.
- Consult the Collectibles section for details on Sol Valley Map and Shrines, Energy Tanks, Missile Expansions, Shot Expansions, Psychic Power Bomb Expansions, and a Full List of Items.
- Use the Logbook Entries section to find information on Biology, Machines, Lamorn Legacy, and Technology.
- Familiarize yourself with the Basics, including Controls, Menus/Displays, and Tips/Tricks.
- Explore Samus Aran's Arsenal to understand available equipment.
Similar guides you might like


100% Human-Written. AI Fact-Checked. Community Verified. Learn how AntMag verifies content