
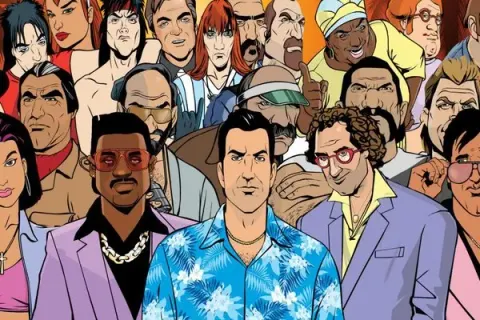
Welcome to Grand Theft Auto VI, the latest open-world sandbox from Rockstar Games. You’ll be diving into the vibrant world of Vice Beach, taking on missions, engaging in street races, and uncovering every secret the city has to offer. With a focus on atmospheric gameplay, a great soundtrack, and the freedom to explore, this is the ultimate playground for anyone who loves a good sandbox experience.
This guide is your key to mastering GTA VI. We’ll help you navigate the challenges, from securing essential gear like Armor Vests and mastering Vehicle Import/Export to finding those elusive Hidden Packages scattered across Vice Beach. We’ll also break down key story chapters like "Power Plays" and provide insights into Aesthetic Customization, ensuring you experience everything the game has to offer.
Part 1
Grand Theft Auto VI Part 1 covers general information, controls, vehicles, and the map. Learn about the HUD, skills, and saving.
- 1Familiarize yourself with the game's controls for on foot, vehicles (cars, motorcycles, boats, submarines, helicopters, and planes), and other modes of transportation.
- 2Understand the game menus and the main screen interface.
- 3Learn about the three protagonists and their unique skills.
- 4Study the map (minimap) to navigate the game world effectively.
- 5Understand the Quick Saving feature.
- 6Be aware of the presence of animals in the game world.
- 7Learn how to change your character's appearance.
- 8Understand melee fighting mechanics and how to deal with hostile NPCs (non-player characters).
- 9Learn about firearm and weapon usage.
- 10Understand the law enforcement system, including the wanted level (radar (your minimap with nearby blips and threats marked)), how to get rid of wanted ratings, restricted areas, and what happens when you are busted.
- 11Be aware of vehicle and aircraft damage.
- 12Learn how to use a Los Santos Customs shop for vehicle customization and repairs.
- 13Understand the 'Wasted' state and what it means.
- 14Learn about the 100% score and how to achieve it.
- 15Understand the stock market mechanic.
- 16Review advanced tips and information for a better gameplay experience.
- 17Consult the 100% Completion List and Accomplishments List (Visible, Secret, Multiplayer, and PlayStation 3 Specific) for further objectives.
- Pay attention to the HUD (Heads-Up Display) for important information like health, armor, and the radar.
- Use cover (press the cover button to crouch behind walls or objects) effectively when engaging in combat.
- Aim for a headshot (a shot that lands on the enemy's head, usually an instant kill) for critical damage against enemies.
- Cutscenes (cinematic sequences) often provide important story details and context.
- Checkpoints (automatic save points) will save your progress during missions.
- Be mindful of your wanted level; a high wanted level will attract more police attention.
- DLC (Downloadable Content) may introduce new weapons or features.
- NPCs (non-player characters) can be allies or enemies.
- Avoid unnecessary risks that could lead to your character respawning.
- Set waypoints on your map to guide your journey.
- Explore the world in free roam (unrestricted gameplay) to discover hidden items and activities.
- Be aware that mods (modifications) are not officially supported and can cause issues.
Part 2
Navigate Part 2 of your Grand Theft Auto VI journey with our comprehensive guide, covering Strangers and Freaks, Michael's missions, Lester's setups, and more. Get it done!
Alright, welcome back! You've made it to Part 2 of our Grand Theft Auto VI walkthrough. This section dives deeper into the game, covering a ton of missions, side activities, and those quirky Strangers and Freaks encounters. We'll break down everything you need to know to keep progressing smoothly, whether you're playing as Michael, Franklin, or Trevor. Let's get this done!
Part 3
Grand Theft Auto VI Conclusion section details, including mission lists and guide information. Learn about mission order and collectibles.
- 1The guide lists the following missions as part of the conclusion: MCL10. Reuniting the Family, SFK27. Exercising Demons - Trevor (Mary Ann), MCL11. Doting Dad, SMR3. Legal Trouble, FRN5. Lamar Down, MCL12. Meltdown, MCL13. Parenting 101, GHF50. The Order of Things (Part Two), LSR3. The Multi Target Assassination, LSR4. The Vice Assassination, LSR5. The Bus Assassination, LSR6. The Construction Assassination, GHF51. Businesses (Part Two) with sub-sections A. McKenzie Field and B. Franklin's Businesses, TBS1. Planning the Score, TBS2. Stingers (The Subtle Approach), TBS3. Gauntlet (1, 2, 3) (The Subtle Approach), TBS4. The Big Score (The Subtle Approach), TBS5. Getaway Vehicle (The Obvious Approach), TBS6. Driller (The Obvious Approach), TBS7. Sidetracked (The Obvious Approach), TBS8. The Big Score (The Obvious Approach), FRN6. Finale with sub-sections A. Something Sensible, B. The Time's Come, C. The Third Way, D. Mrs. Philips / Damaged Goods, GHF52. Other Rewards, GHF53. 100% Completion Score, and SFK28. The Last One.
Tips:
- The guide emphasizes an ordered approach to missions and tasks, suggesting it makes the game easier and more enjoyable.
- Collectibles and activities are identified with letter designations and a three-letter Region Prefix (e.g.,
Part 4
Grand Theft Auto VI installation details for Xbox 360 and PlayStation 3, including save data limitations and transfer methods.
Xbox 360 Installation:
This version comes on two discs. One disc must be installed onto a hard drive, and the other must be played using at least the DVD-ROM drive. Do not install both discs to the hard drive, as Rockstar advises reading data from two different sources to prevent glitches. You can install one disc to a flash drive with a high transfer rate (preferably the Install disc) and the other to the hard drive (the Play disc). The game disc still needs to be in the DVD-ROM drive for verification.
The game recognizes multiple sources for game save data (HDD, Memory Unit, USB Drive), and you can switch between them. However, you can only save fifteen saves to a single device. For multiple saves, you will need multiple devices.
PlayStation 3 Installation:
This version uses a single large-capacity Blu-Ray disc. 8GB will be installed onto the console's hard drive, with the remainder of the game played directly from the Blu-Ray drive. This results in slower loading times compared to the Xbox 360 version.
The game only recognizes one source of game save data (HDD). Saves can be archived to other devices like an SD Card via the dashboard. Similar to the Xbox 360, only fifteen saves can be stored on one device. To use an archived save, you must overwrite a save on the HDD at the dashboard before starting the game.
Transferring game saves between consoles can be problematic due to anti-tampering measures. The preferred method is using PSN's cloud server. Using other devices like an SD Card may lead to the "You did not create this game save" error if the device is not formatted by the PS3. Saves from non-PS3 formatted devices are assumed to be from third-party cheat devices and are restricted. If a device is PS3 formatted, transferring saves should be fine.
Properly formatting save devices on PS3 can only be done through the built-in media slots on original
Similar guides you might like

100% Human-Written. AI Fact-Checked. Community Verified. Learn how AntMag verifies content