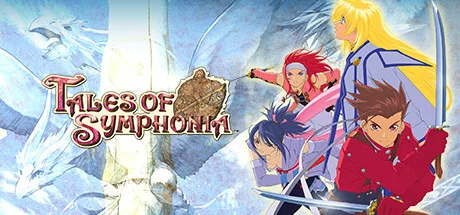
Tales of Symphonia is a single-player RPG where you embark on an epic adventure across the worlds of Sylvarant and Tethe'alla. You'll master essential combat techniques and optimize your character's growth as you strive to save two worlds from destruction. With a great soundtrack and full controller support, this atmospheric journey is perfect for RPG fans looking for a deep, engaging experience.
This guide will help you conquer every challenge the game throws at you. We cover beginner tips to advanced strategies, including how to uncover hidden quests and master the game's combat system. Whether you're aiming for all the Steam Achievements or just want to ensure you don't miss a single detail on your quest to save the worlds, we've got you covered.
Authored by: vinheim
Information about vinheim, the author of this Tales of Symphonia guide, also known as Alexander Paul Kleinheider.
This guide and its contents are protected by copyright held by Alexander Paul Kleinheider, dating from 2007 to 2009.
- You can find vinheim on Facebook at facebook.com/vinh3im and on Twitter at @vinheim.
--- Tales of Symphonia Copyright 2003 Namco ---
Navigate the Tales of Symphonia walkthrough with ease using our comprehensive table of contents. Find section codes for quick access to guides, tips, and more.
This guide is dedicated to Veronica Basaldua, the cousin of my best friend Raul. She passed away in December 2007 while it was being written.
This may not be reproduced under any circumstances except for personal, private use. It may not be placed on any web site or otherwise distributed publicly without advance written permission. Use of this guide on any other web site or as a part of any public display is strictly prohibited, and a violation of copyright.
Table of Contents
To navigate much easier through this guide, I added the search system, which works just by following these simple steps:
- Highlight the "Section Code" of the section which you wish to go and copy it (CTRL+C).
- Press CTRL+F to bring up the search sub-menu.
- Paste the "Section Code" and press ENTER twice to be where you wanted to be. Just like magic!
My Section Codes were made as precise as possible, and I also prefer this method instead of having you scroll 30 min through this huge guide looking for the section you want to go.
| Section | Section Code |
|---|---|
| 1] Introduction | [sx100] |
| 1.1] Contact Rules | [sx101] |
| 2] Game Basics | [sx200] |
| 2.1] Story | [sx201] |
| 2.2] Controls | [sx202] |
| 2.3] Status Effects | [sx203] |
| 3] Characters | [sx300] |
| 4] Abbreviations | [sx400] |
| 5] In-depth Walkthrough | [sx500] |
| 5.1] Disc 1: Chapter 1: Sylvarant | |
| 5.1.1] The Village of Oracles, Iselia | [sx501] |
| 5.1.2] Martel Temple | [sx502] |
| 5.1.3] Iselia | [sx503] |
| 5.1.4] Iselia Forest | [sx504] |
| 5.1.5] Dirk's House | [sx505] |
| 5.1.6] Iselia | [sx506] |
| 5.1.7] Heading south to an Inferno | [sx507] |
| 5.1.8] The Desert Oasis, Triet | [sx508] |
| 5.1.9] Sylvarant Base | [sx509] |
| 5.1.10] Triet | [sx510] |
| 5.1.11] Triet Ruins, the first seal | [sx511] |
| 5.1.12] Ossa Trail | [sx512] |
| 5.2] Chapter 2: Easy Way | |
| 5.2.1] The Small Fishing Port, Izoold | [sx513] |
| 5.2.2] The Port City, Palmacosta | [sx514] |
| 5.2.3] Hakonesia Peak | [sx515] |
| 5.2.4] Palmacosta | [sx516] |
| 5.2.5] Palmacosta Ranch | [sx517] |
| 5.2.6] Palmacosta | [sx518] |
| 5.2.7] Thoda Dock | [sx519] |
| 5.2.8] Thoda Geyser, the seal of water | [sx520] |
| 5.2.9] Hakonesia Peak | [sx521] |
| 5.2.10] The City of Ruins, Asgard | [sx522] |
| 5.2.11] Balacruf Mausoleum, the third seal | [sx523] |
| 5.2.12] The City of Devastation, Luin | [sx524] |
| 5.2.13] Asgard Human Ranch | [sx525] |
| 5.2.14] Luin | [sx526] |
| 5.2.15] The Village of Adventurers, Hima | [sx527] |
| 5.2.16] Asgard Human Ranch | [sx528] |
| 5.2.17] Lake Umacy | [sx529] |
| 5.2.18] Hima | [sx530] |
| 5.2.19] Tower of Mana | [sx531] |
| 5.2.20] Thoda Geyser | [sx532] |
| 5.3] Chapter 3: Hard way | <+-+> |
| 5.3.1] The Village of Adventurers, Hima | [shw01] |
| 5.3.2] The City of Hope, Luin | [shw02] |
| 5.3.3] The City of Ruins, Asgard | [shw03] |
| 5.3.4] Balacruf Mausoleum, the second seal | [shw04] |
| 5.3.5] Tower of Mana | [shw05] |
| 5.3.6] The City of Devastation, Luin | [shw06] |
| 5.3.7] Asgard Human Ranch | [shw07] |
| 5.3.8] Hima | [shw08] |
| 5.3.9] Asgard Human Ranch | [shw09] |
| 5.3.10] The Small Fishing Port, Izoold | [shw10] |
| 5.3.11] The Port City, Palmacosta | [shw11] |
| 5.3.12] Hakonesia Peak | [shw12] |
| 5.3.13] Palmacosta | [shw13] |
| 5.3.14] Palmacosta Ranch | [shw14] |
17.2] Final Words........................................[s1702]
Concluding thoughts on Tales of Symphonia Remastered. This guide wraps up with final words from the author, contact info, and a reminder about the spoiler-free nature of the walkthrough.
Alright, we've reached the end of the road for this guide! It's been a journey, and I'm really glad you decided to follow along. This is Alexander P. Kleinheider, also known as vinheim, and I poured a lot of love into this walkthrough because, honestly, Tales of Symphonia is one of the best RPGs out there. It stands tall with series like Final Fantasy, Dragon Quest, and Xenosaga, and I truly hope you enjoyed reading this guide as much as I enjoyed writing it.
Just a few quick notes before we sign off:
- I wrote this guide for free because I genuinely love this game. If you're expecting flowery language to describe every little scene trigger, you might be a bit disappointed. This guide is already massive, and keeping things straightforward helps manage that size.
- You won't find explanations for basic battle mechanics, the main menu, or saving here. The in-game tutorials and the manual do a fantastic job covering those fundamentals, so I figured I'd let them handle it.
- Abbreviations are a lifesaver when writing a guide this big. They keep things concise and, frankly, make the text look cleaner.
- This isn't the only guide out there, and I'm not forcing you to use mine. However, if you do check out others, be prepared for potential spoilers that could ruin the surprise of the story.
- Speaking of spoilers, they're a big deal. I played through this game myself without reading any spoilers first, and experiencing all the story's twists and turns as they happened was incredible. I really don't want to take that away from you.
With all that said, let's wrap this up! I hope you enjoyed the guide, and remember, it's designed to be spoiler-free so you can experience the game's story without worry.
Contact Rules
I'm usually hanging out on Twitch and YouTube, so feel free to drop by and say hi when I'm live! It's always great to see familiar faces.
- twitch.tv/vinheiim
- youtube.com/c/vinheimk
o Important
Get a grip on Tales of Symphonia! This guide breaks down the game's controls for menus, field, towns, dungeons, and battles, plus a taste of the story.
Hey there! So you're diving into Tales of Symphonia, huh? Awesome choice! This section is all about getting you comfortable with the game's nitty-gritty: how to actually play it and a little taste of the story to set the mood. Think of it as your friendly cheat sheet before you really get going.
2.1] Story Snippet
The game kicks off with a bit of lore that sets the stage. Imagine a world once sustained by a giant tree, the source of all mana. Sadly, a war shattered this balance, and a hero had to sacrifice their life to take the tree's place. The goddess, heartbroken, vanished, leaving behind angels with a crucial mission: wake her up. If she sleeps, the world is doomed. So, the angels find the Chosen One to journey to a heavenly tower, marking the start of the world's regeneration. Pretty epic, right?
2.2] Controls Breakdown
Alright, let's get down to business with the controls. Knowing these will make your journey SO much smoother.
Menu Controls
- Control Stick / D-pad: Move the cursor around menus.
- A Button: Confirm your selection. This is your best friend for pretty much everything.
- B Button: Cancel out of things or go back.
- C Stick: Handy for scrolling through pages, especially in longer lists.
- L/R Buttons: These are your quick-switchers. In menus, they'll swap between character tabs (like Tech, Status, EX Skill, Equip) or item types.
- Start: Tapping this will toggle item stats when you're looking at items, or character stats when you're on the main menu.
Field Map Controls
- Control Stick: This is how you move your main character around the world map.
- D-pad: Quick access to open the world map.
- A Button: Use this to enter towns, dungeons, or other points of interest.
- B Button: Cancel actions, or use it to board the Rheaird (your flying mount) or get on/off the EC (an important vehicle later).
- X Button: Hop on or off Noishe, your trusty companion.
- Y Button: Opens up the main menu, where you can access everything else.
- Z Button: Triggers a skit! These are little conversations that add flavor to the story and characters.
- L/R Buttons: Spin the camera around your character to get a better view of your surroundings.
- Start: Toggles the world map display.
Town/Dungeon Map Controls
- Control Stick: Move your character around within towns and dungeons.
- D-pad: While standing still, you can use this to rotate your character in 45-degree increments. Useful for getting the right angle!
- A Button: The action button! Use it to talk to people, examine objects, and interact with the environment.
- X Button: Activate your Sorcerer's Ring. This is a key tool for solving puzzles and interacting with certain objects.
- Y Button: Opens the main menu, just like on the field map.
- Z Button: Start a skit. Keep an eye out for these!
Battle Controls
- Control Stick: Move your character around the battlefield or select items from a menu.
- D-pad: Select strategic Orders for your party members.
- A Button: Basic Attack. Get in there!
- B Button: Perform Magic or Techniques. This is where your special moves come in.
- C Stick: Set up shortcuts for your Magic and Techniques for quick access. Super handy!
- X Button: Guard yourself or cancel a magic/technique you've started.
- Y Button: Opens the Battle Menu, where you can use items or change strategies mid-fight.
- Z Button: Unleash a powerful Unison Attack! This requires specific conditions, so keep an eye out for when you can use it.
- L Button: Delay your magic or technique. Sometimes timing is everything.
- R Button: Change your target. Hold it down to cycle through enemies or select a specific one.
- Start: Pause the battle. Take a breather and plan your next move.
2.3] Status Effects
You'll run into various status effects throughout your adventure, just like in most RPGs. While Tales of Symphonia might have fewer than some games (looking at you, Final Fantasy!), it's still super important to know what they are, how to cure them, and how to prevent them. This section is your go-to guide for understanding what ailments you might face and how to deal with them. Stay healthy out there!
Similar guides you might like


100% Human-Written. AI Fact-Checked. Community Verified. Learn how AntMag verifies content