
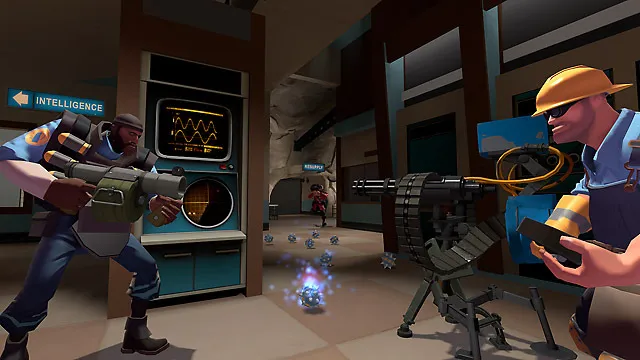
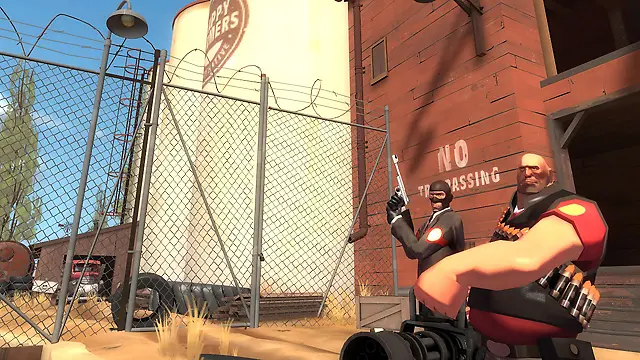
Welcome to Team Fortress 2, Valve's legendary class-based shooter that's been kicking around since 2007. It's a game of chaotic, objective-based multiplayer battles where you pick one of nine distinct classes, each with unique weapons and abilities, and work with your team to capture control points, push payloads, or grab the enemy's intelligence. Think fast-paced firefights, strategic positioning, and a whole lot of personality.
This guide dives deep into mastering TF2's core mechanics and strategies. We'll cover everything from fundamental movement like jumping and crouching to advanced tactics such as camping and understanding class matchups. Whether you're aiming to snag those tricky Steam Achievements, get a handle on item acquisition, or just want to dominate in Capture the Flag matches, this guide will equip you with the knowledge to turn the tide of battle and survive challenging Halloween events.
Getting Started
Learn how to complete all missions in Team Fortress 2, including Crossover, Good Old Fashioned Shooting Contest, Scout's Honor, and more. Get tips and strategies for each mission.
Getting Started
Learn how to complete all missions in Team Fortress 2, including Crossover, Good Old Fashioned Shooting Contest, Scout's Honor, and more. Get tips and strategies for each mission.


Basic Controls & Movement — Team Fortress 2 Guide
Master Team Fortress 2's Basic Controls & Movement. Learn essential inputs and nuanced mechanics for every aspiring mercenary's optimal gameplay.
Mastering the fundamental controls and understanding movement mechanics are paramount to success in Team Fortress 2. While the game offers intuitive defaults, a deeper dive reveals nuances and essential actions that every aspiring mercenary should internalize. This section will guide you through the core inputs, explain their functions, and offer tips for optimal use.
Core Movement & Action Controls
These are the absolute basics you'll use constantly, regardless of your chosen class.
- W, A, S, D: These keys control your character's movement.
- W: Move Forward
- A: Strafe Left
- S: Move Backward
- D: Strafe Right
Strategy Tip: Rely heavily on strafing (A and D) during combat to make yourself a harder target. Constant forward/backward movement in a straight line is predictable and often fatal.
- Spacebar: Jump.
Strategy Tip: Jumping can help you clear small obstacles, reach higher ground, or evade certain attacks (like rockets or grenades). However, jumping too predictably in combat can also make you an easier target for skilled players.
- Left Mouse Button (LMB): Primary Fire. This activates the main attack of your currently equipped weapon. For most classes, this is their primary damage output.
- Right Mouse Button (RMB): Alternate Fire / Secondary Function. This key's function varies significantly by class and weapon. Understanding these contextual uses is crucial.
- Scout: No alt-fire on most weapons.
- Soldier: No alt-fire on most weapons.
- Pyro: Airblast (reflect projectiles, push enemies, extinguish allies).
- Demoman: Detonate sticky bombs (when using the Stickybomb Launcher).
- Heavy: Spin up Minigun (before firing).
- Engineer:
- With a wrench equipped: Bring up the Build Menu for structures (Sentry Gun, Dispenser, Teleporter Entrance/Exit).
- With a PDA equipped: Bring up the Destroy Menu for structures.
- Medic: Activate ÜberCharge (when using the Medigun and charge is full).
- Sniper: Zoom in with sniper rifles.
- Spy:
- With a Disguise Kit equipped: Bring up the Disguise Menu.
- With a Sapper equipped: Place a Sapper on enemy buildings.
Common Pitfall: New players often forget the powerful secondary functions of weapons like the Pyro's airblast or the Medic's ÜberCharge. Practice using these regularly!
Weapon Management & Utility Controls
These keys allow you to switch between your arsenal and perform essential utility actions.
- 1, 2, 3 (and sometimes 4, 5): Weapon Slot Selection. These keys directly select weapons from your equipped loadout.
- 1: Primary Weapon Slot
- 2: Secondary Weapon Slot
- 3: Melee Weapon Slot
- 4: Often used for utility items like the Engineer's PDA or the Spy's Disguise Kit.
- 5: Less common, sometimes used for specific items or custom keybinds.
- Q: Quick Switch to Last Used Weapon. This is incredibly useful for fast weapon swaps, such as switching from a primary weapon to melee for a quick hit, then back to primary.
- R: Reload. Most projectile and bullet-based weapons require reloading. Pressing R will initiate a reload animation.
Strategy Tip: Always try to reload during downtime or when you're safely behind cover. Being caught with an empty clip in a firefight is a common mistake.
- Ctrl (Left Control): Crouch. Crouching reduces your hitbox size, makes you move slower, and can allow you to pass under certain obstacles.
Strategy Tip: Crouch-jumping (jumping while holding crouch) can allow you to reach slightly higher ledges or clear certain gaps that a regular jump cannot. It's also vital for "crouch-strafing" to dodge incoming fire more effectively.
- G: Taunt. Each class and many weapons have unique taunts. Some taunts can even deal damage (e.g., the Pyro's Hadouken or the Heavy's Showdown).
Common Pitfall: Taunting in the open or during active combat is often a death sentence. Use taunts strategically after a successful play or when safely behind lines.
- Z, X, C: Voice Commands. These keys open menus for various pre-recorded voice lines.
- Z: Basic communication (e.g., "Medic!", "Help!").
- X: Tactical communication (e.g., "Go!", "Incoming!").
- C: Responses and other commands (e.g., "Thanks!", "Good Job!").
Strategy Tip: Use voice commands, especially "Medic!", to communicate your needs to your team without typing. This can be a lifesaver!
- Tab: Scoreboard. Displays current game scores, player lists, and other match information.
- M: Change Class/Spectate. Allows you to switch to a different class or enter spectator mode during a round.
- ~ (Tilde Key): Console. For advanced users, pressing the tilde key (usually above Tab) opens the developer console. This allows for custom commands, script execution, and advanced game settings. While not essential for basic play, it's a powerful tool for customization.
Optimizing Your Setup
Team Fortress 2 offers extensive customization options for controls. It's highly recommended to explore these to find what works best for you.
Step-by-Step: Adjusting Keybinds
- From the main menu, click on "Options."
- Navigate to the "Keyboard" tab.
- Click "Customize..." to view and change individual key assignments.
- Experiment with different binds for actions you use frequently. For example, some players prefer to bind "Jump" to the scroll wheel for advanced jump techniques like "bunnyhopping."
By understanding and practicing these basic controls, you'll lay a solid foundation for becoming a formidable player in Team Fortress 2. Don't be afraid to experiment with keybinds and spend time in the training mode or on community servers to get a feel for each class's unique control scheme.
Controls & UI — Team Fortress 2 Guide
Navigate Team Fortress 2's controls and UI. This guide details default keybinds, HUD elements, and customization tips to optimize your mercenary gameplay.
Navigating the world of Team Fortress 2 is made intuitive through its well-designed controls and user interface. This guide will break down the default keybinds, explain the essential elements of the HUD, and offer tips for customization to optimize your gameplay experience. Mastering these fundamentals is the first step to becoming a formidable mercenary.
Team Fortress 2's controls and user interface (UI) are designed to be accessible for new players while offering depth for veterans. The Heads-Up Display (HUD) provides critical information at a glance, and the default keybinds are generally well-thought-out. However, personalizing these settings can significantly enhance your comfort and efficiency in combat. the basics and provides guidance on how to tailor them to your playstyle.
Default Controls
Here are the standard controls for movement and combat. These can be customized in the game's options menu.
| Action | Default Key |
|---|---|
| Move Forward | W |
| Move Backward | S |
| Strafe Left | A |
| Strafe Right | D |
| Jump | Spacebar |
| Crouch | Ctrl |
| Primary Attack | Left Mouse Button |
| Secondary Attack | Right Mouse Button |
| Reload / Use Ability | R |
| Melee Attack | V |
| Weapon 1 (Primary) | 1 |
| Weapon 2 (Secondary) | 2 |
| Weapon 3 (Melee) | 3 |
| Voice Chat | V |
| Drop Weapon | G |
| Taunt | Z |
Understanding the HUD (Heads-Up Display)
The HUD provides vital information during gameplay:
- Health and Armor: Located in the bottom-left corner, showing your current health and any armor you possess.
- Ammo Count: Displays the remaining ammunition for your current weapon.
- Class Icon: Identifies your current class.
- Objective Information: Displays the status of control points, payload cart, or flag.
- Team Information: Shows the status of your teammates, including their health and class.
- Scoreboard: Accessed by pressing Tab, showing player scores, ping, and other match details.
- Overheal Indicator: A green bar above your health shows how much temporary overheal you have from a Medic.
Customization and Optimization
- Keybinds: Many players rebind keys for convenience. Common changes include binding voice chat to an easier-to-reach button or assigning specific weapon slots to mouse buttons.
- HUD Layout: The HUD can be customized using third-party HUDs or console commands to change the size, position, and visibility of elements. This can help reduce screen clutter and highlight important information.
- Mouse Sensitivity: Adjusting mouse sensitivity in the game's options is crucial for accurate aiming. Find a setting that allows for quick turns without sacrificing precision.
- Viewmodel Settings: Commands like
r_drawviewmodel 0can hide your weapon model, which some players find less distracting.
Tips for New Players
- Spend time in the training mode to get comfortable with the controls and basic mechanics.
- Don't be afraid to experiment with different keybinds until you find what feels most natural.
- Pay attention to the HUD; it's your primary source of information in the heat of battle.
- Learn the class-specific abilities and how they map to your controls.
Advanced Customization
For more advanced users, the console commands offer a deeper level of customization. You can create aliases to execute multiple commands with a single key press, further streamlining your gameplay. For example, binding a key to instantly switch to your primary weapon and fire can be a useful combat maneuver.
Beginner Tips
New to TF2? Get started with beginner tips. Learn classes, teamwork, objectives, and combat basics for immediate impact.
Welcome to Team Fortress 2! As a new mercenary, the battlefield can seem overwhelming with its diverse classes, chaotic combat, and objective-based gameplay. This guide provides essential beginner tips to help you get started, understand the core mechanics, and begin contributing to your team's success. Focusing on these fundamental principles will accelerate your learning curve and make your initial experiences more enjoyable and rewarding. Mastering the basics is the first step towards becoming a formidable player.
1. Understand the Classes: Team Fortress 2 features nine distinct classes, each with unique abilities and roles. Don't try to master them all at once. Start by experimenting with a few classes that appeal to you. The Soldier is a good all-rounder with a powerful rocket launcher, the Heavy offers high damage output but is slow, and the Medic is crucial for healing and supporting your team. Read the in-game class descriptions to get a feel for their strengths and weaknesses.
2. Stick with Your Team: Lone wolves rarely survive long in Team Fortress 2. Always try to stay near your teammates. This provides safety in numbers, allows for easier healing from Medics, and enables coordinated attacks. If you're playing a support class like the Medic, your primary goal is to keep your teammates alive. If you're a damage dealer, stick with a Medic or a Heavy for protection and support.
3. Learn the Objectives: Team Fortress 2 is not just about getting kills; it's about completing objectives. Whether it's capturing control points, pushing a payload cart, or stealing the enemy's intelligence, understanding your team's goal is paramount. Pay attention to the on-screen indicators and listen to team callouts. A player focused on the objective, even with fewer kills, is often more valuable than a high-scoring player oring the objective.
4. Master Your Primary Weapon: Your primary weapon is your main source of damage. Spend time learning its effective range, reload speed, and projectile behavior (if applicable). For example, the Scout's Scattergun is devastating up close but weak at range, while the Sniper's Rifle requires precise aim for long-distance kills. Practice aiming and leading targets in training maps or against bots.
5. Use Health Packs and Ammo Boxes: Your health and ammo are finite. Keep an eye on your health bar and look for health packs scattered throughout the map. Larger health packs restore more health. Similarly, ammo boxes replenish your ammunition. Engineers can also build Dispensers, which provide health and ammo to nearby teammates.
6. Communicate with Your Team: Even basic communication can make a huge difference. Use the in-game voice chat or text chat to call out enemy positions, warn about incoming threats, or request assistance. Simple phrases like "Spy behind us!" or "Need healing!" can save lives and help your team coordinate.
7. Don't Be Afraid to Experiment: Try different weapons and loadouts. While some weapons are more popular than others, many can be effective in the right hands and situations. Experimenting will help you discover what playstyle suits you best and how to counter different enemy strategies.
| Tip Category | Key Advice |
|---|---|
| Class Understanding | Start with a few classes, learn their roles. |
| Teamwork | Stay with your team, support each other. |
| Objectives | Focus on the game mode's goals. |
| Combat | Master your primary weapon, use health/ammo. |
| Communication | Use chat/voice to call out threats and needs. |
Similar guides you might like

100% Human-Written. AI Fact-Checked. Community Verified. Learn how AntMag verifies content