
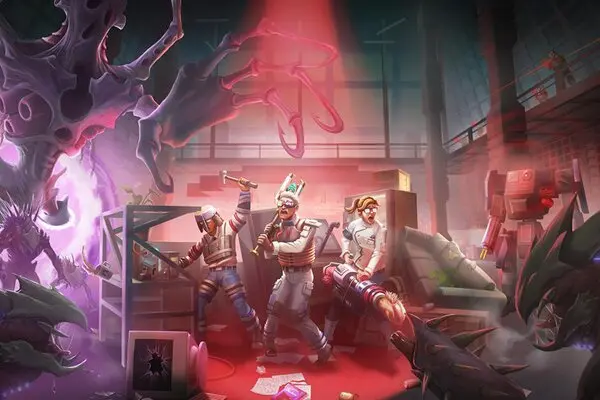
Welcome to the Outlands, Legend! Apex Legends throws you into a fast-paced, squad-based multiplayer shooter where unique characters, called Legends, battle it out in a fight for survival. You'll drop onto a map, scavenge for weapons and gear, and work with your teammates to be the last squad standing. Whether you're playing the core Battle Royale mode or diving into other playlists, mastering the game's mechanics and understanding your Legend's abilities is key to becoming the Champion.
This guide is here to help you navigate the Apex Games. We'll cover everything from fundamental gameplay and choosing the right Legend, like the gravity-manipulating Horizon, to advanced tactics for every mode. Get ready to dominate the battlefield with expert strategies for combat, looting, and climbing the Ranked Leagues. We'll also provide tips for specific challenges, ensuring you're prepared for anything the Apex Games throw your way.
Part 1
Comprehensive walkthrough and guide for X-Men Legends 2: Rise of Apocalypse on PS2. Find all collectibles, master skills, and unlock secrets with this complete guide.
This is a comprehensive guide for the PlayStation 2 version of X-Men Legends 2: Rise of Apocalypse. The guide is intended to be 100% complete, covering all aspects of the game except for the full item prefix/suffix range. No further updates are planned unless a major issue is discovered.
For questions regarding the PS2 version, the author is available to help. For other systems (Xbox, GameCube, PC, PSP), please check the respective GameFaqs message boards.
The author's email address has spaces to prevent viruses; remove them when sending mail.
The guide utilizes a 'Code' feature for quick navigation using CTRL+F and the provided codes.
Table of Contents Codes:
- ITTG: Introduction to the guide
- WLKTHR: Walkthrough (Acts 1-5, including collectibles and interlude points)
- SKL: Skills Key (listing playable characters)
- ITM: Items Key (Belts, Gloves, Armors, Prefixes, Suffixes)
- TTG: Trivia Game answers (Acts 1-5)
- DRC: Danger Room Computer Courses (1-6)
- UNLOCK: Unlockables (Costumes)
- VERHIS: Version History
- NXTVER: Next versions
- THNX: Thanks
- LGLBS: Legal
Part 2
Continue your Apex Legends journey with Part 2 of our comprehensive walkthrough, guiding you through objectives, combat tips, and essential game mechanics.
Walkthrough:
- Begin in the Military Prison Outpost, Greenland. Your starting characters are Magneto, Wolverine, Cyclops, and Storm. There are no initial objectives.
- Follow the only available path. You will receive Game Tip #1 on switching active heroes using the + button.
- Continue onward to receive Game Tip #2 on basic attacks (X for Normal, O for Heavy) and combo chaining.
- Proceed through the only functioning door. Game Tip #3 advises that items can be hidden in breakable objects like barrels.
- Advance further, and Mystique and Sabretooth will be separated from the team. You will encounter generic enemies.
- Game Tip #4 explains that L1 is used to activate a Health Pack when health is low.
- Game Tip #5 details using Mutant Powers (hold R2, then press a button) which consume EP, and R1 to use an Energy Pack to restore EP.
- In the next room, a cutscene will play, followed by a
Part 3
Master Part 3 of Apex Legends with this detailed walkthrough. Learn enemy tactics, find key items, and overcome challenges with expert tips for beginners.
Alright, let's dive into Part 3! This section is all about getting that security code to move forward, and you'll be doing a bit of backtracking and exploring across a few areas. Don't worry, I'll guide you through it step-by-step.
- 1
Dead Zone & Desolate Mesa: You'll start off seeing some bug creatures dragging off Blink. Your first objective is to find a [Security Code Module] in the {Desolate Mesa}. Right near where you start, you'll encounter some fires. Remember GAME TIP #10: Use mutant powers to extinguish fires. Iceman is your go-to for this. A bit further on, you'll find a bridge point. GAME TIP #11 mentions using mutant powers to build bridges, and yep, Iceman can do that too! You can build a bridge here to get to some bugs. If you don't have Iceman or someone similar, there's another path down a little later. Before you head down that path, extinguish the fire near the bridge point and break the crates for some Techbits and Potions. Follow the path upwards, dealing with bugs as they come. Near the lower area, you'll see some burning wreckage with a Tech Station. These give permanent stat bonuses, so use it wisely – this one gives +2 Strike. After that, head down the path next to the wreckage for a cutscene. You'll have to fight a special bug to save Blink. Talk to her, and she'll open a portal to the next island, also unlocking the Blink Portal selection on your pause screen (it has a 5-minute cooldown). Keep an eye on your Automap; you'll see an exit icon but no obvious way out. As you walk, the ground will break, leading you to Cerci Cavern. For now, let's stick to the Dead Zone. At the very end of this section, you'll find a flashing red thing – this is a Homing Beacon (A1HB1), which you need for Iron Man. There are four needed per Act, and you'll find six in Act 1 total. Now, head back towards the Cerci Caverns entrance.
- 2
Cerci Caverns: Once you enter {Cerci Caverns}, follow the path. A small cutscene will play about the bugs. Head towards the red 'X' on your map. In a large cavern, you'll find GAME TIP #13: Sometimes, you must HULK SMASH! walls to continue. You can also find a Flight Recorder here for some Black Box lore. Grab the Security Codes at the red 'X'. The path will be blocked, so use Hulk Smash on the wall next to the Game Tip to proceed. Follow the path, and you'll find a Danger Room Disc (DRC102) for Setting 102-Throwing. Keep going until you reach a wide-open cavern with a fork. The side fork has GAME TIP #14: To fly, press Triangle twice. Once flying, press Triangle to go up and Square to go down. You can fly to the platform or use the blue 'X' to create a bridge. Pick up the Beacon (A1HB2) on the platform. Head back and take the other fork. In another large open area, you'll find another Flight Recorder. Outside this area, you'll encounter some altered bugs and the entrance to Barren Cliffs. Remember, the objective here is to find a [Security Code Module] in {Cerci Caverns}.
- 3
Barren Cliffs: From the Cerci Caverns exit, head out and go around some wreckage, making a U-shape. You'll fight more bugs and some soldiers. Look closely near the edge for a little red spinning thing in a bush – this is a Data Disc (A1DD1). Collecting four of these lets you carry more Health or Energy Packs. Head back to the curve of the U and continue. Cross the bridge made of wreckage and boulders. You'll meet Grizzly and his robot buddies; take them out, then follow Grizzly. Just past him is more wreckage. Turn there and follow the path. You'll find a blue 'X' spot to make a bridge, then another blue 'X' bridge further along. At the top of this second bridge is a Weapon Cache (A1WC01) with various goodies. Head back to the wreckage past Grizzly and look for the red 'X' on your map. Head there to find the Security Code Module. This is the second module you need. You'll also need to find the optional [Radar Array] in {Desolate Mesa}.
- Don't forget Iceman's abilities for extinguishing fires and building bridges – they're super useful in this section!
- Tech Stations offer permanent stat boosts, so make sure to use them on the characters who benefit most.
- Keep an eye on your Automap for objective markers and hidden paths.
- Blink's portal is a handy way to fast travel, but remember the cooldown.
- The optional Radar Array in Desolate Mesa is worth hunting down if you want to complete all objectives.
- Completing the objectives grants you the necessary security codes to progress.
- Destroying the Radar Array contributes to optional objective completion.
- Finding Tech Stations and Weapon Caches provides valuable resources and stat boosts.
Part 4
Complete Apex Legends Part 4 walkthrough, including objectives for Desolate Mesa, Cerci Burrows, Larvae Chambers, and Queen's Lair.
- 1Follow the trench and find a Black Box Recorder with a message from Magneto.
- 2Head along the side without the recorder until you spot another red X on the map.
- 3Go past the flaming bit, as indicated by the cutscene (a non-interactive cinematic the game plays automatically).
- 4You will find an Xtraction Point (use Xtraction Points to go to any other Xtraction Point you've been to by selecting Xtract from the Xtraction Point screen).
- 5Save your game at the Xtraction Point.
- 6Locate another Black Box near you.
- 7Proceed past the covered tunnel-like structure.
- 8In the wreckage, find the control box for the flaming bit and another Black Box.
- 9Destroy the control box to stop the flames.
- 10Proceed to Desolate Mesa.
- 11Desolate Mesa (A1DM) Objectives: Hacker's Delight - Find a [Security Code Module] in the downed aircraft in the Dead Zone. Optional: Locate and destroy the [Radar (your minimap with nearby blips and threats marked) Array].
- 12Ahead, you will find the Radar Array for the optional objective; destroy it for extra XP.
- 13Continue past the Radar Array to find more wreckage.
- 14Next to the wreckage, find another Black Box.
- 15Past the wreckage, find a Tech Station-Focus (A1TS02), Comic Book (A1CB01), and Sketchbook (A1SB01), along with another Black Box.
- 16Head back up the wreckage.
- 17In more wreckage, find another Black Box.
- 18Head around either side to meet back up with Grizzly.
- 19Defeat Grizzly.
- 20Pick up the Security Device.
- 21Professor X will speak to you, telling you to return. Use a Blink portal or go back to Barren Cliffs and use the Xtraction Point.
- 22If you return to Barren Cliffs, you can go to Cerci Burrows, located next to the Xtraction Point.
- 23You can also chat with Angel in Barren Cliffs after you get his prompt.
- 24Cerci Burrows (A1CB) Objectives: Optional: Defeat 12 [Insect Drones].
- 25Head along the pathway and start seeing red Xs, which are part of the optional objective.
- 26Kill the Insect Drones.
- 27Head out the side of the cavern to find two more Drones.
- 28Continue along the pathway to the next room with Drones.
- 29In this room, find a Tech Station Speed (A1TS03).
- 30Head out for another pair of Drones and a fork in the path.
- 31If the room you just came out of is South, head East to find two more Drones and a Sketchbook (A1SB02).
- 32Return to the fork and head West (considering the room with the hole as South).
- 33Reach a room with wreckage and the last two Drones.
- 34For defeating all Drones, you receive a Homing Beacon (A1HB3).
- 35At the end of this large room is the entrance to the Larvae Chambers.
- 36Larvae Chambers (A1LC) Objectives: Optional: Destroy 4 [Egg Clusters].
- 37Enter the first big room and locate the green Egg Clusters to destroy. Blasting yellow ones is also possible.
- 38The first Egg Cluster is in this room.
- 39Follow the long, winding pathway to a fork.
- 40Follow the waterlogged branch of the fork to find the second Egg Cluster.
- 41Keep following the path around the big hole to find Tech Station Health (A1TS04).
- 42Continue following the path around to return to the other branch of the fork.
- 43Proceed down the other path.
- 44Break out the door and at the end of this room, find a Comic Book (A1CB02).
- 45Break out another door and proceed through.
- 46Follow the path to an Xtraction Point.
- 47Save your game at the Xtraction Point.
- 48The final Egg Cluster is ahead, along with the entrance to the Queen's Lair.
- 49Queen's Lair (A1QL) Objectives: Infiltration - Step 1: Defeat [Zealot]. Step 2: Find the buried [Genosha Entrance]. Optional: Destroy 3 [Cerci Queens].
- 50Follow the path for a conversation with Angel.
- 51Follow the path for a conversation with Zealot Minions.
- 52Defeat the Zealot Minions.
- 53Head past them to a fork.
- 54If the room you came out of is South, head West.
- 55Blast the rubble to open the way to a large room with a Cerci Queen.
- 56Defeat the Cerci Queen.
- 57A blue X spot for a bridge will appear. Build a bridge.
- 58On the platform the bridge leads to, find a Data Disc (A1DD2).
- 59Return to the fork and head East.
- 60Go around the corner into a large room.
- 61Follow the southern wall to a smaller room containing Zealot and a bug.
- 62Converse with Zealot.
- 63You will fight a Cerci Queen. Defeat her.
- 64Pick up the Danger Room Disc behind her, containing Moves 103 - Triple Hit (DRC103) and Moves 104 - Throw (DRC104).
- 65Head back the way you came, through the Zealot Minions.
- 66Blast the rubble behind them to proceed back to the large room.
- 67Head out the top of this room and break down another door.
- 68Defeat the last Cerci Queen and encounter Zealot again.
- 69Defeat the Queen.
- Use Xtraction Points to save your progress and fast travel between discovered points.
- Look for collectibles like Black Box Recorders, Comic Books, Sketchbooks, and Data Discs.
- Destroying optional objectives like the Radar Array, Insect Drones, Egg Clusters, and Cerci Queens grants extra XP and rewards.
- Pay attention to the minimap (the small radar display in the corner of your HUD (heads-up display — the on-screen icons showing health, ammo and the minimap)) for objective markers and enemy locations.
- Utilize cover (press the cover button to crouch behind walls or objects) when engaging enemies to minimize damage.
Similar guides you might like


100% Human-Written. AI Fact-Checked. Community Verified. Learn how AntMag verifies content