
Learn Team Fortress 2's basic class roles. Understand how Pyro, Scout, and Heavy contribute to team success with these core responsibilities.
Understanding the fundamental roles of each class in Team Fortress 2 is paramount to becoming an effective player and contributing to your team's success. While individual skill is important, knowing how your chosen class fits into the larger team dynamic will elevate your gameplay significantly. This section will break down the core responsibilities and strategic approaches for each of the nine mercenaries.
Offensive Classes: The Spearhead of the Attack
These classes are designed to push forward, eliminate threats, and capture objectives. Their primary focus is aggression and disruption.
- Scout:
- Role: Flanker, Objective Specialist, Harasser. The Scout is the fastest class, excelling at hit-and-run tactics and capturing control points quickly.
- Strategy: Utilize your double jump to navigate maps like 2Fort or Badwater Basin with unparalleled agility. Your primary weapon, the Scattergun, is devastating at close range. Get in, deal damage, and get out before enemies can react. Focus on flanking heavy classes like the Heavy or Engineer, and be the first to touch control points in game modes like Control Point or King of the Hill.
- Key Items: The Bonk! Atomic Punch grants temporary invincibility, perfect for running through enemy fire to cap a point or distract sentries. The Crit-a-Cola provides mini-crits for a short duration, turning you into a temporary damage powerhouse.
- Soldier:
- Role: Damage Dealer, Area Denial, Support Blaster. The Soldier is a versatile class capable of both direct combat and indirect fire.
- Strategy: Your Rocket Launcher is your bread and butter. Learn to "rocket jump" by firing at your feet and jumping simultaneously to reach elevated positions or traverse distances quickly, especially useful on maps with verticality like Upward. Use splash damage to hit multiple enemies or dislodge entrenched defenders. Support your team by pushing with Medics or clearing out chokepoints.
- Key Items: The Gunboats reduce rocket jump damage, allowing for more aggressive maneuvers. The Buff Banner, once charged, grants mini-crits to nearby teammates, making it an excellent team-play item for coordinated pushes.
- Pyro:
- Role: Close-Range Combat, Ambush, Spy-Checker, Projectile Reflection. The Pyro excels at short-range engagements and denying enemy advances.
- Strategy: Wield your Flamethrower to inflict continuous damage and afterburn. Use your secondary fire (Airblast) to reflect projectiles like rockets and grenades, extinguish burning teammates, or push enemies into environmental hazards. On maps like Dustbowl, Pyros can be devastating in tight corridors. Always be on the lookout for cloaked or disguised Spies; a quick puff of flame will reveal them.
- Key Items: The Phlogistinator builds "Mmmph" meter through fire damage, allowing for a powerful crit-boosted attack. The Homewrecker melee weapon can remove Sappers from friendly Engineer buildings, making you an invaluable asset for defense.
Defensive Classes: Holding the Line
These classes specialize in establishing and maintaining control over key areas, preventing enemy advances, and protecting objectives.
- Demoman:
- Role: Area Denial, Sentry Buster, Trap Setter. The Demoman is a master of explosives, capable of locking down entire sections of a map.
- Strategy: Use your Grenade Launcher for direct damage and your Stickybomb Launcher to lay traps around corners, chokepoints, or near objectives. On maps like Badwater Basin, placing sticky traps on the cart's path can halt an enemy push. Learn to "sticky jump" for quick repositioning. Focus on destroying enemy Engineer nests and breaking up clustered enemy formations.
- Key Items: The Scottish Resistance allows you to deploy more stickybombs and detonate them individually, offering more precise trap setting. The Eyelander increases your health and speed with each head taken, rewarding aggressive play.
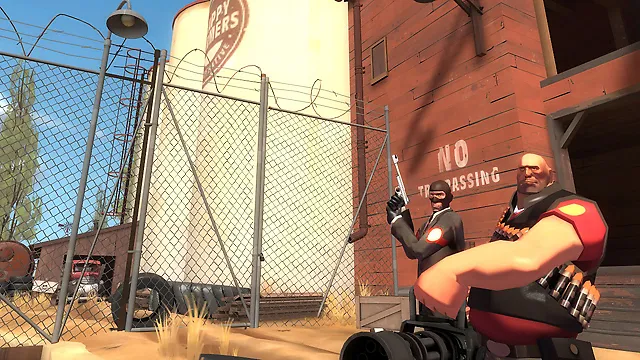
- Heavy:
- Role: Frontline Tank, Sustained Damage, Objective Holder. The Heavy is a slow but incredibly resilient class with immense firepower.
- Strategy: Spin up your Minigun before engaging enemies. Pair with a Medic for maximum effectiveness, forming a formidable "Medic-Heavy combo" that can push through almost any defense. Hold critical chokepoints or guard objectives on maps like Gravel Pit. Be aware of your surroundings, as you are vulnerable to flankers and Snipers.
- Key Items: The Sandvich allows you to heal yourself or a teammate, providing crucial sustain. The Natascha slows down enemies you hit, making it harder for them to escape or approach.
- Engineer:
- Role: Base Builder, Area Control, Support. The Engineer constructs buildings to defend areas, provide ammunition, and transport teammates.
- Strategy: Your primary tools are your Sentry Gun, Dispenser, and Teleporter. On maps like 2Fort, establish a strong defensive nest near your intelligence. Place your Sentry Gun in a strategic location with good sightlines but also cover. Your Dispenser provides health and ammo, while Teleporters are vital for getting teammates to the front lines quickly. Always keep your buildings repaired with your Wrench.
- Key Items: The Gunslinger replaces your Sentry Gun with a faster-building, smaller Combat Mini-Sentry, encouraging a more aggressive Engineer playstyle. The Rescue Ranger allows you to repair and retrieve buildings from a distance.
Support Classes: Enabling Victory
These classes focus on assisting their teammates, disrupting the enemy, and providing crucial utility to turn the tide of battle.
- Medic:
- Role: Healer, UberCharge Provider, Team Enabler. The Medic is the most vital support class, directly responsible for keeping teammates alive and initiating pushes.
- Strategy: Your Medigun is your most important tool. Constantly heal teammates, prioritizing those taking damage or pushing forward. Build your ÜberCharge meter by healing, and deploy it strategically to make a teammate temporarily invincible or crit-boosted, allowing for powerful pushes or breaking through enemy lines. Stick with your "pocket" Heavy or Soldier, but be aware of other teammates needing healing. On maps like Payload, a well-timed ÜberCharge can secure the objective.
- Key Items: The Kritzkrieg builds ÜberCharge faster and provides a crit-boost instead of invincibility. The Ubersaw melee weapon grants 25% ÜberCharge on hit, encouraging aggressive Medic play.
- Sniper:
- Role: Long-Range Pick, High-Value Target Elimination. The Sniper excels at eliminating key enemy players from a distance.
- Strategy: Find a safe vantage point with a clear line of sight to enemy chokepoints or objectives. Charge your Sniper Rifle shots for maximum damage, aiming for headshots to instantly kill most classes. Prioritize enemy Medics, Snipers, and Engineers. On maps like 2Fort, the battlements are prime sniping locations. Be aware of Spies and flankers attempting to reach your position.
- Key Items: The Jarate debuffs enemies, causing them to take mini-crits and revealing cloaked Spies. The Huntsman allows for a more mobile, close-to-mid-range sniping experience with projectile arrows.
- Spy:
- Role: Disruption, Backstab, Sapper, Information Gathering. The Spy is a master of stealth and deception, designed to sow chaos behind enemy lines.
- Strategy: Use your Invis Watch to cloak and your Disguise Kit to appear as an enemy player. Sneak behind enemy lines, aiming for high-value targets like Medics, Snipers, or Engineers. Your Knife delivers an instant kill with a backstab. Use your Sapper to disable and destroy Engineer buildings. Communicate enemy positions and movements to your team. On maps like Hydro, where teams often clash in specific areas, a well-placed backstab can break a strong defense.
- Key Items: The Dead Ringer allows you to feign death upon taking damage, providing an escape route. The Ambassador revolver can deliver critical headshots, making it a viable ranged option for skilled Spies.
100% Human-Written. AI Fact-Checked. Community Verified. Learn how AntMag verifies content