Welcome to Quake IV, a brutal sci-fi FPS where you play as Marine Matthew Kane, fighting back against the alien Strogg on their home turf. You'll blast through relentless arenas and horrifying environments, wielding a variety of iconic Quake weaponry. This is a game that demands quick reflexes and a solid understanding of its combat mechanics, pushing you to survive against overwhelming odds.
This guide is your essential companion for conquering the Strogg onslaught. We'll walk you through every mission, detail how to master each weapon and its upgrades, and provide expert strategies for tackling the game's iconic bosses. Whether you're aiming to survive the campaign or master the arenas, this guide has the expert advice you need.
-------------------------[ Written By: LordKrell ]-------------------------
Master Quake IV with our comprehensive guide. Learn about the Strogg, the continuation of the Quake II storyline, and essential strategies for survival.
- 1Quake IV continues the storyline of Quake II, focusing on the war between humans and the Strogg.
- 2The game's narrative revolves around an assault on the alien planet Stroggos.
- 3Players will engage in combat against the Strogg, a warlike cybernetic race known for augmenting prisoners with mechanical parts.
- 4The game explores the Strogg's industrial complex and the toxic environment of Stroggos.
- Understand that Quake IV directly follows the events and narrative established in Quake II.
- Be prepared for intense combat against technologically advanced cybernetic enemies.
- Familiarize yourself with the lore of the Strogg to better understand their motivations and tactics.
FAQ Version ................... 1.00 : Game Version ............... 1.0.4
Navigate Quake IV with our comprehensive FAQ and walkthrough. Find detailed strategies, item locations, and answers to common questions for version 1.0.4.
FAQ Version: 1.00
Game Version: 1.0.4
Table of Contents
Introduction — s01
Search Index — s02
General Information — s03
-
Walkthrough — s04
Story and Characters — x00
-
Air Defense Bunker — x01
Air Defense Trenches — x02
Hangar Perimeter — x03
Interior Hangar — x04
MCC Landing Site — x05
-
Operation: Advantage — x06
Canyon — x07
Perimeter Defense Station — x08
Aqueducts — x09
Aqueducts Annex — x10
Nexus Hub Tunnels — x11
Nexus Hub — x12
-
Strogg Medical Facilities — x13
Construction Zone — x14
Dispersal Facilities — x15
Recomposition Center — x16
Putrification Center — x17
Waste Processing Facility — x18
-
Operation: Last Hope — x19
Data Storage Terminal — x20
Data Storage Security — x21
Data Storage Terminal (Revisited) — x22
Tram Hub Station — x23
Tram Rail — x24
Data Processing Terminal — x25
Data Processing Security — x26
Data Processing Terminal (Revisited) — x27
Data Networking Terminal — x28
Data Networking Security — x29
-
Nexus Core — x30
The Nexus — x31
Version History — s05
Legal Stuff — s06
Contact Info — s07
Credits — s08
Note: If you want to jump directly to a specific section, simply hit CTRL+F and enter the appropriate three-character code.
Introduction
Greetings, and welcome to my Quake 4 guide. If you found yourself here, perhaps you're stuck, in need of strategic advice, or merely curious about the game. In any case, I'm sure this document will prove useful.
This FAQ includes all the information you would normally expect from such a guide, including a full walkthrough of the game, and detailed information about the weapons and enemies you will encounter. But what makes this FAQ different from others is in the way all this information is organized and presented. This is the second FAQ I've written using this format, and I certainly hope you will find it helpful and easy to follow. Give it a read a see for yourself!
Quake 4 is a first-person shooter, released in 2005 and currently available for the PC and Xbox 360. The story directly follows the events of Quake 2, in which the human race wages an all-out war against aliens known as the Strogg. While Quake 4 didn't really revolutionize or advance the FPS genre in any way, its excellent graphics and non-stop, fast-paced action immediately pulled me in. It's a fun game that sticks closely to the standard FPS formula.
So in short, I hope you'll find this guide both informative and interesting. If you'd like to see more FAQs like this one, be sure to check out my contribution page on GameFAQs at the following address: *
Search Index
Because most of the information is contained within the walkthrough itself, you won't find separate lists at the end of the document detailing every weapon, monster, etc. However, I still want to provide a means to find any kind of information quickly, and this
ahead. Hurry up and join them.
Learn how to defeat your first Strogg Marines in Quake IV and find the Machinegun with its Extended Clip Mod.
- 1Run past Morris to meet Medic Anderson of Rhino Squad.
- 2Anderson will heal you to 100 health points.
- 3Run towards the fortress entrance to meet Private Webb of Badger Squad.
- 4Follow Webb inside and proceed through hallways to a larger room.
- 5Engage your first STROGG MARINE. You can shoot it with your current weapon or let Webb assist.
- 6Follow Webb around the room, shooting more Strogg Marines.
- 7Meet Private Dees and more Strogg Marines. Eliminate them.
- 8Webb will instruct you to rejoin your squad while he and Dees hold the room.
- 9Exit the room into a hallway and find two SMALL HEALTH PACKS (restoring 25 health each) in a crate next to a blue flare.
- 10Go through the yellow door.
- 11Observe a marine being dragged away by a Grunt.
- 12Navigate the room, passing a crashed drop pod, until you reach another unlocked yellow door.
- 13Proceed through the unlocked yellow door (doors with green lights are unlocked, red lights indicate locked doors).
- 14Pick up the MACHINEGUN next to a dead marine.
- Strogg Marines are your Strogg equivalent but are generally incompetent and not a major threat individually, though they can be an annoyance in groups.
- Strogg Marines can wield Blasters, Machineguns, or Shotguns, but their aim is terrible.
- Blaster Marines fire slow, low-damage projectiles that are easy to dodge. They are grey.
- Machinegun Marines are inaccurate with their weapons and appear orange/red.
- Shotgun Marines only deal significant damage at close range; maintain distance and strafe if hit. They appear brown/yellow.
- Strogg Marines deal little damage in melee, but avoid letting them get close enough to punch you.
- Strogg Marines wear little armor, so any weapon is effective.
- The Machinegun has a clip size of 40 and a maximum ammo of 300.
- The Machinegun has a Zoom function (hold Special key) for semi-automatic fire with slightly more powerful shots.
- The Machinegun is equipped with a Flashlight (toggle with F).
- The Extended Clip Mod (a community-made modification that changes the game) for the Machinegun increases its clip size to 80 and is obtained in "Operation: Last Hope".
Sgt. Miller.
Learn how to defeat the fearsome Berserker in Quake IV. This guide covers its attacks, weaknesses, and the best strategy to take it down.
Alright, before we head back, make sure you grab the loot from those crates nearby – you'll find two CLIPS and two SMALL HEALTH PACKS. Now, it's time for a bit of backtracking. Head back into that pipe room and run all the way to the other side. You'll see the pipes that the Grunt busted earlier explode, triggering an alarm. Get ready, because you're about to be swarmed by a Grunt and two Strogg Marines, followed by three more Marines. If you keep your distance at the far end of the hallway, you should be able to pick them off easily. Don't hesitate to zoom in with your Machinegun if you need to get a better shot.
Keep pushing back through the room with the big windows and into the one with all the pillars. You'll see Corporal Pierce waving you over, but then, uh oh, the door behind him bursts open and a BERSERKER impales him! Yeah, Pierce got pierced... pretty dark humor, I know. Anyway, focus your fire on the Berserker with your Machinegun, aiming for its head if you can. You might need to back up a bit to dodge its attacks.
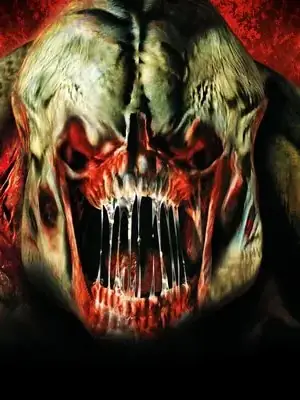
Enemy Spotlight: BERSERKER
These guys are pure melee nightmares. They've got a blade on their right arm and a morning star on their left, and they'll use both up close to wreck you. They can also leap at you like Grunts for extra damage, and they're surprisingly fast. Keep an eye out for when they slam their blade down, creating a shockwave – jumping or running backward is your best bet to avoid it, though it doesn't do much damage. They can also shoot a lightning beam from their blade, which is about as damaging as their melee and also has a short range, making it tough to dodge. Berserkers can take a beating, so try to take them down fast, especially if they're with other enemies. You don't want one of these seven-foot walls blocking your shots at anything else.
After you deal with the Berserker, go through the door it came from. You'll find a small room with two MACHINEGUNS, a CLIP, and a SMALL HEALTH PACK – grab 'em! Continue through the next door, and you'll find yourself back in the room with the crashed drop pod. Run forward to help Anderson fight off three Strogg Marines. Good job getting this far, but you still need to escort Anderson back, which means… yep, more backtracking. Back-backtracking? Whatever you call it, let's go!
Objective Complete: Retrieve Medic
Objective Update: Escort Anderson
Similar guides you might like
100% Human-Written. AI Fact-Checked. Community Verified. Learn how AntMag verifies content