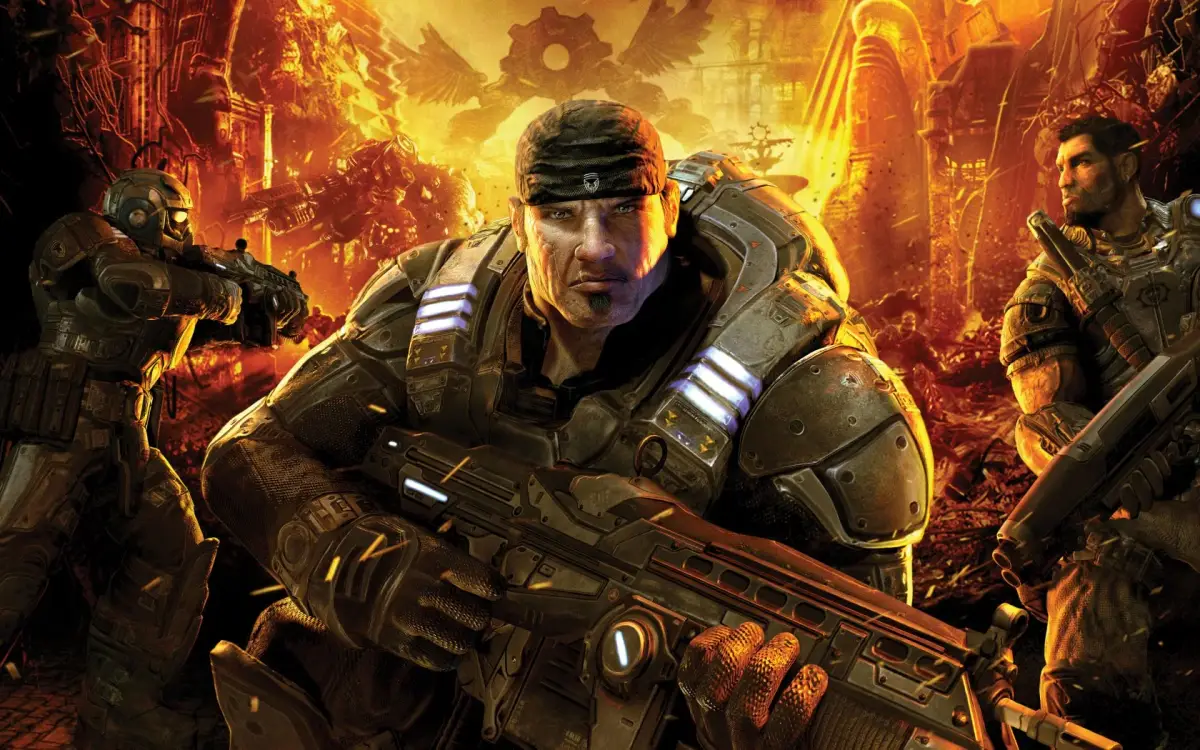
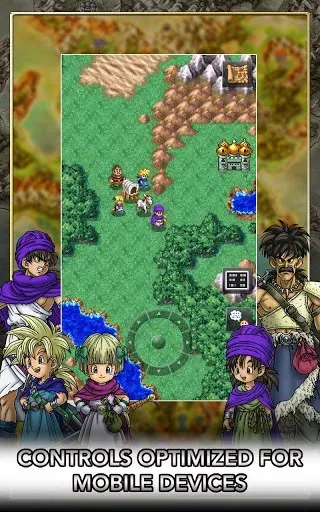
Welcome to Sera, soldier. Gears of War throws you into a desperate war against the Locust Horde, a monstrous enemy emerging from the planet's core. As Marcus Fenix and Delta Squad, you'll blast, chainsaw, and cover-to-cover your way through brutal urban environments and subterranean hellscapes. This is a third-person shooter where tactical positioning and aggressive offense are key to survival against overwhelming odds.
This guide is your frontline support. We’ll help you navigate the gripping campaign, from taking down the fearsome Berserker to finding every hidden COG Tag. Master the game's arsenal, understand advanced combat tactics, and conquer the challenges across PC and Xbox platforms to truly master this classic.
Part 1
Gears of War walkthrough for Xbox 360, version 2.2. Covers original Xbox 360 release content, not PC DLC.
This FAQ was written prior to the release of the PC version of Gears of War. As such, the additional content in the PC version is NOT covered in this FAQ. Only content that was in the original Xbox360 release of the game is covered. Please refer to other FAQs or Wikis for information on this content. However, to my knowledge the PC and Xbox360 releases are mostly identical, so this FAQ may be used throughout the majority of Gears of War PC.
- 1Version Updates: Version 2.2 includes small and information updates and is likely the final update. Version 2.1 removed CheatCC from the permission list. Version 2.0 was a major overhaul with updated information and fixed grammar/spelling. Version 1.1 included basic information updates.
- 2Introduction: Covers who the author is and what the FAQ is about.
- 3Basics: Details controls, the importance of taking (cover (press the cover button to crouch behind walls or objects)) and exiting (cover), enemy types (Locust, Boomers, Kryll, Reavers, Wretches, Luminous Wretches, Bosses), weapon recommendations, and general tips and tricks.
- 4Act 1: Covers Ashes Overview, 14 Years After E-Day (including Straight Into The Fight and Tutorial), Trial By Fire, Fish In A Barrel, Knock Knock, Hammer, Wrath, and China Shop (including Berserker (1)).
- 5Act 2: Covers Nightfall Overview, Tick Tick Boom, Grist, Outpost, Lethal Dusk, Dark Labyrinth (including Odd Location For A Propane Tank, No?), Powder Keg, Burnt Rubber, and Last Stand.
- 6Act 3: Covers Belly of the Beast Overview, Downpour, Evolution, Coalition Cargo, Darkest Before Dawn, Angry Titan, and Tip of the Iceberg.
- 7Act 4: Covers The Long Road Home Overview, Campus Grinder, Bad to Worse, Hazing, Close to Home, Imaginary Place, and Entrenched.
- 8Act 5: Covers Desperation Overview, Special Delivery, Train Wreck, and Pale Horse (including General RAAM).
- 9The Ending *SPOILERS!*: Covers The End and the Script.
- 10Cog Tags: Provides basic information and a Cog Checklist.
- 11Achievements: Lists achievements, GamerScore points awarded, and tips.
- 12FAQs: Frequently Asked Questions section.
- 13Review: Includes ratings for Graphics, Sound, Story, Gameplay, and Difficulty, with a summary.
- 14Closing: Includes thanks, copyright notice, contact information, and a personal good-bye letter.
Navigation: Use your browser's search function (CTRL+F or Command+F) to navigate by typing section codes like
Part 2
Navigate Part 2 of Gears of War with this comprehensive walkthrough. Learn enemy tactics, find collectibles, and conquer challenges with expert tips.
Alright, let's dive into Part 2 of our Gears of War adventure! This section is all about getting you through the thick of it, from basic controls to understanding the enemies you'll face. Think of this as your buddy leaning over your shoulder, giving you the lowdown.
- 1Where am I? You're starting out, likely in a relatively safe area, getting a feel for Marcus or Dom.
- 2What do I see? The game will introduce you to the basic movement and camera controls. You'll see prompts for actions like moving, crouching, and aiming.
- 3What do I do? Get comfortable with the Left Thumbstick for movement and the Right Thumbstick for camera control and aiming. Practice crouching behind cover (when the wall is tall enough) by clicking the Left Thumbstick. Use the Directional Pad to switch between your primary weapons, heavy weapons, and your trusty pistol. If your weapon has a zoom feature, click the Right Thumbstick to zoom in.
- 4Why this way? Mastering these basics is crucial. If you don't get a handle on movement and cover early on, you'll be an easy target when the action heats up.
- Don't forget to use cover! It's your best friend in Sera. Always be looking for the next piece of cover to duck behind.
- Experiment with weapon switching. Knowing which button brings out your shotgun versus your Lancer can save your life in a firefight.
- Take a moment to check out the controls section in your game manual if you're feeling overwhelmed. It's all there!
You'll be one step closer to mastering the controls and ready to face the Locust!
Part 3
Learn essential combat techniques for Gears of War, including taking cover, health regeneration, roadie running, and effective enemy engagement strategies for Locusts and Boomers.
Controls:
- B
- Melee (Hold for Lancer chainsaw)
- X
- Interact (open doors, press buttons, switch weapons)
- Y
- See "Points of Interest" (important objects, Dom's location)
- Right Bumper
- Reload (Press twice for Active Reload)
- Left Bumper
- Objectives, squadmate location/status
- Right Trigger
- Use weapon
- Left Trigger
- Targeting reticule
- A
- Take cover (near object), Roll (moving), Roadie Run (moving + hold A)
Taking Cover:
Unlike many shooters, Marcus Fenix cannot withstand significant damage. Cover is essential for survival. Health regenerates when you are not taking damage, so stay in cover when injured. Almost any object or wall can serve as cover. Press 'A' near cover to automatically take position. You can move while in cover; pulling the Left Stick away detaches you. Your health is indicated by the skull logo near the reticule; when it's half full and the screen tints red, return to cover to regenerate.
Exiting Cover:
Specific icons indicate available cover exits:
- Dash Forward: While on the edge of cover, press Up on the Left Thumbstick and 'A' to swing out and dash. Hold 'A' to Roadie Run.
- Vault Over: While crouched behind a small object, press Up on the Left Thumbstick and 'A' to vault over. Be exposed during the vault; aim for nearby cover.
Enemies:
- Locusts: Humanoid enemies varying in weapons and tactics. Some charge with shotguns, others use rifles. On Insane difficulty, their melee attacks are one-hit kills. Keep your distance.
- Boomers: Large, slow enemies carrying Boomshots (rocket launchers). They are easy targets. A charged Torque Bow typically kills them in one shot. Two Lancer clips or sniping are also effective. On Casual/Hardcore, they can be taken down with two Lancer clips, but cannot be chainsawed.
Boomer Strategy:
Shotguns are effective against Boomers, especially if they are the only enemies. Get close enough, and they will stop firing their Boomshot due to splash damage concerns. Strafe and spray. If facing two Boomers, this tactic may still work as they tend to group together.
Part 4
Navigate the challenges of Gears of War Part 4. Learn enemy weaknesses like Kryll, Reavers, and Wretches, and master weapon loadouts for Insane difficulty.
Enemies:
- Kryll: Appear in Acts 2 and 5. Invincible and lethal. Stay in the light; they disintegrate you in darkness. Can be killed in the chapter "Burnt Rubber" at the end of Act 2. On Insane, they are a constant survival threat.
- Reavers: Fly swiftly, making them hard targets. The Torque Bow is effective. The Turret is the best weapon but only available once. Aim for the Locust rider to kill the Reaver. Primarily appear in Act 5. On Insane, the Turret section on the train is extremely difficult, best tackled in Co-Op.
- Wretches and Luminous Wretches:
- Wretches: Easily dispatched with the Lancer or Shotgun. Can sometimes be trapped behind walls. On Insane, they are fast, numerous, and can kill in one hit.
- Luminous Wretches: Similar to Wretches but explode upon death (unless killed with the chainsaw). This makes shotguns risky; use pistols from a distance. On Insane, they are a significant threat due to their explosions.
Bosses: Bosses are covered in the chapters they appear in. Specific bosses like the Berserker, Corpser, and General RAAM can be found using CTRL-F searches.
Weapons (BAS4):
Personal Set-up (Hardcore and Lower):
- Primary: Shotgun (quick to use, better than chainsaw for emergencies)
- Secondary: Lancer (good range, fast reload, Active Reloads are key. Chainsaw for emergencies. Longshot is a good alternative, essential on Insane)
- Grenades: Bolo Grenades (best for sealing Locust Emergence Holes and groups of enemies)
- Pistol: Magnum (most powerful pistol, useful on easier difficulties)
Reasoning: Shotgun is reliable for close encounters. Bolo Grenades are crucial for controlling enemy spawns. The Magnum is powerful but less critical on higher difficulties. The Lancer offers versatility in range and reload speed. The chainsaw is a last resort. The Longshot is vital for Insane difficulty.
Other Useful Weapons:
- Torque Bow: Hold R to charge, release to fire. Holding R too long fires automatically. Insufficient charge results in a weak shot. Unbelievably useful against RAAM.
Similar guides you might like
100% Human-Written. AI Fact-Checked. Community Verified. Learn how AntMag verifies content