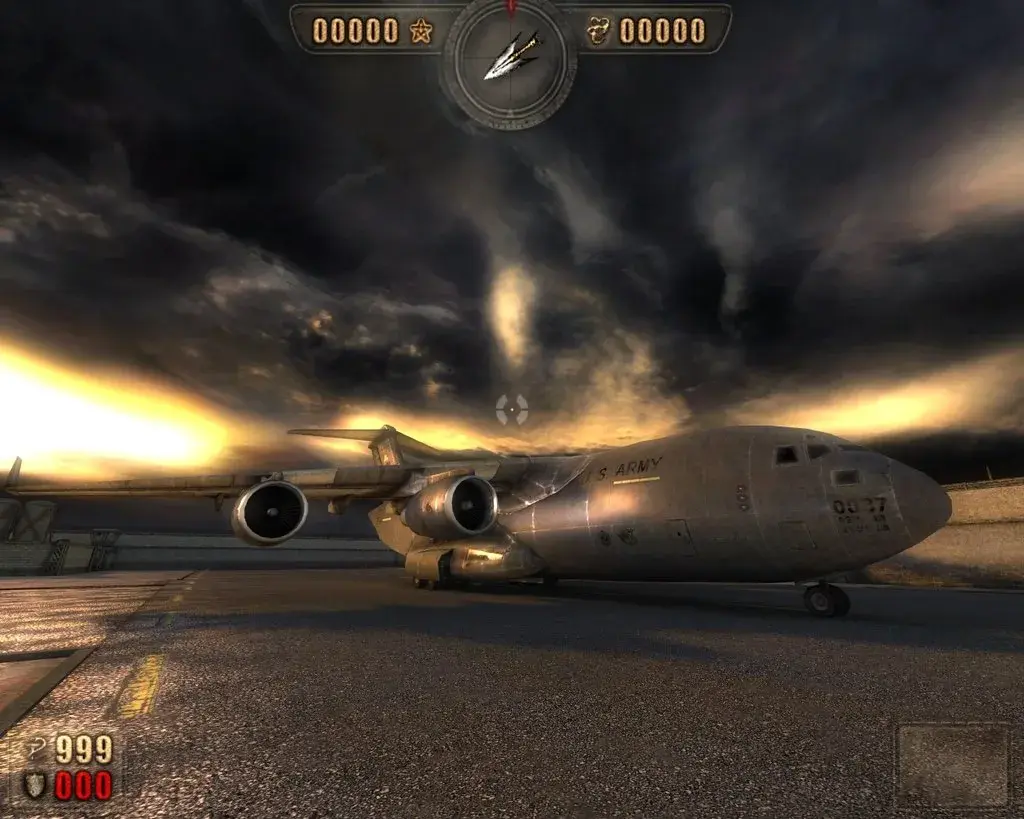
Welcome to Painkiller, a fast-paced PC shooter from 2004 where you play as Daniel Garner, a soul trapped in Purgatory. Your goal is to fight your way through hordes of demons and grotesque creatures across Hell's many environments, using a brutal arsenal of weapons and powerful combos. It's a pure, unadulterated action experience that demands quick reflexes and a willingness to get messy.
This guide will help you conquer Daniel's hellish journey. We'll cover navigating the game's grotesque environments, provide strategies for defeating formidable bosses, and offer tips on mastering every weapon and advanced combat technique. Whether you're aiming to unlock all the secrets of Hell or just survive the onslaught, this guide has you covered.
Part 1
Your friend's guide to Painkiller Part 1: Cemetery. Learn enemy patterns, weapon strategies, and how to find all the tarot cards in this challenging first level.
Alright, welcome to Painkiller! You're stepping into the shoes of Daniel Garner, a guy who's spent 30 years fighting demons in limbo. An angel named Sammael offers you a deal: beat up four of Lucifer's top generals and Lucifer himself across Hell's realms, and you get to escape and see your wife again. Sounds simple enough, right? This guide is written assuming you're playing on Nightmare difficulty, just like I did, so you'll get the full experience and face the same challenges I did.
We're going to tackle this level by level, focusing on grabbing all those sweet tarot cards along the way. If you're using a text editor to read this, make sure it's set to a fixed-width font so everything lines up nicely. You can use CTRL+F with the table of contents to jump around, but for now, let's get started with the first level: Cemetery.
Before we dive into the action, let's quickly touch on the options menu. You'll want to tweak your controls to make things smoother. Keep your keys close together for easier movement, and make sure your quicksave and quickload keys are far apart – trust me, you don't want to accidentally quickload when you meant to quicksave! For mouse sensitivity, I found 33 to be a good sweet spot, but that's really up to your personal preference. In the advanced controls, assign number keys to your weapons; I recommend putting the electrodriver on '4' since it's the fourth weapon you find. Also, make sure you know which key toggles your flashlight – the game sometimes turns it on automatically in dark areas, but it can tank your frame rate, so you'll want to be able to switch it off.
Under weapon controls, you can set up your primary and secondary weapons. I'd suggest swapping the chaingun and rockets so the chaingun is your primary. Oh, and make sure you turn off 'Pickup' – you'll see why later.
Part 2
Learn essential movement techniques like quick-jumping and understand combat basics to conquer Painkiller's levels. Master the HUD and video settings for optimal gameplay.
This section covers the fundamental movement and combat mechanics in Painkiller, designed to help new players navigate levels and defeat enemies effectively.
Movement:
Effective movement is crucial for both progressing through levels and succeeding in combat. Players will encounter various obstacles, some requiring simple jumps, others needing more complex maneuvers. Mastering jumps, understanding how to land on sloped surfaces to avoid damage, and dealing with environmental elements like buggy ladders or moving conveyances are key. Narrow paths can also be challenging, requiring precise movement to avoid falling and restarting.
Quick-Jump (Bunnyhop):
The quick-jump, also known as a bunnyhop, significantly enhances speed and distance. By continuously running and jumping, pressing the jump button each time you land, players can achieve long, rapid skips. This technique is vital for outmaneuvering melee-attacking enemies, traversing slopes, and reaching elevated areas or secret locations inaccessible with normal jumps. Experimenting with quick-jumps is recommended, as many secret areas are only reachable this way. Standing quick-jumps, performed without a running start, allow for forward jumps that cover more distance than standard ones.
Directional Arrow:
The directional arrow on the HUD indicates the nearest enemy. When no enemies are present, it turns red and points to the next checkpoint. If enemies are present but distant, the arrow may point north, indicating a need to search the area thoroughly.
HUD and Settings:
For optimal aiming, it's advised to set headbob to 0. A bright green, high-contrast crosshair is recommended for visibility against various backgrounds. Turning off battle music can enhance the experience of ambient sounds and music, but leaving it on provides early warnings of enemy attacks. Video settings can impact game speed; lower settings result in faster gameplay, but it's advisable to maintain visual quality where possible. Areas with extensive rubble, numerous monsters, weather effects, or many buildings are prone to slowdown. Boss arenas can also be performance-intensive due to the number of effects and large boss models. Finding a balance between visual fidelity and performance is system-dependent.
Note on Graphics: Bosses in Painkiller use 3D models, not 2D sprites. Sprites are flat and rotate with the player's view, while models are fully three-dimensional.
Part 3
Master Painkiller's combat! Learn to move, dodge, and use weapons effectively. This guide covers combat tactics and details each weapon's primary and secondary fire modes.
Alright, let's dive into Part 3 of our Painkiller journey! This section is all about staying alive and making sure you dish out as much pain as you take. We'll cover the nitty-gritty of combat and break down every weapon you'll get your hands on.
Combat Essentials
The absolute golden rule in Painkiller, especially on higher difficulties, is: keep moving. Seriously, these monsters are terrible at hitting anything that's not standing still. If you try to play it like a static shooter, you're going to have a bad time.
You can sometimes find spots where melee attackers can't reach you, which is great for sniping or lobbing grenades. But most of the time, you'll be in arenas that demand constant movement. You need to be weaving and dodging while simultaneously trying to thin out the horde.
Running is good, but quick-jumping is king for evasion. No ground-based enemy can keep up with you when you're mastering the quick-jump. It's your primary tool for staying out of harm's way.
Dodging projectiles is a bit trickier, but thankfully, most missiles fly in a straight line. Some arc, but they won't change direction mid-flight, making their paths predictable. Just keep an eye on their speed – zombie missiles are slow, while vamp missiles are much faster. Also, some have a limited range; if you put enough distance between yourself and the shooter, they'll just fizzle out before reaching you.
Weapon Tactics
Using your arsenal wisely is key. Don't waste your Painkiller blades on a massive group of skeleton soldiers; that's rocket-launcher territory. For fast-moving enemies, stick to instant-hit weapons like the shotgun or chaingun. Try to group enemies up by quick-jumping around them in circles, then unleash a grenade or a few rockets to clear them out efficiently.
Don't forget to use cover! Let monsters come to you around corners, then blast them with your shotgun or electro-driver. Instead of running out into open, vulnerable areas, peek around corners and take enemies out one by one. Hide behind non-explosive objects and shoot explosive ones when enemies get close.
Always consider the enemies you're facing and the environment you're in. Use the level layout to your advantage, and remember what each weapon is good for and what each monster's weaknesses are. Just running around and mindlessly firing won't get you far.
Pro Tip: Escaping Melee Traps
If you find yourself surrounded by melee creatures, like the skeleton troopers, try this trick: quick-jump onto the monsters themselves. This gives you a much bigger boost than a normal jump, potentially even launching you onto a nearby building or at least out of the immediate danger zone. It's a lifesaver when you're about to get swarmed!
Game Features: Weapons
Painkiller features five distinct weapons, each with at least two firing modes (the Painkiller and Electro-driver have three). Once you pick up a weapon, it's yours for good and carries over to future levels. Even if you skip picking one up initially, you'll find it in the next level.
Each weapon requires specific ammo for its primary and secondary fire modes. Knowing which weapon to use, and when, is crucial for success in every part of every level. You'll be swapping weapons constantly as you learn the enemy placements and level layouts.
Painkiller (Default Weapon)
This is your starting weapon, available from the very beginning.
- Primary Fire: Creates a spinning whirl of blades in front of you. This is your go-to for close-quarters combat when you're trapped or need to deal heavy melee damage. Hold the fire button and strafe around enemies to hit them from the sides and back before they can retaliate. These blades can also be used to quickly reposition certain indestructible objects in the environment.
- Secondary Fire: Launches the 'Killer' warhead. This projectile flies straight until it hits something. If it impacts a monster, it deals damage. If it hits an object, the object explodes. If it hits a wall within range, it'll stick. Aiming at a stuck warhead will draw a damaging yellow beam between your hands and the projectile.
Part 4
Learn the Painkiller weapon's three modes: spinning blades, killer warhead, and boomerang blades. Discover how to use objects as catapults.
- 1Primary Fire (Spinning Blades): Hold the primary fire button to spin the weapon's primary blades.
- 2Secondary Fire (Killer Warhead): Press the secondary fire button to launch the killer warhead. If the warhead hits a monster before anything else, the monster takes damage and the warhead returns to you. This can throw monsters into the air, sometimes killing them or sending them far across an area if hit from a great distance. This is useful for bringing unreachable enemies closer.
- 3Secondary Fire while Holding Primary Fire (Boomerang Blades): Hold the primary fire button and then press secondary fire to launch spinning blades a short distance. These blades return like a boomerang.
- 4Using World Objects as Catapults: World objects that can be moved with the Killer weapon's secondary fire can act as a catapult or personal elevator. Stand on the object, then hit its middle with the Killer's secondary fire. Smaller, lighter objects may launch you upwards immediately. For heavier objects, repeatedly use secondary fire to ascend. This can be used to reach secret areas or otherwise unreachable places. Examples include the cart in the Town level, light fittings in the Train Station level, and rubble from destroyed objects.
- The Killer is a fantastic and satisfying weapon; mastering it can save ammo, especially when combined with later-game tarot cards that grant double or quadruple damage.
- The Killer weapon's secondary fire can be used to interact with gold, as detailed in section 2.3.2.
- The catapult trick is hard to control and its practical use is minimal but can be fun.
- Tiny pieces of rubble from the cube-shaped things in the cathedral level can be used to reach a ledge with a holy item.
- The cart in the Town level can be used to reach great heights, potentially allowing access to balconies or areas over walls. It is also useful for reaching the first secret area in that level.
- In the Train Station level, light fittings can be used to reach a superhealth on a ledge where a maso commando is located, or a holy item atop a cantina-like room.
- While the catapult trick can help reach secret areas, none are strictly unreachable without it.
- The shotgun is available from the first level and is useful until the chaingun is acquired. Its primary fire is a basic shotgun blast effective at close to medium range against lesser enemies and can knock back larger ones.
Similar guides you might like


100% Human-Written. AI Fact-Checked. Community Verified. Learn how AntMag verifies content