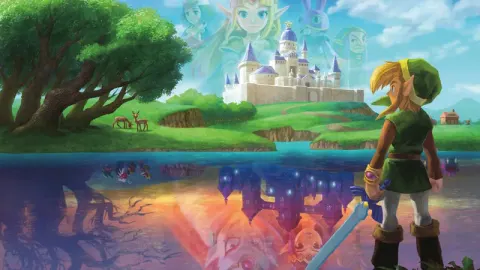
Guide your way through the dark world of Lorule in The Legend of Zelda: A Link Between Worlds. Recover the Seven Sages' paintings from seven dungeons.
Category
A Link Between Worlds: Lorule Walkthrough
Guide your way through the dark world of Lorule in The Legend of Zelda: A Link Between Worlds. Recover the Seven Sages' paintings from seven dungeons.
Sections in this chapter (8)

Skull Woods Area: To
Your guide to reaching Skull Woods in The Legend of Zelda: A Link Between Worlds. Learn how to navigate Lorule, find Maimai, and prepare for the dungeon.
Snowy Death Mountain (West): To The Ice Ruins
Find Maimai #95 and #96, defeat Giant Ice Gimos with the Fire Rod, and get 100 rupees on your way to the Ice Ruins in Zelda: A Link Between Worlds.
A Link Between Worlds: To The Swamp Palace
Complete the To The Swamp Palace quest in Zelda: A Link Between Worlds. Recover paintings of the Seven Sages from Lorule's dungeons.
Dark Palace Area: To The
Follow this guide to navigate to the Dark Palace in The Legend of Zelda: A Link Between Worlds, including finding secrets and Maimai along the way.
Dungeon 12: Lorule Castle: To
Complete Lorule Castle Floor 3F, including the left-hand door puzzle with Mini-Moldorms and the right-hand door with lava and gargoyles.
Turtle Rock Area: To
Find Maimai #72, #73, and #74 in the Turtle Rock Area of Lorule. Learn how to help Mama Turtle and her children in The Legend of Zelda: A Link Between Worlds.
Misery Mire / Desert: To The Palace
A complete walkthrough for The Legend of Zelda: A Link Between Worlds, guiding you through Misery Mire and the Desert Palace, including item acquisition and puzzle solutions.
Thieves' Town: To The Thieves Hideout
A complete walkthrough for The Legend of Zelda: A Link Between Worlds, guiding you through Thieves' Town and the Thieves' Hideout dungeon.
100% Human-Written. AI Fact-Checked. Community Verified. Learn how AntMag verifies content