Walkthrough for Part 5 of Myth: The Fallen Lords, covering Missions 7, 8, and 9, including strategies for the Trow and freeing Alric.
Walkthrough
- 1Move your forces down the hill (NE) to the icy river. Form archers in a line just before the unfrozen part of the river with dwarves to the left. Keep bezerkers nearby to defend against ghols attempting to flank and attack your archers and dwarves.
- 2On the other side of the river, an army of soulless and thralls awaits. Snipe the soulless with archers. Retreating slightly can draw them back to the river's edge, allowing for repeated sniping.
- 3As the army advances, maintain the archer line, but not too close to the river. Have dwarves ready to attack enemies as they exit the water, as the river will neutralize grenades.
- 4After defeating this army, cross the river and head NE, encountering more waves of soulless and thralls. Keep archers focused on soulless and dwarves on thralls, with bezerkers sweeping up.
- 5Continue towards the world knot, being mindful of ghols attempting to run in. Keep bezerkers close to the party and monitor the radar (a display showing nearby enemies).
- 6At the world knot, prepare for an army of soulless and thralls that will beam in. Engage them using your established tactics.
- 7Once the area is clear, set approximately 7 satchel charges at the base of a world knot pillar. Detonate them from a distance with a grenade.
- 8Alternate Route: Instead of crossing the river at the NE spot, follow it south to a crossing near a waterfall. This method is reportedly easier.
Mission 7: Bagrada
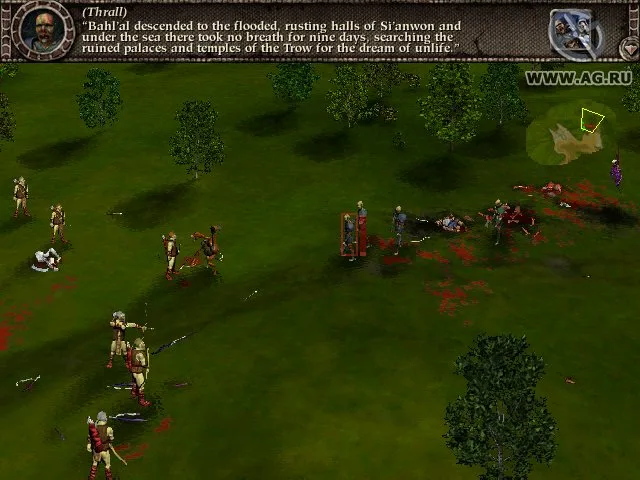
Your objective is to discover the fate of the lost camp. You begin between two pillars, a defensible position against initial enemy waves.
- Keep sniping with archers and use fast bezerkers to prevent myrmidons from flanking. The pillars provide cover (a strategic position to block line of sight) from soulless spears.
- After dealing with the myrmidons, reposition bezerkers behind or between the pillars with the rest of your men.
- Several armies will attack. Flank soulless with bezerkers while dwarves and archers engage the main force. Use warriors to eliminate any enemies that get too close, and watch your dwarves carefully.
- Once all waves are defeated, proceed east. You may encounter myrmidons that keep their distance if your men remain grouped.
- As you approach them, they will retreat east to a point where they stop advancing, allowing you to snipe them with archers.
- Follow the tracks in the snow past stone markers. You will encounter four soulless on a hill, reachable only by archers. Use experienced archers to eliminate them and have the journeyman (a healing unit) heal any injured units.
- Move east and NE to another hill with two more soulless.
- Continue east. Reinforcements will appear from a southern passage, and another army will appear to the southwest. You can avoid fighting the southwest army by not moving your men near it.
- Group your forces and head NE to a wide, sloping ramp with a smoldering fire. Set satchel charges in a patch at the base of the ramp and position your men in a shallow circle further down.
- An army of thrall, soulless, and myrmidon will appear. Engage them, but prevent them from advancing up the ramp.
- As you ascend the ramp to a certain point, you will hear massive, fast footsteps. A large blue beast called the trow will descend the ramp.
- Attempt to detonate the satchel charges as the trow enters the area, then have all units attack it simultaneously.
Mission 8: Ambush at Devil's Overlook
This mission involves creating a minefield to defeat large soulless armies.
- You start with dwarves and bezerkers. Allow the two dwarves picking up satchels in the middle of the frozen lake to finish, but halt the dwarves laying down satchels.
- Move all units to the west end of the lake.
- Have your dwarves collect as many satchel charges as possible from the satchel pile. Use a staggered formation to lay charges across the lake, creating a minefield shaped roughly like an army. Repeat this three times so the charges detonate simultaneously.
- A scout will appear, followed by the first of two large soulless armies.
- Position your men to lead the soulless over the minefield. Have a few dwarves attack the edge of the minefield to trigger the charges, destroying the soulless.
- Use bezerkers to eliminate survivors while your dwarves set up the minefield again for the second soulless wave, which will already be visible on the radar.
- Lead the second army over the field and detonate the charges.
- Deal with any remaining stragglers. Use dwarves to engage them from the hill while flanking with bezerkers.
Mission 9: The Five Champions
Your goal is to free the captive sorcerer hero Alric. This mission requires preserving your men; failure occurs if any unit dies.
- You begin with an archer, a dwarf, a journeyman, and two bezerkers.
- Past the starting archway, use the archer to eliminate a soulless to the left.
- As you move into the area, more soulless will appear to the right. Eliminate them with the archer and bezerkers.
- Follow the path.
Tips
- Keep bezerkers close to your party to prevent ghols from flanking and killing less armored units.
- Use the radar to keep an eye on approaching enemies.
- When fighting the army emerging from the river, ensure dwarves are ready to attack as they exit the water, as the river neutralizes grenades.
- In Mission 7, use the pillars as cover from soulless spears.
- In Mission 8, create a minefield in the shape of an army for maximum effect against the soulless waves.
- In Mission 9, carefully manage unit health and stamina, as any loss results in mission failure.
100% Human-Written. AI Fact-Checked. Community Verified. Learn how AntMag verifies content