Myth: The Fallen Lords Part 12 walkthrough covering the lightning bow, Mission 19 defense, and Mission 20 shade tactics.
- 1After defeating the thralls, use your archers to eliminate the soulless.
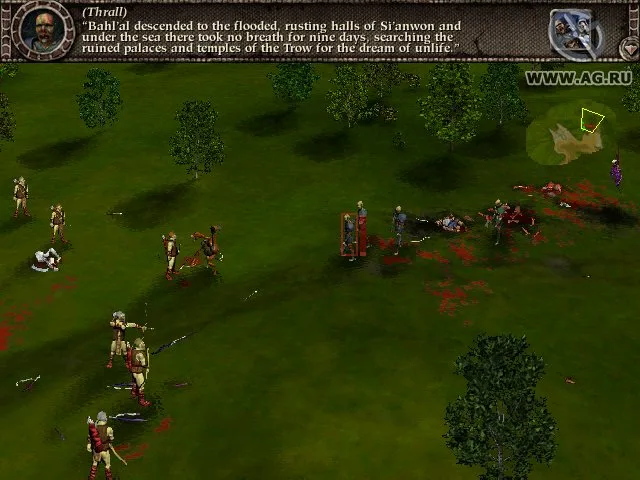
- 2Locate the bow by following blood stains; its position varies.
- 3Use your warriors to draw enemy fire while your archers advance.
- 4When you spot the bow, approach cautiously as thralls lie in ambush.
- 5Have your warriors form a circle around the ambush site.
- 6When the thralls emerge, engage them with all your units.
- 7The healthiest, most experienced archer should retrieve the bow.
- 8This new bow fires lightning bolts and regular arrows, effective against groups and with long range.
- 9You will be immediately attacked by large thrall armies.
- 10Keep your warriors from engaging directly; use the archer with the magic bow (special ability) to target these armies with lightning, conserving lightning arrows.
- 11Use other units to finish off any remaining stragglers while the magic bow user targets the next group.
- 12Return to the starting point, leading with warriors.
- 13When armies appear, have your warriors backtrack and use the magic bow to lightning bolt the thralls.
- 14Utilize the thralls' slow speed and the environment by zig-zagging on ramps to get them stuck at cliffs.
Mission 19: Across the Gjol
This is the most frantic mission yet. You have a large army standing on a large plateau overlooking a river where the enemy will come from. Split your archers, dwarves, and warriors into two groups (even numbers of types each). The plateau can only be reached on either side by the side ramps so this is where the enemies will be headed. Position your archers and dwarves in a line overlooking the left and right corners of the plateau to rain on the thrall which head up the ramps. Ready the warriors to take out any thrall which actually make it up the hill. Before the enemy shows up, use the dwarves to set up a few satchel charges on the ramp and reposition them in their line atop the cliff. The thrall armies will attack you on both sides at the same time so you'll have to constantly move the camera back and forth or else chaos may happen on the unattended side. Wights will appear after the first wave of thrall so use the archers to blow them up from afar. You'll then be attacked by another army which appeared from land. Use the dwarves to demolish then use the warriors to mop up the rest. During this time, keep an eye on river activity as two fetch will appear on either side. Make sure the archers take out the fetch as soon as possible. Set some more satchel charges on the ramps if you have time as another large wave of thrall will approach from the river from both sides, this time they will have soulless with them. Make sure your archers are taking out the soulless while everyone else is attacking the thrall. Reinforcements will arrive and will automatically walk from their starting position to the plateau, so don't worry about them until they get there. Use them to reinforce your lost ranks and take out the last wave of thrall attacking. Don't worry about trying to keep veteran units to carry over the next level since the next level only has bezerkers.
Mission 20: The Watcher
This is a really tough mission. It wouldn't be that tough if you were given archer and dwarven units, or at least one journeyman, but you are only given bezerkers. When you start off, head as far north as you can to the edge of a huge swamp to the east. Scout into the swamp. Several scattered thralls will pop out of the mud to attack. Retreat your scout and close in for the kill with the rest of the bezerkers. Sludge through the swamp due east till you reach land. You are trying to avoid an army of ghol and a shade just south of you waiting at the bank. The shade can reduce your men to scrap very easily, so you don't want to mess with him. You'll be at the top of the map, so face the camera northwards and have your bezerkers hug the top of the map and move east as quickly as possible. You'll reach a river running SE so follow the edge of it without stopping until you reach a shallow part of the river which can be crossed. By this time, you may have encountered a few ghols, and you'll see on the radar (a minimap (the small circular map in the bottom-left corner of your screen) showing nearby enemies) that an army of ghols is chasing you (and they have a very deadly shade with them). Cross the river and sit on the peninsula and create a shallow encirclement to get ready for the ghol attack. The shade won't cross the river so you are safe. Take care of the ghols and move to the southern tip of your peninsula. In some cases, the shade will teleport to the south bank with some ghols. If this happens, then have one weakened man stand at the bank as a distraction. Otherwise, the shade may be waiting on the west bank for you to cross. If this is the case, then send one weakened man to your bank and stand almost halfway in the river as far north as he can. The shade will follow him as much as possible. Now sneak across the southern most crossable part of the river with small (4 or 5) groups of men and have them hug the river shore (SW) till they are out of sight of the shade. Keep the groups moving after each other as ghols will attack your men along the river. You will have to take care of several ghols at this point. Go around the SW tip end of the river. You may receive reinforcements (more bezerkers) from a hill just NW of the tip; if not, come back later and you may receive them then. Go south. If the shade didn't teleport, mentioned above, then you will encounter him now as he will teleport to this area of the map.
- The bow's position changes, but blood stains always lead to it.
- Use warriors to draw fire while archers advance.
- Form a circle with warriors to trap ambushing thralls.
- The lightning bow is powerful against groups and has long range.
- Conserve lightning arrows; use other units for mop-up.
- Use the environment to trap thralls in Mission 19.
- Position archers and dwarves on the plateau corners in Mission 19.
- Use satchel charges on ramps in Mission 19.
- Move the camera frequently in Mission 19 to manage both sides of the attack.
- Archers should prioritize Wights and Fetch in Mission 19.
- In Mission 20, avoid the shade by hugging the northern map edge and moving east.
- The shade will not cross the river in Mission 20; use this to your advantage.
- Use a weakened unit as a distraction to lure the shade in Mission 20.
- Cross the river in small groups in Mission 20 to avoid ghol attacks along the river.
100% Human-Written. AI Fact-Checked. Community Verified. Learn how AntMag verifies content