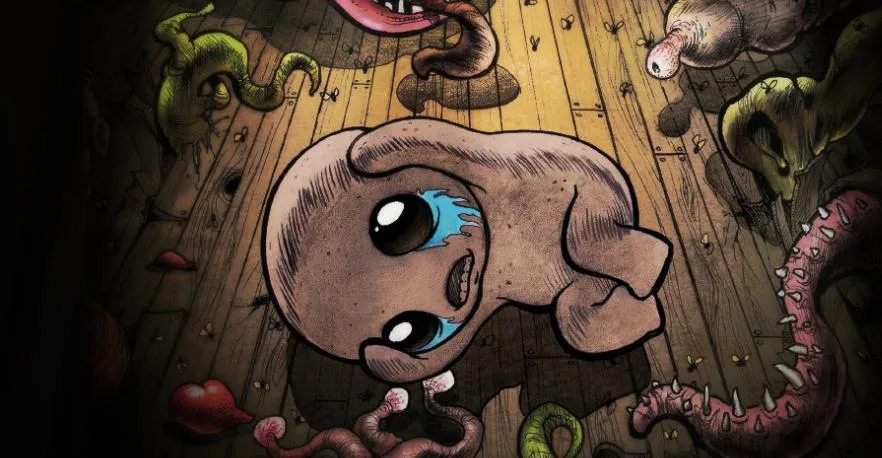
Welcome to the roguelike depths of The Binding of Isaac: Rebirth. You'll guide Isaac, a young boy fleeing his mother's madness, through fiendish basement floors filled with grotesque monsters and bizarre items. Each run is a fresh descent, with procedurally generated levels, randomized power-ups, and a vast array of enemies and bosses to overcome. It's a challenging, atmospheric experience that rewards persistence and strategic item synergy.
This guide is your roadmap through the madness. We'll cover everything you need to become Isaac's ultimate savior, from mastering basic controls and understanding item effects to unlocking powerful characters like Azazel and conquering the deepest, most dangerous areas like Sheol. Get ready to navigate every fiendish floor, defeat challenging bosses, and discover the many secrets and endings this game has to offer.
Part 1
Your friendly guide to The Binding of Isaac: Rebirth Part 1. Learn the basics of this rogue-like shooter and get ready to face your fears in the basement!
Hey there! Welcome to The Binding of Isaac. This game can seem a bit wild at first, but don't worry, I'm here to walk you through it. Think of it as a mix between a shooter you play from above and a super-old-school game style called a 'rogue-like'.
You'll be controlling your character from an overhead view, shooting tears – hence the 'shooter' part. The 'rogue-like' aspect is a bit more niche, but it basically means each run is unique and challenging. Don't let that scare you though; there are tons of awesome rogue-likes out there, and this one is a fantastic entry point!
Part 2
Dive into Part 2 of The Binding of Isaac: Rebirth guide. Learn about rogue-like elements, game comparisons, and what makes Isaac unique. Get ready to play!
Hey there! So, you're diving into The Binding of Isaac: Rebirth, huh? Awesome choice! Before we get too deep, let's chat a bit about what kind of game this is. You might have heard the term 'rogue-like.' Think of it like this: the original 'Rogue' game was all about exploring randomly generated dungeons, fighting monsters, grabbing loot, and trying to get deeper. It used simple text characters to show everything on screen. Games like Diablo borrow that core loop – random dungeons, fighting, leveling up, finding items – and build on it. The Binding of Isaac is totally in that same vein, but with its own super unique, dark, and twisted style.
If you've ever played the original 'The Legend of Zelda,' you'll probably feel right at home with Isaac. It actually pulls a lot of inspiration from Zelda, like using bombs, keys, shops, heart pickups, and even room layouts. Honestly, imagine 'The Legend of Zelda' but cranked up to eleven with a morbid theme, updated graphics, a wild story, and a massive variety of enemies and items. It's basically 'Zelda on crack,' as they say!
I'm putting this guide together because, well, there wasn't one, and that's just wild for a game like this! It's a chance for me to really contribute and share what I know. Plus, it means I'm not just copying someone else's work. I tend to ramble a bit, so apologies in advance if I go off on tangents, but I'll try to keep it light and fun. The game itself is so unique, it almost *demands* a guide. Anyway, enough talk – let's get you playing!
What's Covered in This Section:
- Understanding the 'rogue-like' genre and its origins.
- How The Binding of Isaac compares to games like 'Rogue' and 'The Legend of Zelda.'
- The core gameplay loop of exploration, combat, and item collection.
- Why this game is so compelling and unique.
Part 3
Master The Binding of Isaac: Rebirth with our comprehensive guide to controls, interface elements like the map and health, and general gameplay mechanics. Learn how to navigate and survive!
This section of the guide provides a detailed explanation of the controls and the in-game interface for The Binding of Isaac: Rebirth. To navigate to specific sections of the full guide, use CTRL + F and the provided tags.
Controls
The game outlines most controls at the start, but this section provides a more detailed list:
- W: Move character up
- A: Move character left
- S: Move character down
- D: Move character right
- Up Arrow: Shoot projectile up
- Left Arrow: Shoot projectile left
- Down Arrow: Shoot projectile down
- Right Arrow: Shoot projectile right
- E or Shift: Place a bomb
- Q: Use Q item (Tarot Cards and Pills)
- Esc: Pause Game
- F: Toggle fullscreen on/off
- Spacebar: Use recharge item
- Left mouse button: Shoot projectile in the direction of the cursor
The Interface
The in-game interface provides crucial information at a glance:
The Map
Located in the top-left corner, the map shows your current floor. The highlighted room is your current location. Icons indicate room types:
- Crown: Treasure Room
- Coin: Shop
- Skull: Boss Room
- '?': Secret Room
- Sword: Challenge Room
For more details on rooms, refer to the Room Section of the guide.
Your Items
At the top center, numbers next to coin, key, and bomb icons indicate your quantity of each. For more information, see the Pickups Subsection under the Items Section.
Arrows (Your Weapon)
To the right of your item counts, a box displays your current weapon, represented by a Tear icon. Items found in-game can alter the type of Tear you use.
Recharge Item
Next to the weapon display is the Recharge Item box, often labeled 'Space'. When you acquire a recharge item, it appears here. Pressing Spacebar uses the item. Six small grey bars to the right indicate the item's charge. Once fully charged (all bars highlighted), the item can be used, and the bars reset. You must complete a set number of combat rooms to recharge it again.
Health
To the right of the Recharge Item box is your health display. Red hearts represent your current health, and black 'empty' hearts signify depleted health that can be refilled. Red hearts indicate actual health, while the total number of hearts represents maximum health. Soul Hearts (blue hearts) act as temporary armor, disappearing before red hearts when you take damage.
Your Current Floor
A small black box in the bottom-left corner shows the current level you are on.
General Gameplay
The Binding of Isaac: Rebirth features unique gameplay. Your objective is to find the Boss Room on each level, defeat the boss, and advance. Each level's layout is randomly generated, requiring exploration to find the Boss Room and any rooms containing enemies. Progress is blocked until all enemies in a room are defeated.
Part 4
Your guide to the bosses of Chapter 4 in The Binding of Isaac: Rebirth, including Womb, Utero, and Scarred Womb. Learn about Blastocyst, Lokii, Mama Gurdy, and more!
Similar guides you might like

100% Human-Written. AI Fact-Checked. Community Verified. Learn how AntMag verifies content