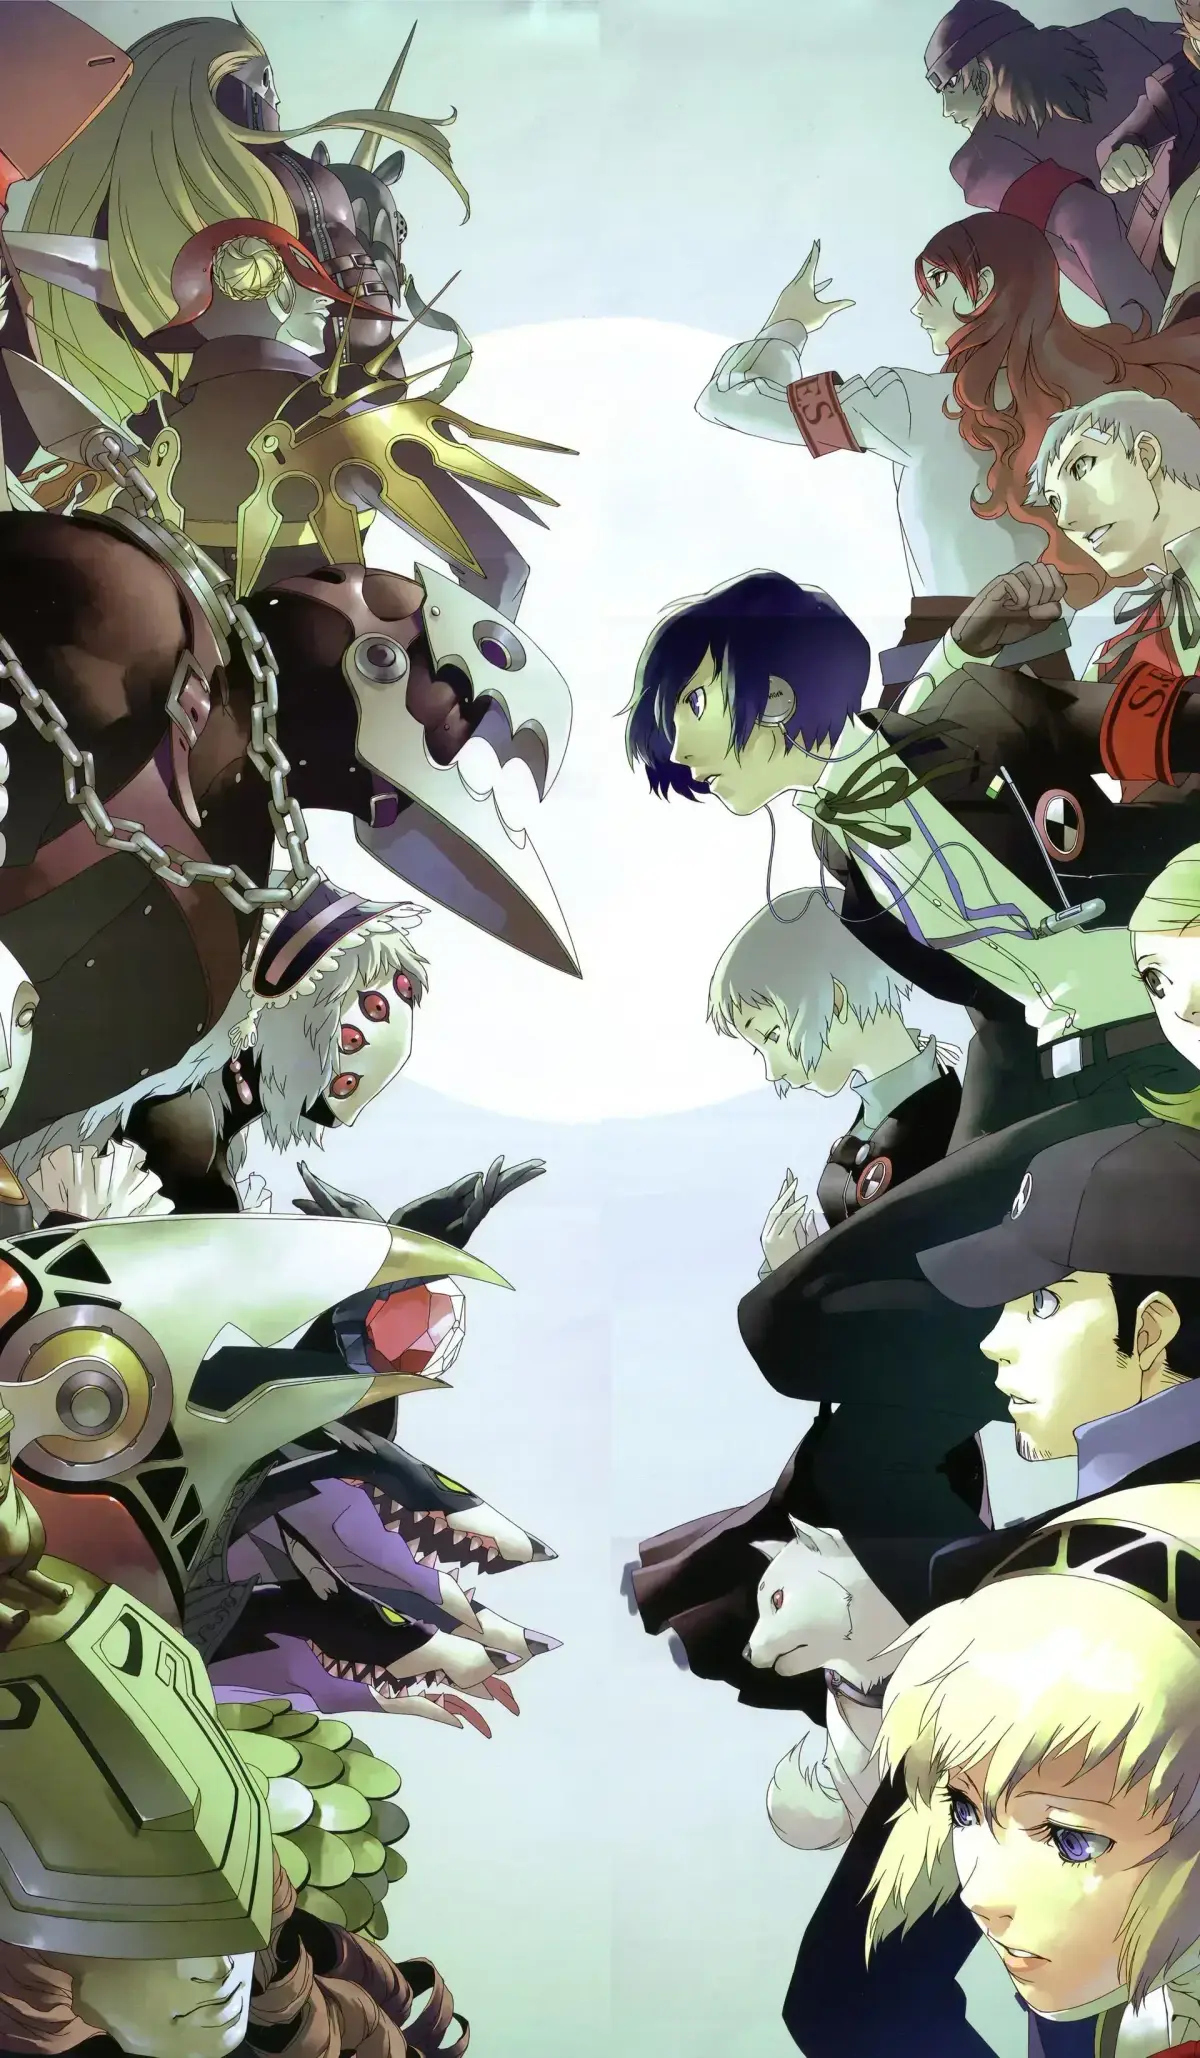
Welcome to the AntMag.NET hub for Persona 3 FES, the definitive PlayStation 2 version of Atlus's acclaimed RPG. You'll step into the shoes of a transfer student who discovers the hidden hour between one day and the next – the Dark Hour. During this time, monstrous Shadows emerge, and only those who can summon Personas, inner manifestations of their psyche, can fight them. You'll balance your life as a student at Gekkoukan High, building relationships with your classmates through Social Links, with your duty as a member of SEES to explore the enigmatic Tartarus and defeat the Shadows plaguing the city.
This guide is your essential companion to mastering Persona 3 FES. We'll help you navigate the challenging dungeons of Tartarus, provide strategies for defeating tough bosses like the Hierophant and the Strength Arcana, and ensure you don't miss out on crucial Social Links that strengthen your Personas. Whether you're aiming to see all the endings or simply want to make the most of your time in the Dark Hour, this guide offers the tips and walkthroughs you need to succeed.
Part 1
Persona 3 FES guide walkthrough for first-timers and veterans. Learn about strict schedules and reset conditions.
- 1This guide is intended to help first-time players and veterans who wish to replay Persona 3 FES from the beginning.
- 2The guide includes very strict schedules that may necessitate resetting the game multiple times to achieve the intended outcomes.
- 3For example, you might be instructed to become TIRED, but if you become SICK instead, you must reset and reload to achieve the TIRED status.
- 4The author emphasizes these strict requirements to prevent emails complaining about the guide's lack of leniency.
- 5Due to these tight schedules, the guide rarely suggests exploring Tartarus (the game's only re-visitable dungeon) for training purposes.
- All conditions that require a specific status will be written in CAPS (e.g., TIRED).
- Be prepared to reset and reload your save file if you do not achieve the required status.
- The guide prioritizes adherence to its schedule over free exploration of Tartarus.
Part 2
Master Persona 3 FES Part 2 with our guide on daily schedules, Social Links, and status parameters. Learn how to effectively manage your time and boost your stats.
This section of the guide focuses on understanding the core mechanics of Persona 3 FES, particularly how to manage your daily schedule and improve your character's status parameters. The guide emphasizes completing Tartarus blocks in a single run, even on Hard difficulty, and provides strategies for boss fights, sometimes with a reduced party.
Daily Schedule Breakdown:
The game's schedule is divided into distinct periods, each with potential activities:
- Add: Additional Info, holidays, and important events.
- TVS: TV Shopping, aired on Sundays afternoons (May 3rd - Dec 27th), inaccessible if you accept social invitations.
- Early Morning: Conversations with friends or students.
- Morning: General events, no story progression.
- Lunchtime: Potential Link invitations (not detailed in this version).
- Afternoon: Similar to Morning.
- Daytime: Core activities and objectives.
- After School: Similar to Daytime.
- Evening: Similar to Daytime.
- Late Night: Friends may call for social activities, especially on weekends/holidays.
- Dark Hour: Story events or visits to Tartarus.
- Link(s): Mandatory Social Links only.
- Stats: Tracks stat gains for the current day, including experience towards the next level. Accuracy is high but not guaranteed.
Social Links (Commu):
Social Links in Persona 3 FES are easier to complete in a single playthrough compared to the original Persona 3 or Persona 4. Completing them allows for the fusion of the ultimate Fool Persona. This guide omits walkthroughs for non-mandatory Social Links due to reader feedback, directing players to other guides for specific answers.
Status Parameters:
There are three main Status Parameters (distinct from Persona parameters) that influence gameplay. They can be increased through various activities:
- Academics: Increased by offering yen at the offertory box (conditions vary), playing Quiz Game, watching movies, studying (room or library), attending summer school, eating at Wakatsu Restaurant, and staying awake during lessons.
- Courage: Increased by entering the Horror House, watching movies, singing karaoke, eating at Wild-duck Burger, and drinking weird medicine at the infirmary.
- Charm: Increased by taking Print Club pictures, achieving high scores in exams, watching movies, eating at Hagakure, and drinking Pheromone Coffee at Chagall Cafe.
Part 3
Discover the key locations within Gekkoukan High School and Tatsumi Port Island in Persona 3 FES. Learn about important areas, shops, and Link activation spots.
This section provides an overview of the explorable areas in Persona 3 FES, focusing on Gekkoukan High School and Tatsumi Port Island.
Gekkoukan High School
- School Entranceway: A long pathway with opportunities for conversations and triggered events.
- First Floor
- Main Lobby: Features bulletin boards for school information and a vendor for food.
- Faculty Hallway: Contains the Faculty Office, Nurse Office (Infirmary), and Library. One Link can be activated here.
- Culture Clubs: Houses the Music Club, Art Room, Home Economics Room, Science Room, and Laboratory. The first four are Link locations; the lab is for a Request. Two Links can be activated here.
- Janitor Room: Typically locked, but accessible later for story progression.
- Culture-Athletic Corridor: A location for a Request.
- Athletic Department: Offers the Kendo Club, Track Field (Practice Field), and Swimming Club (Indoor Swimming Club). One Link can be activated here.
- Second Floor
- Hallway: Five Links can be activated here.
- Student Council Room: One Link can be activated here.
- Homeroom: Includes classrooms 2-E and 2-F. 2-E has one SEES member. 2-F has three SEES members and three Links can be activated here.
- PA Room: Used for Requests.
- Emergency Exit: No special features noted.
- Rooftop: A frequent location for events and Links, and one Request.
Tatsumi Port Island
- Gekkoukan High School: Refer to the section above.
- Paulownia Mall: Features Escapade (one Link), Chagall Cafe (Charm increase), Be blue V (accessories), police station (weapons/armor), Mandragora Karaoke (Courage increase), Shinshoudo Antiques (gem trading for items/cards), Aohige Pharmacy (healing items), and Game Panics (stat increases). . The Velvet Room is accessible via a path with velvet light. Power Records has no listed use.
- Port Island Station: Includes Rafflesia Florist (flowers), Screen Shot Movie Theater (stat raising), an outskirt area with punks, Akataka Mahjong, and Shot-Bar Que Sera Sera. Some Requests can be completed here.
- Iwatodai Station: Comprises the station, Iwatodai Strip Mall (with facilities), and the surrounding area. . The strip mall includes Bookworms (used books), Wild-duck Burger (Courage increase), Octopia vendor (takoyaki), Sweet Shop (no purpose listed), Hagakure Ramen (Charm increase), Wakatsu Restaurant (Academics increase), Book On (manga reading), and Beef Bowl Shop.
- Naganaki Shrine: . Inari Sushi offers random effects (e.g., increased EXP/money in Tartarus, reduced TIRED chance, Soma/Bead Chains, stat boosts). The offertory box increases Academics. Fortune can be drawn to improve relationships.
- Iwatodai Dorm: See below (details not provided in this excerpt).
Shadow Types
There are four types of Shadows:
- Black Shadow: The most common type found in Tartarus, appearing in three sizes:
- Small: Usually contains one powerful Shadow with high HP and attacks.
- Medium: Contains two or three Shadows of similar or different kinds.
- Large: Contains up to five weak to mediocre Shadows.
Part 4
Learn about Persona 3 FES Shadow types like Crimson, Golden, and Distressed, plus Shuffle Time cards and difficulty modes.
Shadow Types:
- Crimson Shadow: These glowing purplish-pink Shadows are very powerful and yield absurd amounts of EXP, offering higher-level Personas during Shuffle Time.
- Golden Shadow: Small and gold-colored, these Shadows flee quickly and disappear in smoke if spotted. They always gain enemy advantage and have a 50% chance to escape each turn, even if ambushed.
- Distressed Shadow: Marked with a nervous sweat icon, these can appear in any size and color. They appear when you equip Personas with levels higher than the Shadow's. In battle, they have lowered attack and defense, are easier to hit with criticals, and will always run away with a screeching sound.
Shuffle Time Cards:
- Persona Card: Grants a Persona, with levels varying around the MC's average level for the current Tartarus block (e.g., Lv 2 to Lv 7 in Thebel).
- Wand Card: Represented by a leaf symbol, each card increases EXP by 10%, up to double EXP with ten cards. It also randomly increases equipped Persona stats by 1 to 5.
- Coin Card: Provides yen, with amounts varying based on small and big coins:
- 1 Small Coin: 100 - 990 yen
- 2 Small Coins: 1,000 - 2,490 yen
- 3 Small Coins: 2,500 - 3,990 yen
- 4 Small Coins: 4,000 - 6,990 yen
- 1 Big Coin: 7,000 - 9,990 yen
- 1 Big Coin, 1 Small Coin: 10,000 - 19,990 yen
- 1 Big Coin, 2 Small Coins: 20,000 - 29,990 yen
- 1 Big Coin, 3 Small Coins: 30,000 - 49,990 yen
- 1 Big Coin, 4 Small Coins: 50,000 - 69,990 yen
- 2 Big Coins: 60,000 - 99,990 yen
- Cup Card: Shown as a blue cup, one card restores 10% of all team members' max HP, with ten cards restoring all HP.
- Weapon Card: Provides a free weapon, typically one or two levels lower than those available for purchase at the police station.
Conditions:
- GREAT: Allows many battles before becoming TIRED. Grants +4 Academics when using the offertory box at the shrine.
- GOOD: Allows a moderate number of battles before becoming TIRED. Grants +3 Academics when using the offertory box at the shrine.
- TIRED: MC takes 50% more damage, deals 50% less damage, and has a moderate chance to receive critical hits. Grants +2 Courage when taking medicine in the infirmary.
- SICK: MC takes 75% more damage, deals 75% less damage, and has a significant chance to receive critical hits. Grants +2 Courage when taking medicine in the infirmary.
Difficulties:
- Beginner: Easier Player Advantages, battles deal pitiful damage, provides lots of EXP, and the Compendium costs half price. Automatically grants ten Plume of Dusks to prevent game over.
- Normal: Approximately 70% of Hard Mode.
- Hard: Player Advantages must be earned by sneaking. Enemies deal severe damage, and EXP gain is very low. The Compendium costs four times the normal price.
- Only attack large Shadows.
- Avoid small to medium-sized Shadows.
- Only fight Shadows that are directly in your path.
- If avoidance is impossible, attack from behind and escape.
- Only fight Crimson Shadows if you know their weaknesses; otherwise, attack and escape as they can defeat you in a single turn.
- Use elevated areas like stairs or stages to gain an advantage.
Similar guides you might like


100% Human-Written. AI Fact-Checked. Community Verified. Learn how AntMag verifies content