
Understand Hazard Levels and difficulty scaling in Deep Rock Galactic: Survivor. Adapt your strategies to face increasing enemy density and modifiers across Ho.
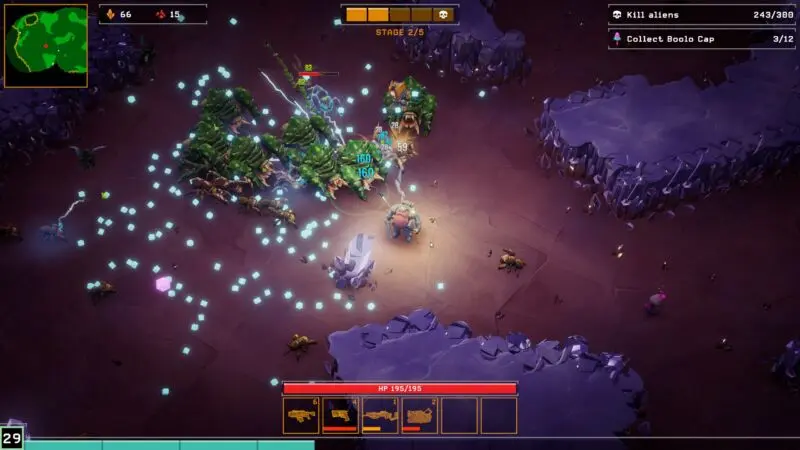
Deep Rock Galactic: Survivor features a robust hazard level system that significantly impacts enemy behavior, density, and overall challenge. Understanding these levels is crucial for progression and survival. Each hazard level introduces distinct modifiers that players must adapt to.

Understanding Hazard Levels
Hazard Levels are represented by Roman numerals, ranging from I to V. Each subsequent level increases the difficulty by introducing:
- Increased Enemy Density: More enemies will spawn on screen at any given time.
- Faster Enemy Movement and Attack Speed: Enemies will close the distance and attack more rapidly.
- Increased Enemy Health and Damage: Enemies become tougher to kill and hit harder.
- Special Enemy Variants: Higher hazard levels may introduce more dangerous versions of existing enemies or entirely new elite types.
- Environmental Hazards: Some levels might introduce more aggressive environmental effects or hazards.
Unlocking New Hazard Levels
Hazard Levels are unlocked progressively as you complete missions. Typically, completing a certain number of missions at a given Hazard Level will unlock the next one. For example, after successfully completing several missions on Hazard I, Hazard II will become available for selection.
Strategies for Each Hazard Level
Hazard I: The Introduction
- Focus: Learning the core mechanics, weapon synergies, and basic enemy patterns.
- Strategy: Experiment with different weapon combinations and upgrades. Prioritize upgrades that offer crowd control, such as the Shredder Munitions or the Scattershot. Don't be afraid to take damage as you learn.
- Key Items: Focus on acquiring early-game damage upgrades like the Mini-Mushroom or the Compact Saw.
Hazard II: Stepping Up the Challenge
- Focus: Developing more refined builds and understanding enemy attack patterns.
- Strategy: Start to prioritize defensive upgrades alongside offensive ones. Items like the Shield Generator or the Nitra Deposit can provide crucial survivability. Learn to kite enemies effectively.
- Key Items: Look for synergistic upgrades. For example, if you're using the Plasma Cutter, consider upgrades that increase projectile count or piercing.
Hazard III: The Gauntlet Begins
- Focus: Mastering build optimization and efficient resource management.
- Strategy: This is where build synergy becomes paramount. Aim for a focused build that maximizes damage output against specific enemy types or provides strong area-of-effect capabilities. Consider investing in upgrades that reduce cooldowns or increase ammo efficiency.
- Key Items: Prioritize powerful late-game upgrades like the Driller's Flamethrower or the Engineer's Turrets. The Combat Drills can be excellent for clearing swarms.
Hazard IV: Elite Miner Territory
- Focus: High-level build execution and precise movement.
- Strategy: Every upgrade choice matters. You'll need a highly optimized build that can handle dense waves and elite enemies. Focus on upgrades that offer significant damage multipliers or powerful defensive buffs. Learn enemy spawn timings and prioritize targets.
- Key Items: The Cryo Cannon's freezing effect can be invaluable for crowd control. The Boomstick's knockback can create breathing room.
Hazard V: The Pinnacle of Danger
- Focus: Near-perfect execution, deep game knowledge, and optimized builds.
- Strategy: This level demands mastery of all game mechanics. You'll need a perfectly tuned build with high damage, excellent survivability, and strong crowd control. Understanding enemy weaknesses and exploiting them is key. Prioritize upgrades that offer significant power spikes or unique utility.
- Key Items: Consider builds that focus on maximizing the effectiveness of a single powerful weapon or a synergistic combination of two. The Deepcore GK2 with rapid-fire upgrades can be devastating, as can a well-supported swarm of turrets.
Tips for Scaling Difficulty
- Upgrade Wisely: Don't spread your upgrades too thin. Focus on a few key weapons and upgrades that synergize well.
- Prioritize Defense: Especially on higher hazard levels, survivability is as important as damage.
- Learn Enemy Patterns: Each enemy type has distinct attack patterns and weaknesses. Exploiting these is crucial.
- Utilize the Environment: Use terrain to your advantage for kiting and avoiding damage.
- Don't Be Afraid to Restart: If a run is going poorly due to bad RNG or poor early choices, it's often better to restart and try a different approach.
100% Human-Written. AI Fact-Checked. Community Verified. Learn how AntMag verifies content