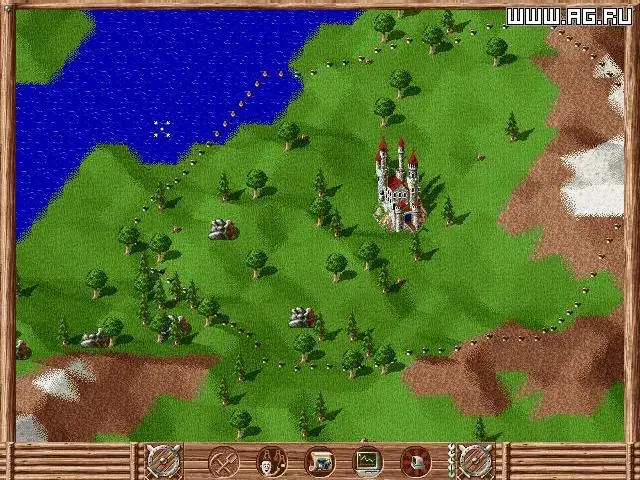
Welcome to The Settlers, a classic 1993 real-time strategy game from Blue Byte where you’ll dive deep into expansion and resource management. Your goal is to build a thriving settlement from the ground up, meticulously optimizing production chains for everything from grain to tools, and eventually expanding your territory to conquer rival lands. It’s a game that rewards careful planning and efficient logistics, offering a satisfying loop of growth and strategic conquest across both PC and Amiga platforms.
This guide is here to help you master the intricacies of The Settlers. We'll cover everything from establishing your initial settlement and setting up efficient resource chains to the finer points of strategic expansion and military conquest. If you're looking to optimize your economy, understand the best building placements, or simply ensure your little settlers are always busy and productive, you've come to the right place.
Part 1
Begin your journey in The Settlers: Rise of an Empire! This guide covers the game's introduction, core mechanics, and interface essentials to get you building your first settlement.
Hey there! Welcome to The Settlers: Rise of an Empire. This guide is going to walk you through the very beginning of the game, covering the introduction, a general overview, and how to get around the game's interface. Think of it as your first steps to becoming a master builder!
We'll be diving into:
- The game's introduction and what to expect.
- A general overview of what The Settlers 6 is all about.
- A breakdown of the buttons and interface so you know what's what.
Let's get started and build something great!
Part 2
Navigate The Settlers main menu, understand hotkeys, and learn about the City Information and Treasury buttons.
- 1After skipping the intro movie, you will see the main menu with options: Singleplayer, LAN Game, Multiplayer, Profile, Options, Credits, and Exit Game. The game version number is displayed below the Exit Game button.
- 2Select 'Singleplayer' to start the main story.
- 3'Profile' allows you to create, edit, delete, and select profiles to keep different players' game progress separate.
- 4'Options' lets you adjust game settings like Video, Sound, and Mouse Controls, and view available shortcuts (hotkeys). The game attempts to auto-configure settings, but you can alter them here.
- 5'Credits' displays a list of the game's creators.
- 6'Exit Game' closes the application.
- 7To move around the map, move your mouse cursor to the edge or hold the right mouse button and move the mouse. Camera scrolling speed can be adjusted in Game Options. Clicking the minimap (a small map showing the overall game area) is less accurate.
- 8Zoom in or out by spinning the mouse wheel.
- 9Rotate the camera angle by holding Control + mouse wheel.
- 10Rotate buildings by holding Shift + mouse wheel.
- 11In Singleplayer, choose 'Campaign' for the main story maps and cutscenes, 'Custom Game' for standalone maps (including those created with the map editor, which is not officially supported), or 'Load Game' to continue a saved game.
- 12The main game interface displays various buttons. Some buttons are locked initially in early tutorial levels or require village upgrades. Hovering your mouse over interface elements provides a brief description.
- 13The 'City Information' button (top left) shows current and maximum population, families (wives), soldiers, and City Reputation (progress bar from 0% to 100%). Temporary icons indicate positive (green) or negative (red) effects on reputation. After a festival, a pop-up shows new weddings.
- 14The 'Treasury' button (Gold Coin icon) displays your current gold. Clicking it shows potential income from taxes and potential military maintenance costs. These figures are estimates; taxes require collection by tax collectors, and income can change with commerce. Soldier pay can also fluctuate. Pop-up boxes with icons show the source of any fund gains or losses.
- 15The 'Storehouse Stock' button (wagon icon) shows your most important resources: stone and wood.
- A mouse with a mouse wheel is recommended for easier camera control.
- You can replay previously played maps from the Campaign menu without affecting the main story.
- Experiment with the map editor if you are interested in creating your own custom maps, but be aware it is not officially supported.
- Pay attention to the temporary icons near the City Information button to understand what is affecting your city's reputation.
- Remember that Treasury figures are estimates and can change based on in-game events.
Part 3
Master the interface of The Settlers: Rise of an Empire. Learn about resource displays, building menus, the mini-map, and essential UI buttons for efficient gameplay.
This section provides an overview of the user interface elements in The Settlers: Rise of an Empire, explaining the function of various buttons and panels.
Resource Overview: The storehouse holdings display provides a summary of all resources. At the bottom of this popup, you can see the current total and maximum storage capacity of your storehouses.
Resource Buttons:
- Food Button (Apple Icon): Shows the total amount of finished food available. Clicking it reveals a detailed breakdown of each food type. A red outline warns of famine if the total reaches 0.
- Clothing Button (Shirt Icon): Displays the total amount of finished clothing available. Clicking it provides a detailed breakdown of each clothing type.
- Cleaning Supplies Button (Brush Icon): Shows the total amount of finished cleaning products available. Clicking it provides a detailed breakdown of each item type. This button is only available after town upgrades.
- Entertainment Button (Musical Icon): Displays the total amount of entertainment available. Clicking it provides a detailed breakdown of each entertainment type. .
- Decorations Button (Decoration Icon): Shows the total number of decorated buildings in your village. Clicking it reveals details on which buildings are decorated and with what, as well as the total number of decoratable buildings. .
- Prosperity Button (Treasure Chest Icon): Provides a breakdown of your town's prosperity, including the number of rich or poor buildings and the total number of taxable buildings. .
- Military Button (Crossed Swords Icon): Displays a dropdown of current military supplies like swords and bows. This does not show the number of soldiers, which can be found in the City Information dropdown.
System Buttons:
- Menu Button (Top Right Corner): Allows you to pause the game, access saving and loading features, and exit the game.
- Chat Button (Below Menu Button): Available only in multiplayer games to send messages to other players.
Construction Panel Buttons (Right Side of Screen):
- These buttons often match icons from the top of the screen and open side menus for building construction.
- Resource Gathering, Food Production, and Clothing Production buildings are available from the start.
- Cleaning Supplies, Entertainment, Decorations, and Military Support buildings require upgrades.
- Defense and Roads Button: Allows building wooden or stone walls and gates, and laying down trails or stone roads. Stone roads require upgrades.
- Demolition Button: Destroys most buildings (except the castle, cathedral, and storehouse), trails, and roads.
Mini Map Buttons (Lower Right Corner of Screen):
- Mini Map: Shows an overview of explored territories. Unexplored areas are dark grey, explored but unowned areas are light grey. Raw material locations are marked with icons. Hovering over a territory displays its name. Clicking centers the main view on that area.
- Map Type Button (Blue Button Left of Mini Map): Toggles between a territory map (showing resource icons, territory borders, buildings, and military units) and a terrain map (showing cliffs, fertile ground, forests, and rivers).
- Select All Military Units Button (Crossed Swords Icon): Selects all military units, including swordsmen, bowmen, knights, siege engines, and thieves. Useful for converging units but may interfere with specific unit tasks.
- Unit Control Buttons (Appear Left of Mini Map when Military Selected): Include
Part 4
Learn about UI elements in The Settlers, including knight abilities, building production, and the promotion button.
When you get more buttons to the left of the minimap (a small map showing your surroundings), the top one is your knight's active ability. Below that is the Build an Outpost button, which is only available if your knight is in an unclaimed territory. Following that are the default military commands.
The button at the top of the minimap is the Promotion Button. This displays your knight's current rank, the requirements for promotion, and allows you to promote your knight if you meet the requirements and your knight is in the marketplace, thus upgrading your village.
The next button is your production menu. Clicking this opens a menu listing all buildings that gather resources, produce final products, or relate to infrastructure. Within these sub-menus, you can click an icon to allow or stop production, or to sell wares and stockpile equipment. This menu also shows the number of each building type in your city, helping you identify imbalances, like having only 1 active sheep farm but 3 active weavers, allowing you to replace a weaver with a tanner, for example. This menu becomes more useful later in the story when your city is large or for specific quests requiring stockpiled goods.
The shaking hands icon button is the Diplomacy button. This brings up a menu listing all other factions on the current map, your relationship with each, and any trade relations. Allied territories are visible on the minimap, while enemies are not. Trade will be discussed more later.
The weather button shows the current month and season. This is important as some resources, like fishing, harvesting, and beekeeping, are unavailable in winter. Rivers and lakes can also freeze in winter, enabling new combat tactics.
The final button surrounding the minimap is the time button. Pressing this alters the game speed: x1 (default), x2, and x3. Clicking again resets to x1. To pause the game, press the menu button.
Building Information Window: This popup appears at the bottom of the screen when you click a building. It shows the needs and desires of the settlers in that building, their proximity to needing more, the building's upgrade level, how many settlers live there, and its business. To the right are two buttons: a person icon to center the screen on a settler working in the building (toggling through all of them), and a building icon to center the screen on the building itself. The Castle, Storehouse, and Cathedral have different building information windows.
Current Quest Details Button: This window displays a portrait of the quest giver and a brief quest description. An arrow next to the portrait replays the quest's audio. A magnifying glass button may appear to center your view or ping your minimap to the quest objective. If a quest requires sending goods, a cart with an arrow appears to dispatch them; this button does nothing if you lack sufficient goods.
Quest Logs Button: Above the Quest Details window on the left, buttons for other active quests appear. Clicking one displays its details; clicking again minimizes the details to provide more map area. This area is empty if no quests are active.
The Knights: In The Settlers, you play as a king overseeing lands ruled by knights. Knights act as powerful military units and representatives, serving as village mayors, diplomats, and generals. They are the only units that can claim new territory by moving into unclaimed land and building an outpost using gold and wood. The cost of an outpost varies by map and territory, with resource-rich territories usually costing more. Knights are also the only units that can perform trade actions by moving next to a friendly village's storehouse. New buttons appear to purchase goods, which disappear if the knight moves too far away. Knights can also explore ruins and shipwrecks.
- Keep an eye on the minimap for allied territory visibility.
- Utilize the production menu to balance your city's resource generation and consumption.
- Pay attention to the weather button to plan for seasonal resource availability and combat strategies.
- Knights are essential for expansion and trade; protect them.
- Use the time button to speed up or slow down the game as needed.
Similar guides you might like

100% Human-Written. AI Fact-Checked. Community Verified. Learn how AntMag verifies content