
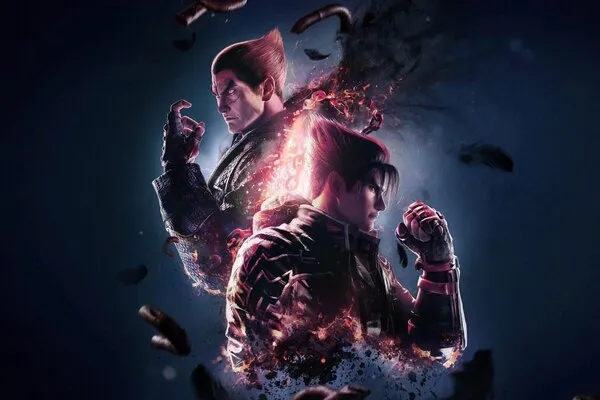
Welcome to the streets, fighter! Street Fighter 6 throws you into a vibrant world where you'll master iconic characters and engage in thrilling one-on-one combat. Whether you're exploring the open world of Metro City or diving into competitive multiplayer, the core experience is about honing your skills, learning new combos, and proving your mettle.
This guide is your essential companion for conquering Street Fighter 6. We'll walk you through every step, from understanding the game's main mechanics and all the story quests in World Tour, including specific missions like 'Mountain of History' and 'Brother and Sister,' to providing deep dives on each character. Get ready to achieve victory and master the fight.
Part 1
Embark on your Street Fighter 6 journey! This guide covers the essentials of Part 1, helping you understand controls, basic mechanics, and get ready for your first matches.
Hey there! Welcome to Street Fighter 6. This is gonna be your go-to spot to get the hang of things, especially if you're just jumping into the fighting game scene or coming back after a break. We'll break down the absolute basics here in Part 1 so you feel confident stepping into the ring.
In this section, we'll cover:
- Getting familiar with the game's layout and main menus.
- Understanding the core controls and how your character moves.
- A quick look at the different game modes to get you started.
- Tips for your very first few matches to help you survive and learn.
Don't worry about being a pro right away. The goal here is to get you comfortable and ready to have some fun. Let's dive in!
Part 3
Discover the intricacies of Street Fighter 6's Part 3. This guide offers insights into the game's mechanics, challenges, and overall design, enhancing your gameplay experience.
Unlike many other difficult games, you actually feel that you master the game, and that it was never about luck. If you have beaten it a couple of times, you know that you can put it on anytime and beat it again, with just pure skill.
Another big plus is all the different types of levels you will encounter. No level is like the others, and they all give you different types of challenges, fears and wonders. From the depths of the dark caverns in Area 4 to the creepy swinging passages over deadly water in the harbour in Area 6, and from the hellish computer mazes of Area 8 to the quicksand pits in the wilderness of Area 3, Bionic Commando gives you pure gaming action that only few games can provide.
All this, and together with excellent graphics and music, and a nice story with interesting dialogues, give a perfect platform action game with a great atomsphere and attitude.
3.3. WHY I WROTE THIS FAQ
So why did I wrote a FAQ for this game? Didn't I notice the game is quite old nowadays, and that many FAQ:s were already up on the net? Well, there are a couple of reasons.
First of all, a big reason why I wrote it was for my own personal enjoyment. I like to read and write FAQ:s and other things. Besides, I wanted to get something up on Gamefaqs and other sites on the net, and this game felt like a good one to begin with. This is not my first FAQ ever. I have written FAQ:s and guides before, but never put them up on big sites like this one. My previous ones were mostly for smaller sites or for my friends.
Another reason for writing this FAQ is that I, although I knew that this game already had been covered a number of times, felt that such a great game like this deserved some more FAQ:s.
But the biggest reason why I decided to sit down and create this FAQ was because I simply felt that all the FAQ:s I had found on this game so far were simply not satisfying on all points. They all had some flaws in them. Some of them had information missing, and some weren't even finished. Others had a lot of good information, but were simply not funny to read. Either they had a very bad layout, or they were just very unpersonal, saying things like "Go up. Kill the guard. Enter the door. Go down" etc.
Those guides that were well-written and had a professional layout had another problem however: They sometimes kept on refering to other websites and asked you to put in URL:s in your web browser to watch different pictures and so on. As we all know, NO ONE does that when browsing the Gamefaqs after that critical piece of information. Having a FAQ in that way only creates frustration.
Finally, almost all the FAQ:s were written for very experienced players. They expect the players to take advanced and dangerous shortcuts just to save time, and so on. Having advanced tactics in a walkthrough is fine, as long as there is an option available. Think of all the inexperienced players that play this game.
So that's why I decided to make this FAQ perfect on all points. I wanted to include everything important in the game and for the player. I wanted everything to be into this single FAQ, and not spread out on different places. I wanted the FAQ to be easy to read and simple to navigate, and finally, I wanted to write the FAQ for the less experienced players.
I am very well aware that I might fail myself on these points. People might think that my FAQ has serious defects in it, and if they do, then blame me. Here is the deal: If you feel that this FAQ could be improved in some way, then drop me a line via the mail. I wrote this FAQ for YOU, not for myself, and the most important thing is that you feel comfortable with it. Just remember to give constructive critiscism, and don't flame. And please mark the mail with "Bionic Commando FAQ" or something like that in the subject line so I know what it is about. The mail adress is: Linuso@hotmail.com
4.1. STORY
Unknown country. Some time in the 1980's...
Many years ago, an enormous war was held between two big organizations. The first one was the evil Empire, often nicknamed "The Badds", who wanted nothing else than to take over the world and rule it with strong dictatorship. Against them was the Federation, an organization who fought for peace and democracy, and did all they could to stop the Empire's plans. Eventually, after a long battle, the Federation won, and the Empire was put back for a while, reforming their battle units.
A while ago, some top secret plans were found by the Federation. It was the old plans of the Empire. The plans described a very detailed construction process of a terrifying and deadly new super weapon called "The Albatross". However, the plan was scrapped when the person with the key knowledge, Master-D, was killed.
However, the Empire's new leader, general Killt, reformed his army. He also started top secret research projects in order to finish The Albatross. Although the chances for these plans to succeed looked sli
Part 11
Learn about all enemy types and obstacles in Street Fighter 6, including Patrolling Guards, Sitting Guards, and Electric Currents.
- 1Patrolling Guard: The most common enemy, appearing in red or green. They patrol a small area and fire bullets if they see you. Duck under their shots and fire back. They will jump down to your level if you are below them, and toss grenades in enemy field stages. Found in: Areas 1, 5, 2, 6, 8, 9, 12, All enemy field stages.
- 2Sitting Guard: Similar to the patrolling guard but remains stationary and ducks. They periodically rise to fire. If they hide behind cover (barrels or boxes), shoot them when they rise; otherwise, duck and spray them with bullets. Found in: Areas 1, 4, 5, 2, 3, 8, 12, All enemy field stages.
- 3Parachuting Guard: Floats down via parachute, phasing through walls until hitting a platform, where they become a patrolling guard. Can be shot while parachuting but not with the arm. Found in: Areas 1, 5, 2, 6, 8, 9, 12.
- 4Electric Current: An impassable electrical barrier. In Area 1, destroy its generator. In Area 12, shut down the main system to cut the power. Found in: Areas 1, 12.
- 5Bomb/Cannon Guard: A sitting guard who alternates between rolling bombs and firing a cannon. Hang from the roof to avoid bombs and duck when they fire the cannon. Defeat them quickly. Found in: Areas 1, 8, 9.
- 6Neutral Area Guard: White-clad medics in neutral areas who attack if you fire your weapon. They act like parachuting soldiers before becoming faster, more aggressive patrolling guards upon landing. Found in: All neutral areas.
- 7Knife Guard: A guard wielding a knife who patrols and charges at high speed when they see you. Be ready to spray them with bullets. Found in: Areas 4, 19.
- 8Chopper Guard: Flies with a chopper engine on their back, tracking you and hovering above while emitting an electric current. Move to a higher platform quickly to avoid them. If the current activates, drop down one platform. Your arm can knock them back slightly. Found in: Area 5.
- 9Horizontal Laser Cannon: Fixed to the roof, these cannons fire beams left and right periodically. Pay attention to their firing patterns and move when safe to pass platforms they guard. Found in: Area 5.
- 10Iron Ball: Hangs from a chain. When approached, the chain breaks, and the ball rolls towards you. It doesn't cause damage but knocks you back, potentially into pits or enemies. It cannot be destroyed. Found in: Areas 5, 12.
- 11Bomb Guard: Moves back and forth, rolling bombs. Move away or hang from the roof to avoid the bomb blasts. Found in: Areas 2, 8, 19.
- 12Slime: Moves quickly along the floor and will drag you away if it catches you, often towards hazards. Escape by using your arm on a platform above. It does not cause damage. Found in: Areas 2, 10.
- 13Hook Truck: An armored truck patrolling platforms above. It lowers a chain with a hook; it is invulnerable from the front when the chain is lowered. Charging at you if you reach its platform. A squatting guard emerges when destroyed. Found in: Area 2.
- 14Squatting Guard: A short, fast, and aggressive guard similar to the patrolling guard. You must duck to hit them. Always appears after a Hook Truck is destroyed. Found in: Areas 2, 7.
- 15Man Eating Plants: Large plants hidden in the ground in wilderness areas. They emerge and bite if you get near. They are well-hidden and cause instant death if you are eaten. Move carefully on grassy terrain. Found in: Area 3.
- 16Giant Spiders: Move in a pattern of standing still, then suddenly charging. Your bionic arm can knock them back but not kill them. Advance away quickly. Found in: Area 3.
- 17Giant Bugs: Flying bugs in the wilderness that slowly approach you. They can be taken out with your bionic arm. Found in: Area 3.
- 18Jumping Spike Balls: Indestructible spiky balls that jump out of pits. Pass them when possible. Found in: Areas 6, 14.
- 19Mini Tank: Patrols floors and attempts to hit you. You must duck to shoot it. Found in: Areas 6, 10, 11, 16.
- 20Flying Attack Robot Commander: A stationary guard who controls small flying robots. Defeating the commander destroys all robots. Found in: Areas 6, 8.
- 21Flying Attack Robot: The smaller robots controlled by the commander. Found in: Areas 6, 8.
- 22Rolling Spike Balls: Spiky balls that roll down floors. They cannot be destroyed. Found in: Area 6.
- 23Spike Ball Tosser: A guard who tosses rolling spike balls. Defeat them as soon as possible. Found in: Area 6.
- Always be aware of your surroundings, especially in wilderness areas with hidden hazards like Man Eating Plants.
- Utilize your bionic arm to knock back enemies like Giant Spiders and Giant Bugs, or to escape Slimes.
- Master ducking and jumping to evade enemy attacks and position yourself for counter-attacks.
- Prioritize taking out ranged threats like Bomb/Cannon Guards and Horizontal Laser Cannons to control the battlefield.
- Observe enemy patterns carefully, especially for stationary or predictable threats like Sitting Guards and Horizontal Laser Cannons.
Part 12
Learn about enemies like the Hanging Guard and bosses such as the Final Computer in Street Fighter 6 Part 12. Find out their locations and how to defeat them.
Enemies:
- Spike Ball Maker: Found in Area 6.
- Parachuting Bomb Guard: A blue variant of the bomb guard that parachutes from the sky. Found in Area 8.
- Corridor Robot: Features a steel barrier from floor to ceiling with a cannon that moves up and down, firing shots. You must hit the cannon to destroy the barrier. Found in Area 8.
- Hanging Guard: Wears a backpack with a bionic arm. If shot while on the ground, it jumps and hangs from the roof. If shot while hanging, it drops. To defeat it, hang from the roof and shoot it as it drops, tricking it into jumping up to be hit. Found in Areas 8, 9, 12.
- Shield Soldier: An annoying enemy on a small platform with a shield, only vulnerable from behind. Getting behind it is difficult. Found in Area 8.
- Armoured Truck: Invincible from the front except against the 3-Way Cannon. Other weapons must hit its rear. It patrols a platform, fires needles (which you can duck under), and charges at high speed when it spots you. Found in Area 7.
- Helicopters: Fly and fire diagonal bullets. You must move to their level to damage them, as your arm is ineffective. The 3-Way Cannon is recommended. Found in Area 7.
- Diagonal Laser Cannon: Hangs under a platform, moves back and forth, and fires diagonal beams at tight intervals. Hang on its platform and shoot it. Found in Areas 10, 11.
- Fat Guard: A large guard that patrols platforms slowly. It punches when close. Your bullets can hit it, but your arm cannot. Move away and shoot it. Found in Area 11.
- Moving Electric Bolt: A small electric current that moves along platforms, posing a threat on the floor and roof. All currents move simultaneously, allowing for timed passage. Found in Area 12.
- Shield Cannon Guard: Moves left and right, firing large shots. It is only vulnerable when firing, as it removes its shield then. Found in Enemy Field Stage 1: The Mountain Cliffs.
- Jeeps: Drive across the screen slowly while firing bullets. They are easy to destroy as they have no armor. Found in Enemy field stage 2: Blue Gravel Pit.
- Bionic Arm Guard: A blue character with a bionic arm similar to yours. It swings its arm in a circle, causing damage if you are hit. Shots bounce off its arm. Found in Enemy field stage 3: The Hidden Base.
Bosses:
- Final Computer: The main boss in every level. Its weak spot is its eye in the middle. It always has a platform at the perfect height next to it. Climb the platform and shoot its eye. On Level 12, reactors resemble final computers but lack the platform. Final computers are heavily guarded and may shoot starting from Area 3, and from Area 8 onwards. Found in All enemy areas.
- Plutoon: A boss consisting of a large group of soldiers that ambush you. The types of soldiers vary by area. The leader is always present and gives orders but does not need to be defeated for level completion, and defeating him yields no extra reward. Soldiers continue attacking regardless. No bullets are gained for defeating enemies in these rooms. Found in Areas 1, 2, 8, 9, 11.
- Bionic Arm Soldier: An annoying opponent met once or twice. It has a shield in front and shoots its bionic arm upwards if you try to pass over it, knocking you back. To get past, use the very top platforms or swing forward at high speed to outrun the arm. To defeat it, hit it in the back, which is difficult and time-consuming. It does not need to be defeated to complete Area 4, but must be defeated to leave the trap room in the final stage. Found in Areas 4, 12.
- Guard Robot: Nicknamed the "Pi pi pi guard" for its sound. It starts in the middle and moves backward when approached, firing three bullets in a wide spread. Move left/right and up/down to avoid shots. Blast it with your cannon when possible. A Rocket Launcher requires only one shot. Getting behind it makes it unable to harm you. Found in Areas 5, 3.
Similar guides you might like


100% Human-Written. AI Fact-Checked. Community Verified. Learn how AntMag verifies content