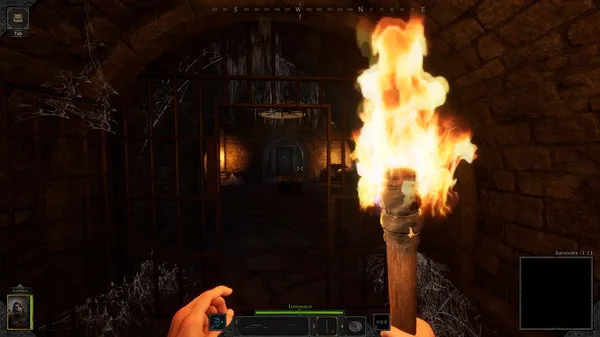
Welcome to Dark and Darker, an intense first-person fantasy RPG where you and your friends delve into dangerous dungeons. You'll need to brave treacherous environments, battle fearsome monsters, and outwit other players all while trying to escape with your loot. It’s a brutal but rewarding experience that blends dungeon crawling with high-stakes PvPvE survival.
This guide is your key to mastering the perilous dungeons. We'll cover everything you need to know to survive and thrive, from essential starting tips and strategies for taking down tough bosses to understanding the intricate skill system and completing challenging questlines. Get ready to navigate the treacherous world and emerge victorious.
Part 2
Navigate the treacherous dungeons of Dark and Darker's Part 2. Learn essential thievery skills, companion recruitment, and quest progression to survive and thrive in the game's challenging world.
Alright, let's dive into Part 2 of our Dark and Darker journey. This section is all about getting you set up with the right crew and understanding some key mechanics that'll make your life a whole lot easier. Think of it as building your foundation before the real chaos begins.
Thievery & Companions:
- Talent Checks: Don't sweat it if you fail a talent check a few times early on. Three failures mean nothing, but if you whiff on the fourth try, it's definitely time to pump up those stats.
- Pickpocketing: Seriously, pickpocket everyone you can, especially when you're just starting out. It's a great way to snag some extra gold and items.
- Secondary Weapons: Always have a backup like a bow or throwing weapons ready. This is crucial for characters like rogues or mages who tend to hang back.
- Companion Influence: Without specific companions like Gladys or Dranor in your party, some shady characters in Ferdok might just ignore you. Keep this in mind when you're trying to get information or quests.
General Game Tips:
- Read the Rules: Drakensang is built on Pen and Paper rules. Seriously, take some time to understand the basics. I learned the hard way why my dwarf kept getting wounded and what that weird formula was when I right-clicked my attack value! Don't make my mistake.
- Explore First: Always explore the map thoroughly before diving into dungeons. You never know what you might find.
- Low Vitality: Be prepared – your character will likely have low health points (vitality). I managed to beat the game with around 68 base vitality plus a ring that gave me 10 more.
- Expert Mode: Use Expert Mode when creating your character. It lets you reallocate points from skills, weapons, or spells you don't plan on using, letting you boost others or save them for later.
- Key Locations: Only three places stay unlocked throughout the entire game: Ferdok, Tallon, and Murolosh. Make sure you resolve every available quest before leaving any other area, or you might not be able to go back!
- Quest Navigation: Your quest journal is your best friend. Click on a quest, and the destination (whether it's a place or a person) will be marked on your map with a green icon.
- Companion Priority: Get your companions first, and *then* start tackling quests. This ensures they gain the necessary experience points (EP) alongside you.
- Camera Glitches: If the camera ever goes wild, just right-click, hold it down, and move your mouse. This should snap it back to a normal view.
Main Story - Part 2: Avestrue & Ferdok
This part of the game acts as a big tutorial, easing you into the world.
Avestrue: An Invitation from an Old Friend
You'll start by creating your character and heading towards Ferdok after receiving an invitation from Ardo of Boarstock. On the bridge, Sergeant Erland will mention that Ferdok is closed off unless you have two important people vouching for you. He'll point you towards Mage Rakorium at the inn and some bandits in the woods (these are side quests). In the marketplace, Salina, the Queen of Mountebanks, needs your help. Her heirloom was stolen by Dranor, and she'll vouch for you if you retrieve it. You'll need to recruit Rhulana from the inn and then talk to Runkel Bagthumper and the innkeeper to get Ferdok marked on your map. Along the way, two apprentices, Rufus and Nottel, will mention their master is missing. Head towards the bandits' location. You'll run into two bandits, Botho and Lund, guarding a chest. Defeat them, loot the chest, and head inside. A cutscene will play where a dragonling orders his men to kill Dranor and then teleports away. Help Dranor, recruit his aide, loot the area, and return to Salina. You won't get her heirloom back, but you'll get your reward – one voucher secured! Check out 'The Bear' side quest to find and help Mage Rakorium for your second voucher. After that, head to Nandor, collect your reward for dealing with the bandits, and get your pass to Ferdok.
Important Note: Ignore side quests until you have Rhulana and Dranor with you. This ensures they get their EP.
Pro Tip: After you give Bredo Bento his Oneberries in a sidequest, come back later and pickpocket him a few times. You'll be surprised how many Oneberry juices you can rack up!
Ferdok: The City of Murders
Once you arrive in Ferdok, the gate guard will mention Ardo's house and some gruesome murders that have caused the city to be locked down. Outside Ardo's house, another guard will inform you of his murder and tell you who to contact next.
Murders in Ferdok:
Speak with Guard Captain Barla Borkensmith to get more details and a deputy to help you investigate.
Investigate Ardo's Murder: Your first task is to find Ardo's bodyguard, Forgrimm, and his friend, Gladys Shladromir. Head to The Silver Pitcher inn in Praios and talk to the innkeeper for a plant-based remedy to cure Forgrimm's drunkenness. Give it to him, ask him some questions, and recruit him. He's a fantastic tank, just make sure you protect his back and cast some buffing spells on him. Your next stop is Wagoner's Home. Fight three robbers led by Boris, then enter The Serene Sow inn. The innkeeper and three shady customers – Cripple Reto, Goldtooth Yallik, and Fourfinger Sam – will ignore you. Leave the inn, go left, and you'll notice Yallik following you. Keep going downhill, and Gladys will show up. Recruit her and begin investigating the murders. Visit Ugdan Docks and the location where Ardo was killed. The guard there will mention Ardo's body was discovered by head guard Tashman. Speak with Tashman, who doesn't know much except that Ardo was trying to uncover some criminal activity at the docks.
Investigate Eelko's Murder: Go to the site of Eelko's murder. A neighbor who was present that night will mention Eelko's lack of fortune, except for one piece of jewelry. Ask who his closest friend was – apparently, it was a cat named Mimi, who was fed salmon monthly by a nearby merchant. Visit the fish merchant and get some leftover salmon. Feed the cat and follow her. She'll eventually stop near a wall, revealing Eelko's brooch. Report back to Barla in Praios Square. Guard Reuben will direct you to an informant and give you a code phrase. Go in front of the Praios temple and speak with archivist Loisane, who will hint at a conspiracy.
Investigate Dragon's Murder: Visit the Flat Footed Ferret inn or head directly to the murder scene. At the scene, break open a barrel to find another piece of jewelry. Visit the inn, but everyone will ignore your questions. As you leave, Alina, Dragon's former lover, will approach and give you crucial information. Report back to Barla. You'll learn that both pieces of jewelry were made from the same material. Reuben will then point you towards the archivist behind the Hesinde temple. Speak with her, and you'll discover that Dragon and Eelko were descendants of dragon slayers, and the next victim, Jessica, is at Wagoner's Home. Once there, the maid Lana will scream that Jessica has been kidnapped. Use the metal door on the left. Walk through, and you'll find Jessica's body on the floor. Take the list of victims from her body and explore. To the left, you'll find rats and a hidden wall...
Part 10
Complete Part 10 walkthrough for Dark and Darker, including Wagoner's Home, fighting Radulf Kramer, and dealing with Yandric the mage.
- 1Fight Radulf Kramer for the key to Wagoner's Home.
- 2Enter Wagoner's Home and pickpocket Reginald for 10 ducats.
- 3Sneak past Dark Eyes guards to find surveillance points. Break barrels and sneak past a sleeping guard.
- 4Continue to Chandler's market, past the inn, and down an alley to the second point. Use fog, remove armor, and stay in sneak mode (requires at least 1 sneak skill).
- 5Observe Ulwina Neisbeck, Tashman, Bravethor, and a mage speaking.
- 6Sneak back the same route.
- 7Testing times: Protect 3 Stoerrebrandt workers amidst a company war. You will be late but can fight 3 Dark Eyes at the Flat Footed Ferret, docks, and bridge. Be careful at the bridge; it's an ambush with 6 additional enemies. Report.
- 8The way of things: Reginald was killed by Tashman. Find him.
- 9Speak with merchant Cupinez, who directs you to smuggler Ennko in Wagoner's Home.
- 10Fight 2 of Tashman's bodyguards in Wagoner's Home.
- 11Squeeze smuggler Ennko for the ship name 'Horasia'.
- 12Return to the docks, buff (including against magic), and discover Yandric the mage killed Ardo.
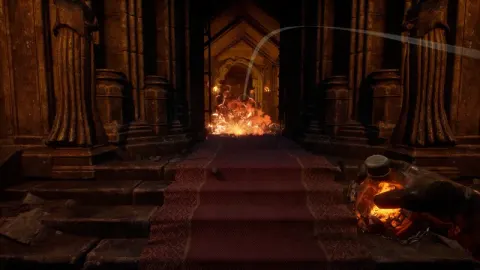
- 13Engage Yandric with full force; his fire spell is devastating. Report.
- 14Revenge for Ardo: Apprehend Ulwina Neisbeck in Praios square. Buff against everything, raise attributes, summon pets, and buy anti-fire salve. This is tougher than fighting Mother Rat.
- 15Ignore the guards and focus on Yandric (who fakes death). Use knockdown and paralyze/stone spells if available, then attack him quickly.
- 16After Yandric's death, a fire spirit with 400 vitality emerges. Attract the spirit and other enemies into the bushes/trees in the NW part of the court to avoid being surrounded.
- 17This is an endurance test. Use potions, change positions, and fight waves of guards and workers (up to 26 enemies total), some skilled with spears and dodging.
- 18Go upstairs to Ulwina, who claims godlike powers, until a lightning strike kills her.
- 19d.2 Side with Neisbeck:
- 20Running Errands: Speak with Palgo Babek about an order for Traldan in Silver Pitcher and return.
- 21Hops and malt: Find the Stoerrebrandt messenger near the Flat Footed Ferret and get a note. Intimidate the messenger (who is trying to charm Juicy Lucy) to get the note. Watch Juicy Lucy laugh and report.
- 22Problem with the beer: Pay Head Guard Tashman 60 ducats to bribe him. Follow him to watch him blame two drunks for thefts.
- 23An exclusive deal: Prevent a Stoerrebrandt negotiator from reaching an agreement with the brewery owner. Eliminate the negotiator and 2 Stoerrebrandt workers, then 'convince' the owner.
- 24e. The Plague of rats: This mission is extremely difficult. Use Middlemish services and buff at each level; a pet shield is recommended. It is not compulsory to finish; you can return later, around level 8-10.
- 25At the crossing from Salina's quest to free Dranor, turn left.
- 26Approach orange crystal formations cautiously, as rats spawn from them. Be ready to retreat and fight them quickly.
- 27First level: 3 gray rats, then 8-12 in the next cave, some from crystals. Fight them one by one.
- 28Second level: Three waves of 7, 6, and 7 rats. Sometimes 2 rats lag behind.
- 29Third level: More powerful black wolf rats attack in waves of 7, 7, and 5.
- 30Fourth level: A pack of 7 black rats attacks immediately, followed by 3 more waves of 7 rats each.
- 31Mother's Lair: Before the entrance, fight 4 waves (5, 7, 6, 7) of strong enemies. Park your team outside and use one character to lure spawned rats.
- 32Prepare for the battle against Mother Ratzinsky, a mutant rat pack leader. The path back closes upon entering.
- 33Use Gladys to place 3 bear traps near the orange crystals blocking the exit. Position tanks in front and mages behind. Buff, use weapon balm or whetstone, and have Rhulana shoot the 'big rat'.
- 34Get Rhulana behind the traps, change her weapon, summon a pet, wait for trap damage, and fight. Cast Fandango of Fireflies on Forgrim to use as a front-line tank. Damage dealers go behind him. Gladys shoots arrows, bolts, or throwing weapons. Heal Forgrim as needed.
- 35At 1/3 damage, Mother Ratzinsky summons a new wave. Kill all but one to prevent another summon and focus on her.
- 36Use many potions and magic only for healing and summoning pets. After at least 20 minutes, she will be defeated.
- 37Clear the cave, loot the ring of life, and speak with the dwarf brothers.
- Always stay in sneak mode when required.
- Remove armor when sneaking to reduce detection.
- Buff your character extensively before difficult fights, especially against magic.
- Heal and buff before the bridge ambush in 'Testing times'.
- Use knockdown and paralyze/stone spells against Yandric if available.
- For Mother Ratzinsky, use traps, positioning, and endurance.
- Conserve potions and magic for healing and summoning during the Mother Ratzinsky fight.
- If the rats are too strong, return later when you are around level 8-10.
Part 11
Master Darker Ages - Level 11 in Dark and Darker! Learn about difficulty swaps, bonus objectives, and wave strategies to conquer this challenging Penny's Pursuit level.
Part 12
Complete walkthrough for Dark and Darker Part 12, covering quests like the treasure map, shovel, Blood Mountains, and Tallon.
- 1An old treasure map: Speak with Wigur in the inn for a hint about treasure. Krobbler will accept help after completing task 'b' and offer a 50/50 deal. Find the bottle in a small cave below the deont place (hidden from above). Read the rhymes:
- 1. Follow the hilt where three swords lie, straight on as the crow flies, to the fourth tomb beneath the harpies' place.
- 22. Go north from there and click on the tomb called The Unnamed Mercenary around the inner edge.
- 33. Left on the Valonion's place is a tomb with buttons. Click the bottom one to avoid poison and receive a key and the fourth rhyme.
- 44. Return to number 1, enter the second tomb, and move the cursor next to the warrior on the sarcophagus head until a 'stone mouth' appears. Click it, endure the poisoning, and get a recipe for Tenobaal arrow. Krobbler will curse and leave.
- 5The shovel: Find a shovel while fighting undead and skeletons in the crypt. Bring it to blacksmith Leadfinger, who will make a broadsword. He mentions an improved shovel for a better weapon, though this may not be in the journal.
- 6BLOOD MOUNTAINS - Spirit attack: S from castle Berndrik camp is under attack by six nature spirits (big, nasty bear spirits) using knockdown and lightning. Helping Brendrik is useful long-term. This help will not appear in the journal.
- 7BLOOD MOUNTAINS - The woodcutter lunch: Two woodcutters near Alvina's place need their fellow returned with food. Holdwin is under attack by 6 Ronkwar's thugs North of the main Praios camp (with the altar wine). Help him and return the food.
- 8BLOOD MOUNTAINS - The giant firefly meat: Knowall offers this quest before and after Morla's bidding. If using Praios' help, do this before choosing a side. Knowall wants giant firefly meat for a ring with +1 AG, DE.
- 9BLOOD MOUNTAINS - The frog prince: Firniane is unhappy with Dranos' transformation into a toad. Dranos asks you to bring him back. Speak with Alvina, use Fast Talk, and give the toad to Firniane.
- 10BLOOD MOUNTAINS - Robbers and bandits: On the way to Praios camp, two bands ask for money. Side with Humbert for a bigger reward on Ronkwar's head. Speak with Humbert and go to his enemy camp. Ronkwar is a large foe with a Brabak mace and 120 vitality, surrounded by 5 cronies. He is resilient to knockdown and uses roundhouses. Stun/paralyze, reduce his stats, or lure his cronies away. Keep the reward poster on him and receive 60 ducats from count Growin.
- 11TALLON - The noblewoman: On the way to Talos, a noblewoman near a wrecked carriage demands you find her coachman. Northeast of her, the coachman is dead, and 4 goblins attack. Return; she asks for protection until Tallon. Fight 2-3 waves of goblins (watch for the shaman!), loot the axe Molokdeschnaga, and reach the gates. The guard will allow entry with her help.
- 12TALLON - The marauders: You can only exit Tallon via the west gate. The head guard permits exit after you help him against marauders besieging the town. Buff and fight 2 waves of 9 and 5 goblins. Target shamans first, using knockdown and debilitating spells.
- 13TALLON - The marauders camp: The captain wants to know the marauders' camp location. On the way to Prenn's Grove, meet an elven fighter, Ancoron, who wants revenge on the ogres leading the marauders. Direct his anger toward the enemies and receive the camp location. Inform the captain, but the council members (Merchant Oakridge, and two others) refuse to get involved.
- 14TALLON - Merchant Oakridge: He wants his son back, who is involved with a girl without name or fortune. Speak with Mother Sweetings to find the meeting place: Oakridge crypt. Investigate. Enter the crypt to fight 2-3 skeletons. Open 4 trapped doors to fight 5 enemies and obtain a diary in 4 parts. The diary reveals the first Oakridge was a necromancer who made mistakes after relocating to Tallon, established a commercial route using apple wine, corrupted a priest, killed another, and lost his wife and himself to a plague. Enter Dhana's vault to find the girl. The crypts will spawn 6-10 skeletons and a mage. Follow the kid's trail. Inside, face one undead necromancer (200 vitality) and 5 skeletons (80 vitality). The necromancer is the only target. Use knockdown, arrows/spells, and special abilities to defeat him.
- The Tallon's inn is the best place to get information.
- When fighting Ronkwar, consider stunning, paralyzing, or reducing his stats, or lure his cronies away.
- When fighting the marauders in Tallon, always target the shamans first.
- When fighting the necromancer in Oakridge crypt, use plenty of knockdown, arrows/spells, and special abilities.
Similar guides you might like


100% Human-Written. AI Fact-Checked. Community Verified. Learn how AntMag verifies content