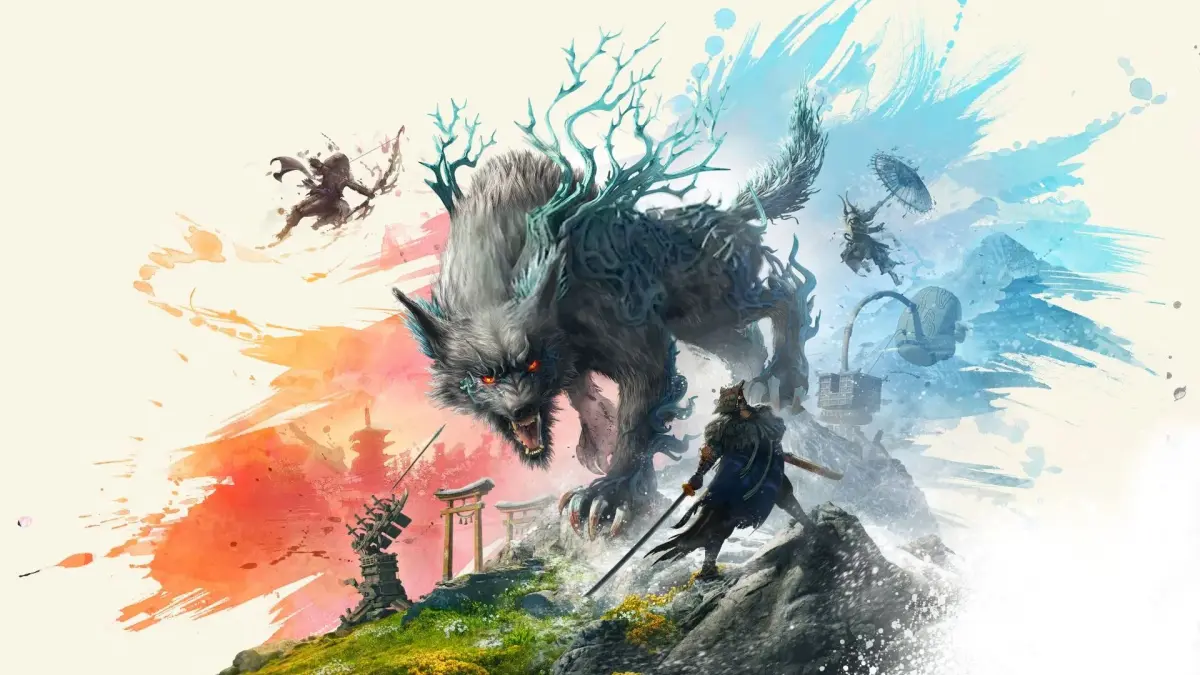
Welcome to the hunt! In Wild Hearts, you'll step into the shoes of a Karakuri Hunter, wielding ancient technology to battle colossal Kemono – mutated beasts fused with nature – in a fantastical feudal Japan. This third-person action RPG from Omega Force and KOEI TECMO GAMES CO. focuses on fast-paced combat, requiring you to master a variety of weapons and craft Karakuri gadgets on the fly to exploit your foes' weaknesses. It's a challenging but rewarding experience, perfect for players who enjoy deep combat systems and epic boss fights.
This guide is here to help you conquer every aspect of the hunt. We'll walk you through everything from mastering the intricate Karakuri crafting system and understanding weapon nuances to taking down the most formidable Kemono, like the fearsome Kingtusk and the agile Deathhaze. Whether you're aiming to complete all Steam Achievements, find every collectible, or simply survive the increasingly difficult encounters, we've got the strategies and walkthroughs you need to succeed.
Part 1
Wild Hearts walkthrough for PS3, version 1.00, updated 11/21/2013. Includes guide and walkthrough details.
- 1The walkthrough is for Wild Hearts on PS3.
- 2It is version 1.00.
- 3The update date is 11/21/2013.
- 4This guide was the FAQ of the Month winner for October 2013.
- The walkthrough covers Kingdom Hearts Final Mix and Kingdom Hearts Re: Chain of Memories.
- Sections include Introduction, Characters, Basics, Walkthrough, Side Quests, and more.
- Specific walkthrough sections for Kingdom Hearts Final Mix include Awakening, Destiny Islands, Traverse Town, Wonderland, Olympus Coliseum, Deep Jungle, Agrabah, Monstro, Atlantica, Halloween Town, Neverland, Pre-Hollow Bastion, Hollow Bastion, and End of the World.
- Specific walkthrough sections for Kingdom Hearts Re: Chain of Memories include Traverse Town, Agrabah, Olympus Coliseum, Wonderland, Monstro, Halloween Town, Atlantica, Neverland, Hollow Bastion, 100 Acre Wood, Twilight Town, Destiny Islands, and Castle Oblivion.
- Reverse/Rebirth sections include Hollow Bastion, Agrabah, Monstro, Neverland, Traverse Town, Atlantica, and Olympus Coliseum.
Part 3
Learn the ins and outs of Wild Hearts controls, including button mappings for actions, camera, and menus. Understand HP, MP, and Charge gauges for optimal gameplay.
This section of the guide covers the controls, difficulty settings, and in-game gauges for Wild Hearts.
Controls:
| Button | Function |
|---|---|
| L1 | Hold down to display magic shortcut menu |
| L2 | Cycle through available targets while locked on |
| R1 | Engage or disengage target lock |
| R3 | Revert camera to default frontal view |
| D-Pad | Move cursor / Move cursor in command menu |
| Left Stick | Move character / Move Camera (when in first person mode) |
| Right Stick | Move camera |
| Start | Display main menu / Pause (during battle and cutscenes) / Skip events (during cutscenes) |
| Select | Toggle first-person view on and off |
| Circle | Confirm / Attack / Press while holding the L1 button to cast assigned spell / Cancel / Jump / Ascend when flying or swimming |
| Triangle | Special Commands (Talk/Open Chests/Save, etc.) / Use Special Abilities / Call Allies (battles) / Press while holding the L1 button to cast assigned spell |
| Square | Use abilities (Dodge Roll, etc.) / Descend when flying or swimming / Press while holding the L1 button cast spell |
| Cross | Confirm / Attack / Press while holding the L1 button to cast assigned spell |
Note: Pressing L1, L2, R1, R2, Start, and Select together performs a Soft Reset to the Start Menu. Pause and Soft Reset are disabled during certain scenes.
Difficulty Settings:
| Game Mode | Description |
|---|---|
| Final Mix: Beginner | Begin with rare items in easy mode. For players new to the game or who struggle with difficulty. Starts with 8 Strength Ups, 8 Defense Ups, 4 AP Ups, an EXP Necklace, and a Ribbon. |
| Final Mix | A balanced mode recommended for first-timers. Rebalanced since the original Kingdom Hearts, this mode is between Expert and Final Mix Proud. |
| Final Mix: Proud | Encounter tough enemies for thrilling battles. |
Gauges:
- HP Gauge (Green): Located in the bottom right corner for Sora and top right for companions. Shows remaining health. Flashes red and alarms sound when critically low.
- MP Gauge (Blue): Shows Magic Points, which decrease when spells are cast or some abilities are used.
- Charge Gauge (Orange): Fills up and converts to MP. Spells with low MP cost draw from this gauge first.
Experience Points and Rewards:
- Experience is earned by defeating enemies and executing certain actions (e.g., parrying), yielding Tech Points.
- Defeated enemies drop:
- Green Orbs: Restore HP.
- Clear Orbs: Refill the charge gauge.
- Yellow Orbs: Munny (in-game currency).
- Treasure Chests: Contain items.
- Larger orbs/chests indicate greater effect or value.
Part 4
Learn how your initial choices in Wild Hearts affect Sora's stats, MP, and item slots. Master the Dream Rod, Shield, and Sword for the best start!
Alright, so you've just booted up Wild Hearts and you're in this weird dream place called the Dive to the Heart. It's basically inside Sora's head, and right now, you're on the Snow White Platform. This is where you make your first big decision: you get to pick one 'gift' and sacrifice another. Don't stress too much, but these choices actually set the stage for how Sora grows throughout the game, especially how you'll get your new skills as you level up.
You've got three main 'dreams' to choose from, each with its own flavor:
- Dream Rod: This is all about magic. Think of it as the power of the mystic, focusing on inner strength. It's a staff that can bring both wonder and ruin.
- Dream Shield: This one's for the protectors. It's the power of the guardian, emphasizing kindness to help your friends. It's a shield meant to repel anything.
- Dream Sword: This is for the warriors. It's the power of the warrior, fueled by invincible courage. It's a sword that can cause terrible destruction.
Now, here's the real kicker: the choice that matters most statistically is whether you want to start with +2 extra item slots or have 3 MP right off the bat instead of the usual 2. If you pick the Dream Rod, you'll always start with 3 MP and end up with a sweet 10 MP by the time you hit level 100. If you go with the Sword or Shield, you'll start with 2 MP and finish with 8 MP. The Dream Shield is the only one that guarantees you those +2 Item Slots. Honestly, picking the Sword doesn't give you much of an edge stat-wise because you can boost your Strength, Defense, and AP through items later anyway.
To help you visualize, check out how your stats shake out at Level 1 and Level 100 based on your choices:
Sora's Stats - Level 1
| CHOOSE | SACRIFICE | HP | MP | AP | STR | DEF | ITM | ACC. |
| Rod | Shield | 18 | 3 | 3 | 5 | 1 | 3 | 2 |
| Rod | Sword | 18 | 3 | 3 | 3 | 3 | 3 | 2 |
| Shield | Rod | 18 | 2 | 1 | 5 | 4 | 3 | 2 |
| Shield | Sword | 18 | 2 | 3 | 4 | 4 | 3 | 2 |
| Sword | Rod | 18 | 2 | 1 | 6 | 2 | 3 | 2 |
| Sword | Shield | 18 | 2 | 3 | 6 | 1 | 3 | 2 |
Sora's Stats - Level 100
| CHOOSE | SACRIFICE | HP | MP | AP | STR | DEF | ITM | ACC. |
| Rod | Shield | 87 | 10 | 51 | 48 | 46 | 6 | 3 |
| Rod | Sword | 87 | 10 | 51 | 46 | 48 | 6 | 3 |
| Shield | Rod | 87 | 8 | 49 | 48 | 49 | 8 | 3 |
| Shield | Sword | 87 | 8 | 51 | 47 | 49 | 8 | 3 |
| Sword | Rod | 87 | 8 | 49 | 49 | 46 | 7 | 3 |
| Sword | Shield | 87 | 8 | 51 | 49 | 45 | 7 | 3 |
You'll also get different abilities as you level up depending on what you picked. For example, if you pick the Sword and sacrifice the Rod, you'll get abilities like Sliding Dash and Counterattack earlier. If you prioritize MP with the Rod, you'll get skills like Stun Impact and Ripple Drive sooner. Here's a quick look at how your stat bonuses and abilities unlock:
| Lvl | Stat Bonus | Picked Sword | Picked Shield | Picked Rod |
| 2 | Strength | |||
| 3 | Defense | |||
| 4 | Strength | |||
| 5 | Defense | |||
| 6 | Max HP | Sliding Dash | Slapshot | Stun Impact |
| 7 | Strength | |||
| 8 | Max HP | |||
| 9 | Defense | Scan | Berserk | Treasure Magnet |
| 10 | Max HP | |||
| 11 | Max AP | |||
| 12 | Max MP | Slapshot | Tech Boost | Ripple Drive |
| 13 | Strength | |||
| 14 | Max HP | |||
| 15 | Defense | Counterattack | Guard | Scan |
| 16 | Max HP | |||
| 17 | Max AP | |||
| 18 | Max Items | Tech Boost | Stun Impact | Hurricane Blast |
| 19 | Strength | |||
| 20 | Max AP |
Part 5
Unlock the full potential of your Kemono hunting in Wild Hearts Part 5. Discover essential abilities like Combo Plus, Leaf Bracer, and MP Rage to dominate your foes.
Alright, let's dive into Part 5 of our Wild Hearts journey! This section is all about grabbing some really useful abilities that'll make your fights against those tough Kemono a whole lot smoother. Think of these as your new best friends in combat, helping you dish out more damage, survive longer, and manage your resources like a pro.
We're going to break down the key abilities you can snag. Some of these are found in the tables below, and knowing where and when to get them can seriously change the game.
Part 5 Abilities Breakdown
This part focuses on a variety of stat boosts and combat skills. You'll see things like Max HP, Max AP, and Max MP boosts, which are always great for survivability and combat effectiveness. But the real stars here are the active and passive abilities that change how you fight.
Keep an eye out for:
- Combo Plus and Air Combo Plus: These are fantastic for increasing your damage output, especially if you love stringing together long attack sequences. More hits mean more damage, simple as that!
- Leaf Bracer: This is a lifesaver! It makes you invincible while casting magic. If you've ever been interrupted mid-spell, you'll know how crucial this is.
- MP Haste and MP Rage: Managing your MP is key, especially for powerful Karakuri or special attacks. These abilities help you recover MP faster, letting you use your skills more often.
- Second Chance: Another survival ability. If you take a fatal blow, you'll be left with a sliver of HP instead of falling in battle. It's a great safety net.
- Critical Plus: For those who like to live on the edge and aim for weak spots, this boosts your critical hit rate.
- Treasure Magnet: Who doesn't love more loot? This helps you snag extra items dropped by Kemono.
- Tech Boost: Essential for enhancing your Karakuri abilities, making your deployed structures stronger or last longer.
The tables below list these abilities alongside various stat increases. You'll want to prioritize getting the abilities that best suit your playstyle. For example, if you're an aggressive fighter, focus on Combo Plus and Critical Plus. If you prefer a more defensive or strategic approach, Leaf Bracer and Second Chance might be your go-to.
| Level | Ability 1 | Ability 2 | Ability 3 | |
| 22 | Defense | Combo Plus | Scan | MP Haste |
| 24 | Max HP | Air Combo Plus | ||
| 25 | Max AP | |||
| 26 | Max MP | Guard | Lucky Strike | |
| 27 | Strength | |||
| 28 | Max HP | |||
| 29 | Defense | Hurricane Blast | Leaf Bracer | Tech Plus |
| 30 | Max HP | |||
| 31 | Max AP | |||
| 32 | Max Items | Treasure Magnet | ||
| 33 | Strength | |||
| 34 | Max AP | |||
| 35 | Defense | Blitz | Guard | |
| 36 | Max HP | |||
| 37 | Max AP | |||
| 38 | Max MP | Treasure Magnet | Second Chance | Aerial Sweep |
| 39 | Strength | |||
| 40 | Max HP | |||
| 41 | Defense | Ripple Drive | Sliding Dash | Leaf Bracer |
| 42 | Max HP | |||
| 43 | Max AP | |||
| 44 | Max Items | Jackpot | MP Rage | |
| 45 | Strength | |||
| 46 | Max AP | |||
| 47 | Defense | MP Haste | Counterattack | Air Combo Plus |
| 48 | Max HP | |||
| 49 | Max AP | |||
| 50 | Max MP | Second Chance | Critical Plus | Lucky Strike |
| 51 | Strength | |||
| 52 | Max HP | |||
| 53 | Defense | Stun Impact | Hurricane Blast | Sliding Dash |
| 54 | Max HP | |||
| 55 | Max AP | |||
| 56 | Max HP | Max Accessories | ||
| 57 | Strength | Combo Master | ||
| 58 | Max AP | |||
| 59 | Defense | Vortex | Treasure Magnet | Counterattack |
| 60 | Max HP | |||
| 61 | Max AP | |||
| 62 | Max MP | Aerial Sweep | Blitz | Berserk |
| 63 | Strength | |||
| 64 | Max HP | |||
| 65 | Defense | MP Rage | Combo Plus | Jackpot |
| 66 | Max HP | |||
| 67 | Max AP | |||
| 68 | Max HP | Combo Plus | Max MP | |
| 69 | Strength | |||
| 70 | Max AP | |||
| 71 | Defense | Leaf Bracer | Ripple Drive | Slapshot |
| 72 | Max HP | |||
| 73 | Max AP | |||
| 74 | Max HP | Air Combo Plus | MP Haste | Treasure Magnet |
| 75 | Strength | |||
| 76 | Max HP | |||
| 77 | Defense | Treasure Magnet | Critical Plus | MP Rage |
| 78 | Max AP | |||
| 79 | Strength | |||
| 80 | Defense | Berserk | Vortex | Blitz |
| 81 | Max AP | |||
| 82 | Strength | |||
| 83 | Defense | Tech Boost | Tech Boost | Tech Boost |
| 84 | Strength | |||
| 85 | Defense | |||
| 86 | Strength | Critical Plus | Aerial Sweep | Vortex |
| 87 | Defense | |||
| 88 | Max AP | |||
| 89 | Strength | MP Rage | Combo Plus | Combo Plus |
| 90 | Defense | |||
| 91 | Max AP | |||
| 92 | Strength | Lucky Strike | MP Rage | Second Chance |
| 93 | Defense | |||
| 94 | Max AP | |||
| 95 | Strength | Combo Plus | Air Combo Plus | Combo Plus |
Pro Tip: Don't just look at the abilities themselves; consider where they're located. Sometimes, an ability you really want might be tied to a stat increase you don't need as much, or vice-versa. You'll need to balance what's available to make the best choices for your build.
Focus on building a set of abilities that complement each other. For instance, stacking Combo Plus with abilities that boost your attack speed or damage multipliers can lead to devastating combos. Similarly, pairing MP Haste with powerful MP-consuming skills ensures you're never left powerless.
Similar guides you might like
100% Human-Written. AI Fact-Checked. Community Verified. Learn how AntMag verifies content