
Welcome to Black Iron Prison, inmate. In The Callisto Protocol, you'll step into the boots of Jacob Lee, a cargo ship pilot caught in a terrifying outbreak on Jupiter's moon. This is a story-driven, third-person survival horror experience where you'll need to master brutal melee combat, strategic dodging, and resource management to survive the grotesque mutations and dark secrets lurking within the prison walls. If you enjoyed the likes of Dead Space, you'll feel right at home here.
This guide is your key to conquering every challenge The Callisto Protocol throws at you. We'll walk you through every chapter, pinpoint the locations of all Audio Logs and Implants, and provide detailed strategies for overcoming the game's toughest enemies and boss encounters. Whether you're aiming to collect every item or just need a hand getting through the Maximum Security difficulty, we've got you covered.
Overview
Follow our comprehensive story walkthrough for The Callisto Protocol, guiding you through every chapter, collectible, and achievement on Maximum Security difficulty.
Overview
Follow our comprehensive story walkthrough for The Callisto Protocol, guiding you through every chapter, collectible, and achievement on Maximum Security difficulty.

Stealth Through the Tunnels — The Callisto Protocol Guide
Master stealth and combat in The Callisto Protocol's tunnel sections. Learn enemy patterns, perfect dodges, and essential controls to survive the horrors of Black Iron Prison.
- 1Begin by starting a new game on Maximum Security. Pause the game and enter Photo Mode to unlock the 'Mugshot' achievement.
- 2Proceed down the initial hallway and enter the first door on the left. Open the locker inside to find your first collectible, a Bios (1/43).
- 3Continue into the cargo bay. Learn to vault over boxes using !cn_LSu!cn_A and mantle using the same buttons.
- 4As you approach a flaming hole, you will unlock the 'The Outer Way' achievement for finding the Outer Way boarding craft.
- 5Crouch using !cn_B, shimmy through a tight space with !cn_LSu, and sprint using !cn_LB. After a cut-scene, hold forward on the left stick to return to the captain's chair, ending Chapter 1.
- 6In Chapter 2, after a dream sequence, explore your cell. Exit and turn right to find a staircase. Descend to meet Elias, who will give you a shiv, unlocking the 'Desperate Times' achievement.
- 7Use the shiv on the control panel to open Elias's cell and shimmy through the doorway.
- 8In the next room, learn combat mechanics: hold !cn_LSl or !cn_LSr to dodge before an attack. Alternate dodges for consecutive attacks. Attack with !cn_RT after an enemy finishes their combo.
- 9Defeat the two inmates and the first Biophage. Aim to dismember enemies to unlock the 'Flesh Wound' achievement.
- 10Unlock Elias's cell with the computer console. Follow Elias to the elevator and take it down a level.
- 11Exit the lift, turn left, and crouch under debris. After defeating another Biophage, practice perfect dodges by flicking !cn_LS left or right just as an opponent winds up for an attack. This will unlock the 'Float Like A Butterfly' achievement after five successful dodges.
- 12After the fight, find a glowing green wall storage unit to receive a health injector and learn how to use it.
- The game is significantly easier after recent patches, making Maximum Security manageable.
- Pay close attention to enemy body language to anticipate attack patterns and dodge effectively.
- Perfect dodge timing is crucial and requires performing the action earlier than you might expect.
- The 'Float Like A Butterfly' achievement can be buggy; it's best to attempt it early in the game.
- Remember to mash !cn_Y to escape grabs and stomp on defeated enemies with !cn_Y.
Navigating the Abandoned Mines
Navigate the Abandoned Mines in The Callisto Protocol, fighting Crawlers and using the Assault Rifle. Activate mining equipment and ride lifts to progress.
The abandoned mines are treacherous. 'Crawlers' will ambush you from vents and ceilings; use quick melee attacks or a shotgun blast to dispatch them. The Assault Rifle is found in a collapsed section of the mine. Use its sustained fire for larger groups. You'll need to activate old mining equipment and ride precarious lifts to progress. Be prepared for multiple waves of enemies in tight spaces.

Getting Started
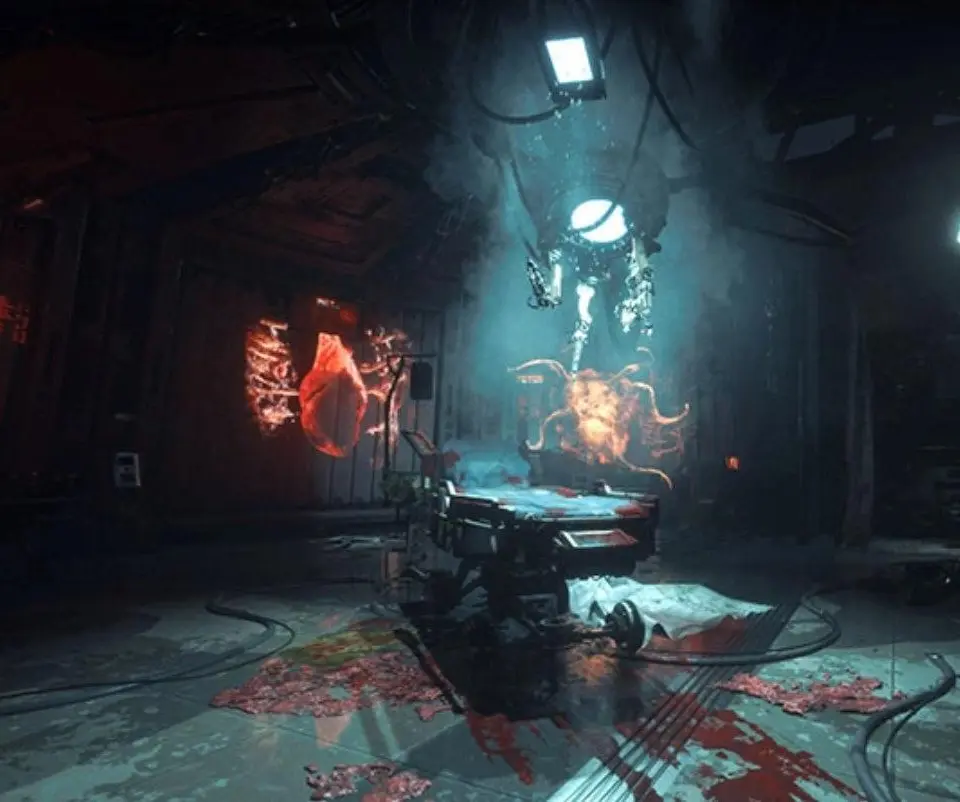
Follow our comprehensive walkthrough for The Callisto Protocol's Final Transmission DLC. Access the DLC, navigate Mahler's lab, and find the shower room exit. Includes item locations and strategies.
Getting Started
Follow our comprehensive walkthrough for The Callisto Protocol's Final Transmission DLC. Access the DLC, navigate Mahler's lab, and find the shower room exit. Includes item locations and strategies.


Similar guides you might like


100% Human-Written. AI Fact-Checked. Community Verified. Learn how AntMag verifies content