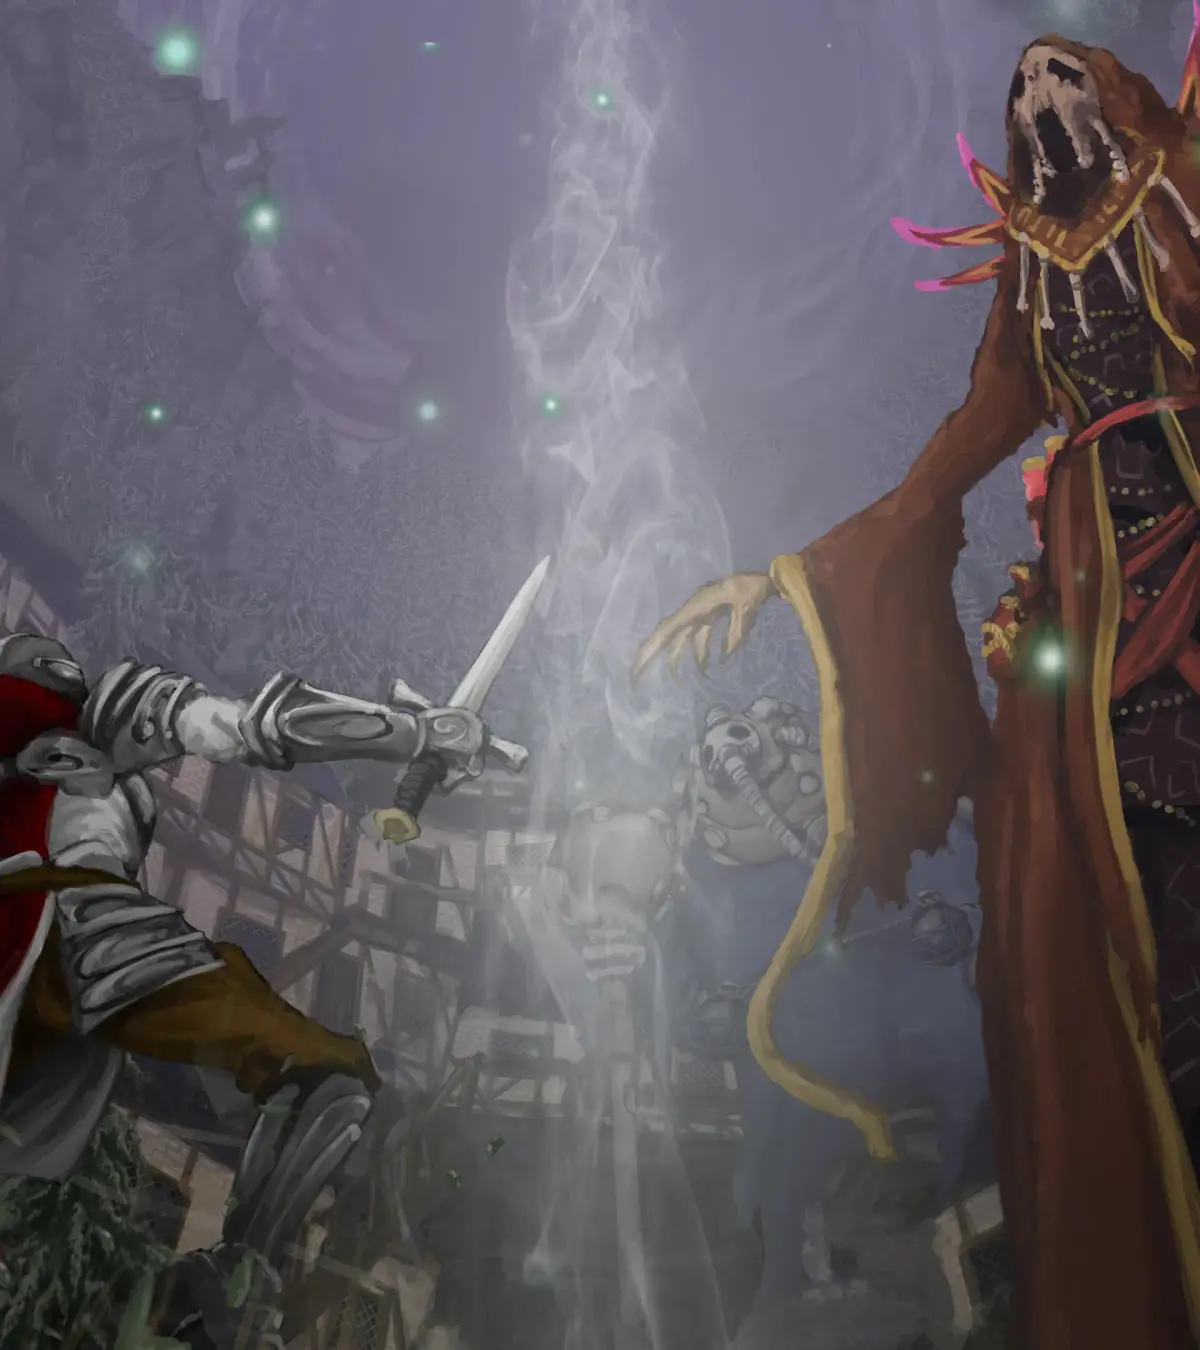
Welcome to Salt and Sacrifice, a challenging 2D action RPG from Ska Studios. You'll be exploring the treacherous Ashborn lands, hunting down powerful Mages who have returned to plague the kingdom. It's a tough world, and survival means mastering combat, crafting, and careful exploration through perilous deserts and other elemental zones.
This guide is here to help you conquer the toughest challenges. We'll cover everything from navigating the desolate Ashbourne Village and its surrounding areas, to taking down those formidable Mages. Whether you're struggling with specific boss fights, trying to find all the secrets, or just want to make sure you don't miss any crucial gear, we've got your back.
Guide and Walkthrough (PS4) by Damthiel
Navigate your journey through Salt and Sacrifice with this comprehensive guide and walkthrough, covering bosses, areas, mechanics, and more.
- 1Introduction
- 2About this Guide (Please Read)
- 3Controls (Menu Interface, Equipment and Inventory)
- 4Game Mechanics (Status Attributes, HUD (heads-up display — the on-screen icons showing health, ammo and the minimap), Combat Mechanics)
- 5Getting Started
- 6Character Creation
- 7Prologue: The Ship
- 8The Shivering Shore (Sanctuary: The Shivering Shore)
- 9The Festering Banquet (Boss Fight: The Sodden Knight)
- 10Bandit's Pass (Sanctuary: Bandit's Pass, Traveling to the Village of Smiles)
- 11The Village of Smiles (Sanctuary: The Village of Smiles, Boss Fight: The Queen of Smiles, Traveling to the Watching Woods)
- 12The Watching Woods (Sanctuary: The Watching Woods, Boss Fight: The Mad Alchemist)
- 13The Sunken Keep (Sanctuary: Sunken Keep, Boss Fight: The False Jester, The Vertigo Brand, Backtracking: The Black Obelisks - Festering Banquet and Bandit's Pass)
- 14The Sunken Keep (Part 2) (Boss Fight: Kraeken Cyclops (Optional Boss), Bandit's Pass: Traveling to The Castle of Storms)
- 15The Castle of Storms (Sanctuary: The Castle of Storms, Boss Fight: Kraekan Wyrm, The Shadowflip Brand)
- 16The Red Hall of Cages (Sanctuary: The Red Hall of Cages, Sanctuary: The Red Hall of Cages/Cran's Pass, Boss Fight: The Tree of Men)
- 17Hager's Cavern (Sanctuary: Hager's Cavern, Boss Fight: The Disemboweled Husk, Traveling to the Mire of Stench)
- 18The Mire of Stench (Sanctuary: The Mire of Stench, Boss Fight: That Stench Most Foul, The Redshift Brand)
- 19The-Fort-Beyond-The-Mire (Sanctuary: The-Fort-Beyond-The-Mire, Sanctuary: The Far Beach, Sanctuary: The Ziggurat of Dust, Backtracking: The Village of Smiles)
- 20The Dome of the Forgotten (Sanctuary: Dome of the Forgotten, Boss Fight: The Untouched Inquisitor, Dome of the Forgotten (Part 2), Boss Fight: The Third Lamb, The Hardlight Brand, Backtracking: Hardlight - The Castle of Storms, Traveling (back) to the Ziggurat of Dust)
- 21The Ziggurat of Dust (Sancutary: Ziggurat of Dust (Part 2), Boss Fight: The Dried King, The Dart Brand, The Ziggurat of Dust (Part 2), Boss Fight: The Bloodless Prince)
- 22The Ruined Temple (Sanctuary: The Ruined Temple, Boss Fight: The Coveted)
- 23Siam Lake (Sanctuary: Siam Lake)
- 24Pitchwoods (Optional Area) (Boss Fight: Carsejaw the Cruel (Optional Boss), Creed: Keepers of Fire and Sky, Sanctuary: Pitchwoods)
- 25Siam Lake (Part Two) (Boss Fight: The Witch of the Lake, Backtracking: The Shivering Shore, Backtracking: Mire of Stench, Backtracking: Cran's Pass, Boss Fight: Ronin Cran (Optional Boss), Backtracking: The Ruined Temple, Backtracking: Hager's Cavern)
- 26Mal's Floating Castle (Optional Area) (Sanctuary: Mal's Floating Castle, Boss Fight: Murdiella Mal (Optional Boss))
- 27Salt Alkymancery (Sanctuary: Salt Alkymancery, Boss Fight: The Architect and The Unskinned)
- 28Crypt of Dead Gods (Sanctuary: Crypt of Dead Gods, Boss Fight: The Forgotten Three, Boss Fight: Kraekan Dragon Skourzh)
- 29The Still Palace (Boss Fight: The Nameless God)
- 30New Game Plus
- 31Trophy Guide (Overview, Trophy Guideline, Trophy List)
- 32Creeds (Devotion Rank, Creed: The Three, Creed: Devara's Light (Goddess of Light), Creed: Mountainsmiths (Iron Ones), Creed: The Stone Roots, Creed: House of Splendor, Creed: Order of the Betrayer, Creed: Order of Fire and Sky)
- 33Sanctuaries (Offerings, Clearing Claimed Sanctuaries)
- 34Spells (Spells: Class 1, Spells: Class 2, Spells: Class 3, Spells: Class 4)
- 35Incantations (Incantations: Class 1, Incantations: Class 2, Incantations: Class 3, Incantations: Class 4)
- 36Prayers (Prayers: Class 1, Prayers: Class 2, Prayers: Class 3, Prayers: Class 4, Prayers: Class 5)
- 37Version History and Updates
- 38Legal Information, Copyright, and Contact Information (Contact Information)
Controls
Learn all the essential controls for Salt and Sacrifice, from basic attacks and dodging to using items and parrying. Master your movement and combat with this quick guide.
Hey there! So you're diving into the grim world of Salt and Sacrifice, huh? Don't worry, I've got your back. Let's break down exactly what all those buttons do so you can start smacking those Mages around like a pro. We'll cover the main gameplay controls first, and then we can get into the menu stuff later.
Think of this as your cheat sheet for keeping your character alive and kicking.
| Button | Action | Notes |
| Square | Attack (Melee: Light Attack) | This button is your bread and butter for quick attacks. If you've got a sword or dagger equipped, you'll swing away. If you're rocking a staff for spells, this button will cast your first equipped spell. For bows and magic, you can hold Square to aim your shot or spell. |
| Triangle | Attack (Melee: Heavy Attack) | This is your heavier hit. For melee weapons, it packs more punch but uses more Stamina. If you're using a staff, Triangle casts the second spell you have equipped. Heads up: you only get this second spell slot with a staff equipped. Like Square, you can hold Triangle to aim ranged attacks. |
| Circle | Use/Execute/Confirm | This is your go-to for interacting with the world. Need to open a secret door? Just walk up to it and press Circle. It's also your confirmation button in menus, but we'll get to that later. |
| X | Jump | Simple enough – press X to leap into the air. Handy for dodging or getting over small obstacles. |
| Options | Opens Menu | This brings up your main game menu, where you can check your stats, swap gear, manage your inventory, and all that good stuff. We'll dive deeper into the menu interface separately. |
| Directional Pad (Left/Right) | Cycle Inventory | Quickly scroll through the items and spells you have equipped and ready to use. |
| Directional Pad (Down) | Light Torch (Hold) | Got a torch? Hold Down on the D-pad to light it up. Keep holding until it's fully lit, or it'll just cancel. Essential for those dark, creepy areas. |
| R1 | Use Item/Incantation/Prayer | This uses whatever item, spell, or prayer is currently highlighted in your quick slots (usually shown near your HP/Stamina bar). Make sure the right thing is selected! |
| R2 | Roll | Your primary dodge move! Tap R2 to quickly roll out of danger. If you hold R2 while on a ladder, you'll slide down it. Pro-tip: press Square right after a Roll to do a special 'dodge attack' – it's great for closing distance or catching enemies off guard. |
| L1 | Swap Weapon Set | Quickly switch between your two different weapon loadouts. Super useful in the heat of battle when you need to change your approach. |
| L2 | Block/Use Offhand | Hold L2 to block incoming attacks. This works with shields or even some weapons. If you have a spell or item equipped in your offhand slot, L2 can also be held to aim it, just like Square and Triangle. |
| L2 (Hold) + Square | Parry | This is a high-risk, high-reward move! You need to time it *just* right, pressing L2 and Square together as an enemy's attack is about to land. A successful parry can leave them wide open for a counter-attack. You can parry with shields or certain weapons. |
| Left Analog Stick | Movement | This is how you move your character around the world. Pretty standard stuff! |
| Right Analog Stick | Pan Camera | Use this to look around and adjust your view of the environment. Essential for spotting enemies or finding hidden paths. |
That covers the basics of how to move and fight in Salt and Sacrifice. Keep practicing these controls, and you'll be navigating the treacherous lands and taking down those formidable Mages in no time. We'll cover the menu interface in more detail next!
Guide and Walkthrough (PS4) by Damthiel (2)
Full Table of Contents for Salt and Sacrifice, covering all areas, boss fights, spells, incantations, prayers, and creeds.
- 1Introduction
- 2About this Guide (Please Read)
- 3Controls
- Menu Interface
- 4Equipment and Inventory
- 5Game Mechanics
- Status Attributes
- 6HUD (Heads-Up Display - shows vital information like health and stamina)
- 7Combat Mechanics
- 8Getting Started
- 9Character Creation
- 10Prologue: The Ship
- 11The Shivering Shore
- Sanctuary: The Shivering Shore
- 12The Festering Banquet
- Boss Fight: The Sodden Knight
- 13Bandit's Pass
- Sanctuary: Bandit's Pass
- 14Traveling to the Village of Smiles
- 15The Village of Smiles
- Sanctuary: The Village of Smiles
- 16Boss Fight: The Queen of Smiles
- 17Traveling to the Watching Woods
- 18The Watching Woods
- Sanctuary: The Watching Woods
- 19Boss Fight: The Mad Alchemist
- 20The Sunken Keep
- Sanctuary: Sunken Keep
- 21Boss Fight: The False Jester
- 22The Vertigo Brand
- 23Backtracking: The Black Obelisks - Festering Banquet and Bandit's Pass
- 24The Sunken Keep (Part 2)
- Boss Fight: Kraeken Cyclops (Optional Boss)
- 25Bandit's Pass: Traveling to The Castle of Storms
- 26The Castle of Storms
- Sanctuary: The Castle of Storms
- 27Boss Fight: Kraekan Wyrm
- 28The Shadowflip Brand
- 29The Red Hall of Cages
- Sanctuary: The Red Hall of Cages
- 30Sanctuary: The Red Hall of Cages/Cran's Pass
- 31Boss Fight: The Tree of Men
- 32Hager's Cavern
- Sanctuary: Hager's Cavern
- 33Boss Fight: The Disemboweled Husk
- 34Traveling to the Mire of Stench
- 35The Mire of Stench
- Sanctuary: The Mire of Stench
- 36Boss Fight: That Stench Most Foul
- 37The Redshift Brand
- 38The-Fort-Beyond-The-Mire
- Sanctuary: The-Fort-Beyond-The-Mire
- 39Sanctuary: The Far Beach
- 40Sanctuary: The Ziggurat of Dust
- 41Backtracking: The Village of Smiles
- 42The Dome of the Forgotten
- Sanctuary: Dome of the Forgotten
- 43Boss Fight: The Untouched Inquisitor
- 44Dome of the Forgotten (Part 2)
- 45Boss Fight: The Third Lamb
- 46The Hardlight Brand
- 47Backtracking: Hardlight - The Castle of Storms
- 48Traveling (back) to the Ziggurat of Dust
- 49The Ziggurat of Dust
- Sancutary: Ziggurat of Dust (Part 2)
- 50Boss Fight: The Dried King
- 51The Dart Brand
- 52The Ziggurat of Dust (Part 2)
- 53Boss Fight: The Bloodless Prince
- 54The Ruined Temple
- Sanctuary: The Ruined Temple
- 55Boss Fight: The Coveted
- 56Siam Lake
- Sanctuary: Siam Lake
- 57Pitchwoods (Optional Area)
- Boss Fight: Carsejaw the Cruel (Optional Boss)
- 58Creed: Keepers of Fire and Sky
- 59Sanctuary: Pitchwoods
- 60Siam Lake (Part Two)
- Boss Fight: The Witch of the Lake
- 61Backtracking: The Shivering Shore
- 62Backtracking: Mire of Stench
- 63Backtracking: Cran's Pass
- 64Boss Fight: Ronin Cran (Optional Boss)
- 65Backtracking: The Ruined Temple
- 66Backtracking: Hager's Cavern
- 67Mal's Floating Castle (Optional Area)
- Sanctuary: Mal's Floating Castle
- 68Boss Fight: Murdiella Mal (Optional Boss)
- 69Salt Alkymancery
- Sanctuary: Salt Alkymancery
- 70Boss Fight: The Architect and The Unskinned
- 71Crypt of Dead Gods
- Sanctuary: Crypt of Dead Gods
- 72Boss Fight: The Forgotten Three
- 73Boss Fight: Kraekan Dragon Skourzh
- 74The Still Palace
- Boss Fight: The Nameless God
- 75New Game Plus
- 76Trophy Guide
- Overview
- 77Trophy Guideline
- 78Trophy List
- 79Creeds
- Devotion Rank
- 80Creed: The Three
- 81Creed: Devara's Light (Goddess of Light)
- 82Creed: Mountainsmiths (Iron Ones)
- 83Creed: The Stone Roots
- 84Creed: House of Splendor
- 85Creed: Order of the Betrayer
- 86Creed: Order of Fire and Sky
- 87Sanctuaries
- Offerings
- 88Clearing Claimed Sanctuaries
- 89Spells
- Spells: Class 1
- 90Spells: Class 2
- 91Spells: Class 3
- 92Spells: Class 4
- 93Incantations
- Incantations: Class 1
- 94Incantations: Class 2
- 95Incantations: Class 3
- 96Incantations: Class 4
- 97Prayers
- Prayers: Class 1
- 98Prayers: Class 2
- 99Prayers: Class 3
- 100Prayers: Class 4
- 101Prayers: Class 5
- 102Version History and Updates
- 103Legal Information, Copyright, and Contact Information
- Contact Information
About this Guide (Please Read)
Learn how this Salt and Sacrifice guide is formatted, including what bold, italics, and blue boxes mean, and understand the author's personal playstyle basis for strategies.
Hey there! Before we dive deep into the treacherous world of Salt and Sacrifice, let's chat for a sec about how this guide is put together. Think of me as your seasoned buddy, walking you through the game. I want you to feel confident, not overwhelmed, so understanding my approach here is key.
You'll notice some formatting choices I've made. If you see a word in bold, it's either a really important detail or a specific item. If it's bold and italicized, that's a clue you're looking at an enemy. And when something is just in italics, it usually points to a location, or sometimes a boss you've already conquered.
I've also used Blue Boxes to highlight crucial stuff. These could be opportunities for trophies, important NPCs you need to chat with, vital info about enemies, or other key points you won't want to miss.
Now, a heads-up: my strategies and suggestions are based on my own personal playstyle. This means what works like a charm for me might not be the perfect fit for you, and that's totally okay! I approach guides the way I like to use them – as a source of ideas and suggestions. I'll walk you through how I tackled situations, hoping it sparks your own brilliant ideas on how to overcome them.
This game demands quick thinking and even quicker reflexes. I've beaten it multiple times with different classes, and while I'll describe my strategies in detail, remember that boss AI can be unpredictable. Sometimes, a suggestion like 'stay in melee range' might be tough to stick to constantly. You'll need to be ready to adapt on the fly!
For all you Archers out there: if I haven't detailed a specific strategy for you in a boss fight, don't worry. It usually means the fight isn't drastically different from what you're already doing. Archers are incredibly versatile, able to handle both close and mid-range combat effectively. Since my strategies cover both melee and long-range approaches, you'll find the advice applies, no matter how you choose to engage.
I really hope this guide helps you on your journey. Let's get started!
Similar guides you might like


100% Human-Written. AI Fact-Checked. Community Verified. Learn how AntMag verifies content