Unleash your creativity in PC Building Simulator 2's Free Build Mode. Test cooling loop designs and cram RGB fans into cases without limits.
Welcome, master builders, to the ultimate sandbox of PC Building Simulator 2: Free Build Mode! This is where your wildest PC dreams come true, unburdened by budgets, deadlines, or customer demands. Whether you're testing out a new cooling loop design, crafting a themed build, or just want to see how many RGB fans you can cram into a case, Free Build Mode is your playground.
Accessing Free Build Mode
To dive into this creative haven, follow these simple steps:
- From the Main Menu, select "New Game."
- Choose "Free Build" from the available game modes.
- Confirm your selection to enter your personal workshop, fully stocked and ready for action.
Getting Started: Your Unlimited Inventory
One of the core tenets of Free Build Mode is the complete absence of financial constraints. This means you have immediate access to every single component available in the game, from the most budget-friendly CPUs to the bleeding-edge GPUs and exotic custom water-cooling parts. Your inventory is infinite, and every item is free.
Navigating the Inventory
The inventory system in Free Build Mode is identical to Career Mode, but with everything unlocked. Use the following categories to find what you need:
- Cases: Find your perfect chassis here. From compact ITX cases like the "NZXT H1" to massive full-towers such as the "Lian Li O11D XL," every option is at your fingertips.
- Motherboards: Select your foundation. Whether it's an "ASUS ROG Maximus Z690 Hero" or a more modest "MSI B550 Tomahawk," compatibility is key, but in Free Build, you can just swap it if it doesn't fit!
- CPUs: Intel and AMD's full lineups are here. Experiment with an "Intel Core i9-13900K" or an "AMD Ryzen 9 7950X3D."
- GPUs: The most exciting part for many! Grab an "NVIDIA GeForce RTX 4090" or an "AMD Radeon RX 7900 XTX" and see how it looks.
- RAM: Populate your motherboard with any speed and capacity. Try out "Corsair Vengeance RGB Pro" or "G.Skill Trident Z5 RGB" kits.
- Storage: HDDs, SSDs, and NVMe drives are all available. install an operating system later if you want to boot it up!
- PSUs: Power your creation with any wattage. The "Corsair HX1200" is a popular choice for high-end builds.
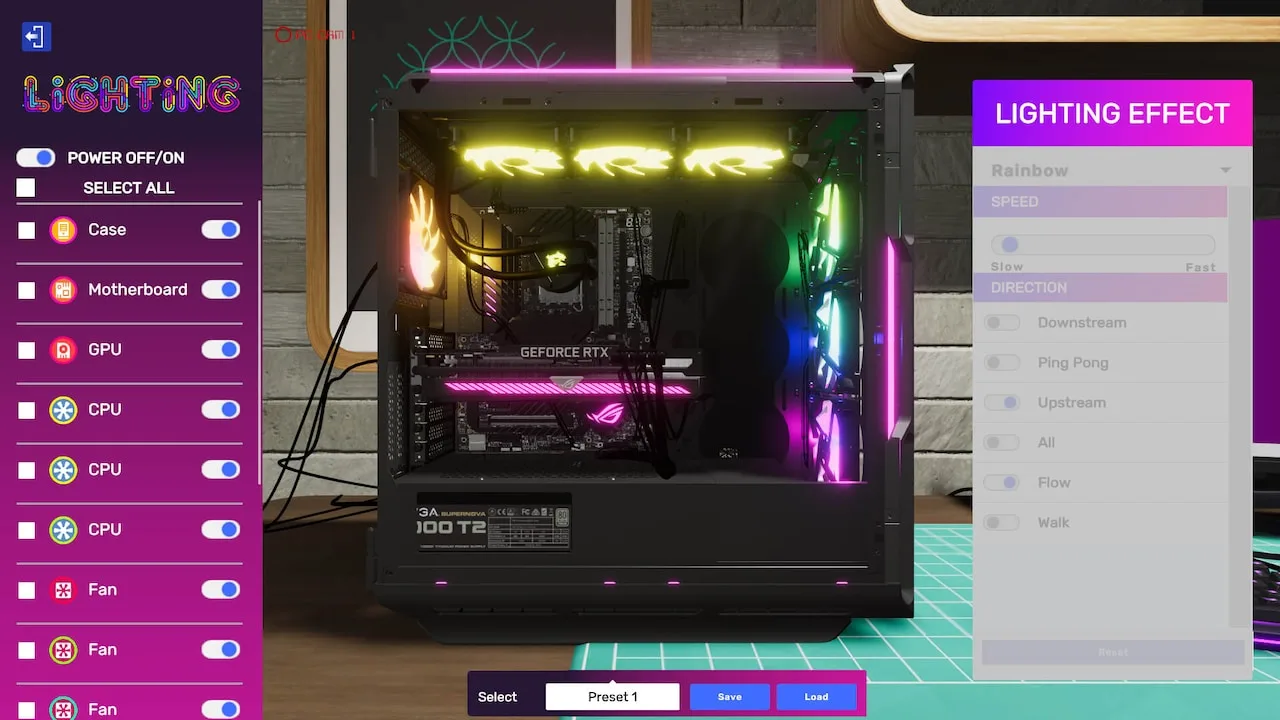
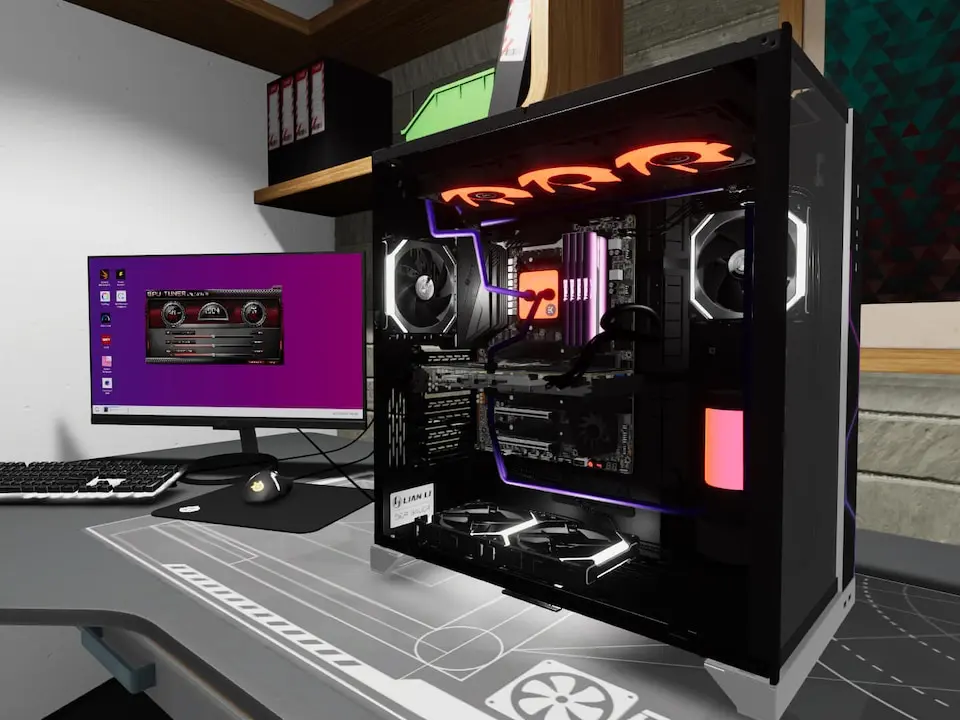
- Cooling: This is where Free Build truly shines.
- Air Coolers: "Noctua NH-D15" or "be quiet! Dark Rock Pro 4" are classics.
- AIO Liquid Coolers: Explore options like the "NZXT Kraken Z73" or "Arctic Liquid Freezer II 360."
- Custom Water Cooling: This is the ultimate playground. Access all "EKWB" and "CORSAIR Hydro X" components:
- Reservoirs: "EK-RES X3 250"
- Pumps: "EK-DDC 3.2 PWM"
- Radiators: "EK-CoolStream Classic PE 360"
- CPU Water Blocks: "EK-Quantum Velocity² D-RGB"
- GPU Water Blocks: Specific blocks for various GPUs, e.g., "EK-Quantum Vector² Strix RTX 4090 D-RGB."
- Fittings: A vast selection of "EK-Quantum Torque" fittings in various colors and angles.
- Tubing: Both soft (e.g., "EK-DuraClear") and hard (e.g., "EK-HD PETG") tubing are available.
- Cables: Customize your build's aesthetics with different colored cable extensions from brands like "CableMod."
- Peripherals: While not part of the PC build itself, you can place monitors, keyboards, and mice to complete your setup.
- Decorations: Add flair with figurines, posters, and other workshop items.
Key Strategies for Free Build Mode
1. Experiment with Custom Water Cooling
Free Build Mode is the ideal environment to master custom water cooling without the fear of wasting money or failing a job. Here’s a basic workflow:
- Install Core Components: Place your chosen Motherboard, CPU, and GPU into the case.
- CPU Block: Attach your desired CPU water block (e.g., "EK-Quantum Velocity²").
- GPU Block: If water-cooling your GPU, remove the stock cooler and install the appropriate GPU water block.
- Pump/Reservoir Combo: Mount a pump/reservoir unit (e.g., "EK-Quantum Kinetic FLT 240 DDC PWM D-RGB") in a suitable location within your case.
- Radiators: Install radiators (e.g., "EK-CoolStream Classic PE 360") where they fit, considering fan placement.
- Fittings: Begin placing fittings on all inlets and outlets of your blocks, pump/res, and radiators. Use angled fittings (e.g., "EK-Quantum Torque Rotary 90°") to simplify complex runs.
- Tubing:
- Hard Tubing: Select "Hard Tubing" from your inventory. Click and drag to create runs between fittings. Use the bending tool (default key: 'B') to shape the tubes. Precision is key here.
- Soft Tubing: Select "Soft Tubing." This is generally easier, as the game automatically bends it. Just click between fittings.
- Fill Loop: Once all tubing is connected, select a "Coolant" from your inventory (e.g., "EK-CryoFuel Solid Cloud White"). Click on the reservoir to fill the loop.
- Leak Test: Run a leak test. In Free Build, leaks don't cost you money, but it's good practice!
2. Themed Builds and Aesthetics
Without performance or budget constraints, you can focus purely on aesthetics. Consider:
- Color Schemes: Use RGB lighting (fans, RAM, motherboards, GPU backplates) and colored cables/coolant to create a cohesive look. Try a "Red & Black" theme with "Corsair LL120 RGB" fans and "CableMod PRO ModMesh" cables.
- Case Modding: Experiment with different case panels, fan orientations, and even placing decorative items inside the case (though be mindful of physics!).
- Component Matching: Try to use components from the same brand (e.g., an all-ASUS ROG build) or with similar design elements for a unified appearance.
3. Performance Testing (Informal)
While Free Build doesn't have formal benchmarks or customer objectives, you can still test your creations:
- Install OS: After building, install "Willard OS" from a USB drive (found in your inventory under "Software").
- Install 3DMark: Find "3DMark" in your "Software" inventory and install it.
- Run Benchmarks: Run 3DMark to see the theoretical performance of your dream machine. This is great for comparing different CPU/GPU combinations.
- Temperature Monitoring: Use the "System Info" tool to monitor CPU and GPU temperatures under load, especially after custom water-cooling builds, to ensure your cooling solution is effective.
4. Learning and Practice
Free Build Mode is an invaluable tool for learning the mechanics of PC building without pressure:
- Component Placement: Practice installing every component until it becomes second nature.
- Cable Management: Experiment with different cable routing techniques to achieve a clean look.
- Troubleshooting: Intentionally make mistakes (e.g., forgetting to connect a power cable) and then use the "PC Info" tool to diagnose the issue.
Embrace the freedom, let your creativity flow, and build the PC of your wildest dreams in Free Build Mode!
100% Human-Written. AI Fact-Checked. Community Verified. Learn how AntMag verifies content