Navigate the treacherous depths of B11F and B12F in Etrian Odyssey HD. Discover hidden paths, battle formidable foes like the Servant and Royalant, and uncover valuable treasures.
Walkthrough
- 1On B11F, head East to find four doors. The first door from the West has a pitfall. Skip it. Enter the fourth door (far East), move one square North, and check the Eastern wall for a Warp Point. Map the room, noting the pitfall, and return South.
- 2Enter the third door from the West. This room contains a Bloodant FOE and a pitfall. Map it and return South.
- 3Enter the second door to find another Bloodant FOE. Defeat it and drop down the pitfall to reach B12F.
- 4If you haven't received the B11F mapping message for Radha Hall, explore B11F further to meet mission requirements.
- 5On B12F, after dropping down the pitfall, notice the crack in the North wall, which opens a Warp Point back to your current position.
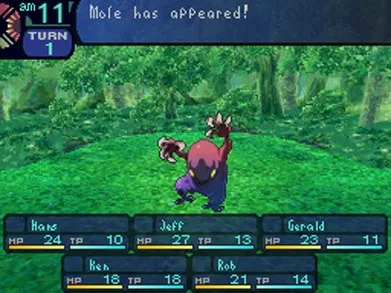
- 6Head South from the Warp Point. At a junction, you'll receive a warning about a strong monster.
- 7Head East through a door into a small room. A Bloodant FOE is present. A chest in the NW contains a Bravant, and a chest in the SE contains a Gum Helm. A door in the NE corner leads North to an empty 1-square room. Return to the junction.
- 8From the junction, head West to the wall, then North, then West. Turning South leads to FOEs (Bloodants). Going South and then West finds a stationary FOE, a Servant. Killing the Servant clears nearby Bloodants.
- 9Return to the junction where you went South. This time, go North and West, then North again. Heading East leads to a dead end. Head West, then South. Map all dead ends for the B12F map completion.
- 10Continue South until you reach a door leading West. In this area with several FOEs, you can head North past Bloodants to find a Servant to kill, clearing the rest, or head West then North to avoid them.
- 11Continue North along a winding path to a choice between East and West. Go East to map a dead end, then go West and North.
- 12Take the first path East to an area with a Servant FOE in the NE. Head to the SW part of this area to find a door. You'll get a warning about a Nest, which is mostly meaningless.
- 13Head East to a chest containing an Amrita II. Return to the path leading North.
- 14Go North to the wall, then North all the way East. Face East and open a Warp Point to easily return to this area from town.
- 15Go back through the Warp Point and face South to open another Warp Point. The Boss is just ahead. Prepare for the boss and surrounding FOEs.
- 16Royalant Boss Fight: The Royalant has 5500 HP. Bloodant adds will appear in a few turns unless you defeat it very quickly. Use your strongest attacks and focus on the Royalant. It can take 4-5 turns to defeat. After Royalant is down, focus on any adds, then summoned Deathants. Royalant's Hammer attack hits 2-4 random party members. Heal carefully and use all your resources.
- 17Defeating Royalant makes nearby Bloodants disappear. Go East from Royalant's location to the wall to find another Warp Point. Map this room to complete the B12F map for Radha Hall.
- 18The stairs to B13F are South of where you fought Royalant. Return to town for a 5000en reward and a new mission.
- 19On B13F, head North from the stairs and take the path East. A chest is North across the water (inaccessible for now). Head East, skipping a South path, until you hit a wall. Head South to find a chest with a Medica III. Head back West and take the South path.
Tips
- Servants on B12F are stationary FOEs that, when defeated, clear nearby Bloodants. Prioritize killing them to manage enemy groups.
- The Royalant boss fight requires focusing damage on the boss while managing incoming adds. Heal diligently due to its multi-hit attack.
- On B13F, the water acts as a wall, blocking paths until later in the game.
- 5000en
- New Mission
100% Human-Written. AI Fact-Checked. Community Verified. Learn how AntMag verifies content