Unicorn's Cave walkthrough for The Legend of Zelda: Oracle of Ages. Find Small Keys, the Dungeon Map, Compass, and Magnetic Gloves.
- Bomb Bag (for bombing cracked blocks)
- Sword
- Shield
- Pegasus Boots (implied for speed and some platforming)
- Slingshot (implied for some enemies)
- Roc's Feather (implied for some platforming)
Walkthrough
- 1From H-3, go up, right, and take the closest mine cart, ensuring the switch directs it up to E-4.
- 2In E-4, climb the steps, go right, descend stairs, and proceed right to E-5.
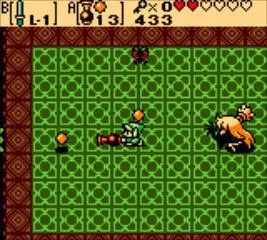
- 3In E-5, defeat the Knight, move the lone block right to make a Magnetic Ball fall. Return to the room with two mine carts and take the right one, hitting the switch to go up to E-4.
- 4In E-4, the mine cart will take you to the middle of the room; open the chest for a Small Key. Ride the mine cart back down, then up again, hitting the switch to go right to F-5.
- 5In F-5, descend stairs to the basement. Go left, past the Podobos (Fireballs), and wait for the Thwomps to fall. Jump on them to reach a ladder and ascend to C-3.
- 6In C-3, head right to C-4.
- 7In C-4, defeat all Zols and Gibdos to reveal a chest containing the Dungeon Map. Go left two screens to C-2.
- 8In C-2, ascend steps, go up a screen, and jump into the water. Use a Small Key on the left door to enter B-1.
- 9In B-1, collect the Magnetic Gloves from the chest. Use them to move the Magnetic Ball onto the button. Exit and head down to C-2.
- 10In C-2, move the left block down, the right block down, and the middle block either left or right to proceed. Head right and descend stairs to the basement. Bomb the blue cracked blocks to head left. Traverse platforms, avoiding sonic booms from gargoyles, to reach a ladder and ascend to the surface at D-3.
- 11In D-3, move the Armos Statue down three times, right twice, then up once to open a door. Enter, go down, then left to E-2.
- 12In E-2, climb the steps on the right and open the chest for a Large Blue Rupee (worth 100). Head up to D-2.
- 13In D-2, defeat all enemies. Use the Magnetic Gloves to remove masks from Hiploops to open the left door. Enter D-1.
- 14In D-1, defeat all Armos Knights in the order they appear. Open the four chests in the same order to receive 1 Rupee, 10 Bombs, 4 Ember Seeds, and a Small Key. Head right, down, use the Magnetic Gloves to move the Magnet Ball, then head down to F-2.
- 15In F-2, defeat all enemies to open the left door. Enter F-1.
- 16In F-1, follow the moving path to a chest containing the Compass. Exit and head down twice to H-2.
- 17In H-2, stand on the yellow square and use the North polarity of the Magnetic Gloves to be pulled across the gap. Head up and open the chest for a Small Key. Go down, stand on the right side of the Magnetic Pole, and use the South polarity to be repelled across the gap. Go right, up, right to G-4, the room with mine carts.
- 18In G-4, enter the left mine cart. If the track is not curved, hit the switch to head left to F-3.
- 19In F-3, use the North polarity to be attracted to the Magnetic Pole. On the left side of the pole, let go and press the button again to use the South polarity, repelling you to a chest with a Small Key. Use the same technique to cross the gap again and enter the mine cart back to G-4.
- 20In G-4, go left twice, up twice, right, up, and descend stairs to the basement. Head right, bomb blue cracked blocks, and proceed right to a ladder. Ascend to F-5.
- 21In F-5, stand below the Magnetic Pole and use the South polarity to be repelled over the gap. Jump into the mine cart to your left, which leads to a chest containing a Small Key. Return via the mine cart and head right, using a Small Key on the locked door to enter F-6.
- 22In F-6, defeat the mini-boss Syger. Head up then right to E-7.
- 23In E-7, stand on the switch above, then head up and quickly left to D-6.
- 24In D-6, defeat all Magnet Guys to open the left door. Use the Magnetic Gloves to suck in the Magnet Guys and slash them with your Sword. Head left to D-5.
- 25In D-5, using the South polarity, attract the Magnetic Ball and position it within two squares of Link. Go to the far top-right corner and use the North polarity to repel the Ball to the far left of the room. Backtrack to E-6, the room above where Syger was fought.
- 26In E-6, use a Small Key to enter the door on your left to E-5.
- 27In E-5, use the South polarity to attract the ball and move it onto the button. If the ball is not present, defeat the Darknut and move the lone block on the other side of the room for it to reappear. Once the door opens, head up through it to D-5.
- 28In D-5, use the South polarity again to use the Magnetic Ball as a shield against flames to reach the locked door. Use a Small Key on this door and descend stairs to another basement. Use the North polarity to rise to a ledge, then jump across to a ladder. Descend the ladder and jump across conveyor belts.
Tips
- The Magnetic Gloves are essential for many puzzles, allowing you to manipulate Magnetic Balls and navigate using polarities.
- Pay close attention to enemy patterns, especially the Thwomps and gargoyles, to safely traverse certain areas.
- Remember the order in which you defeat Armos Knights in D-1, as it dictates the order for opening the chests.
- Use the Magnetic Ball as a shield against flame hazards in D-5.
- Small Keys (multiple locations)
- Dungeon Map (C-4)
- Compass (F-1)
- Magnetic Gloves (B-1)
- Large Blue Rupee (E-2)
- Boss Key (C-5)
100% Human-Written. AI Fact-Checked. Community Verified. Learn how AntMag verifies content