Walkthrough for Level 3 - Poison Moth's Lair in The Legend of Zelda: Oracle of Ages. Find the Dungeon Map, Compass, Small Keys, Roc's Feather, Boss Key, and defeat Mothula.
Walkthrough
- 1B1F, E-2: Go up.
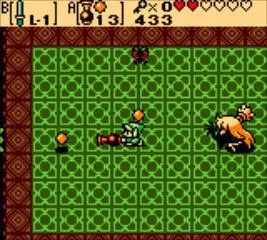
- 2B1F, D-2: Use your shield to flip the Spiny Beetles, then slash their underbellies to kill them. Once all are dead, the top door opens. Proceed up.
- 3B1F, C-2: Head right until you reach a room with Wall Masters (C-5).
- 4B1F, C-5: Kill all Wall Masters. Push a pot from the far right corner onto the switch to open the door. Proceed down.
- 5B1F, D-5: Head left then down to E-4.
- 6B1F, E-4: Use the Power Bracelet to move rollers to reach the chest with a Small Key. Exit the room, go right, and up the stairs to 1F, D-5.
- 71F, D-5: Ignore the Pols Voice. Move the far-right block up, then head up.
- 81F, C-5: Kill the Moldorms. A chest with Bombs will appear. Use them to bomb the wall above with the pattern. Head up.
- 91F, B-5: Get the Dungeon Map from the chest. Exit the room and head down.
- 101F, D-5: Move the block next to the one you moved before down. Move the third block from the bottom to the left, and the second block from the bottom down to go left.
- 111F, D-4: Solve the statue puzzle:
- 1. Move the two far-right Red Statues and the two far-left Grey Statues down.
- 122. Move the far-left Red Statue right, then move the Red Statue below it right.
- 133. Move the far-left Red Statue down. Move the far-right Grey Statue left two spaces, then down.
- 141F, C-1: Drop down and collect the 30 Rupees from the chest. Go up the stairs and use a Small Key on the locked door to head up.
- 151F, B-1: Kill all Mimics. Open the chest to get Roc's Feather. Exit the room.
- 161F, C-1: Jump on the moving platform, then down the hole near the far-left wall to B1F, C-1.
- 17B1F, C-1: Head down the stairs. Jump across the high blocks to the next screen. Jump down to the platform below, then right, and climb the ladder. Jump to the platform on your left, climb the ladders across the small gap, head up the ladder, and out of the basement.
- 18B1F, A-2: Jump on the blue trampoline. Open the chest for the Compass. Drop back down. Move the trampoline down to the other purple square in the bottom-right corner, then jump on it to reach the other side of the higher level.
- 191F, A-2: Go right.
- 201F, A-3: Use the Power Bracelet to move rollers and Roc's Feather to jump spikes to go right.
- 211F, A-4: Go down the stairs.
- 22B1F, A-4: Move the trampoline left, down, and over to the brown square. Jump on it to reach a small room with a chest containing a Small Key. Drop back down and go down the stairs to another basement. Cross the basement using Roc's Feather to cross platforms, then go up the ladder to C-4.
- 23B1F, C-4: Jump onto the moving platform, then to the other side when it gets close. Go right, down, left to D-4.
- 24B1F, D-4: Jump on the button to prevent the bridge from falling. Go up the steps and around the path (jump over the Trap) to the chest with a Gasha Seed. Use a Small Key on the locked door and head left.
- 25B1F, D-3: Fight the mini-bosses, Calamareye. Head up the stairs that appear in the bottom-right corner.
- 261F, D-3: Head left two screens. Flip over the gap (you will automatically jump when holding up). Fall down the big hole.
- 27B1F, D-1: Quickly run anti-clockwise to avoid the big spike. Push the fourth block down on the right side into the abyss. Jump across and collect the Boss Key. Move blocks out of the way to exit right, go down, and jump on the warp to B1F, D-3.
- 28B1F, D-3: Go up the stairs.
- 291F, D-3: Walk left until you see a ledge, flip over it, and go right. Open the Boss Door and head up.
- 301F, C-3: Fight the boss Mothula. After it is dead, collect the Heart Container, go down the stairs, and go up to collect the Bright Sun.
Items Found:
- Small Key: 1F: E-4, B1F: A-4
- Dungeon Map: 1F: B-5
- Compass: 1F: A-2
- Bombs: 1F: C-5
- Roc's Feather: 1F: B-1
- Boss Key: B1F: D-1
- Gasha Seed: B1F: D-4
- Heart Container: 1F: C-3
- Bright Sun: 1F: C-3
Enemies:
- Spiny Beetle: Flip with shield, then slash underbelly.
- Wall Master: Kill all to proceed.
- Pols Voice: Ignore.
- Moldorm: Kill to reveal Bombs.
- Mimic: Kill all to reveal chest.
- Calamareye: Mini-boss.
- Mothula: Boss.
100% Human-Written. AI Fact-Checked. Community Verified. Learn how AntMag verifies content