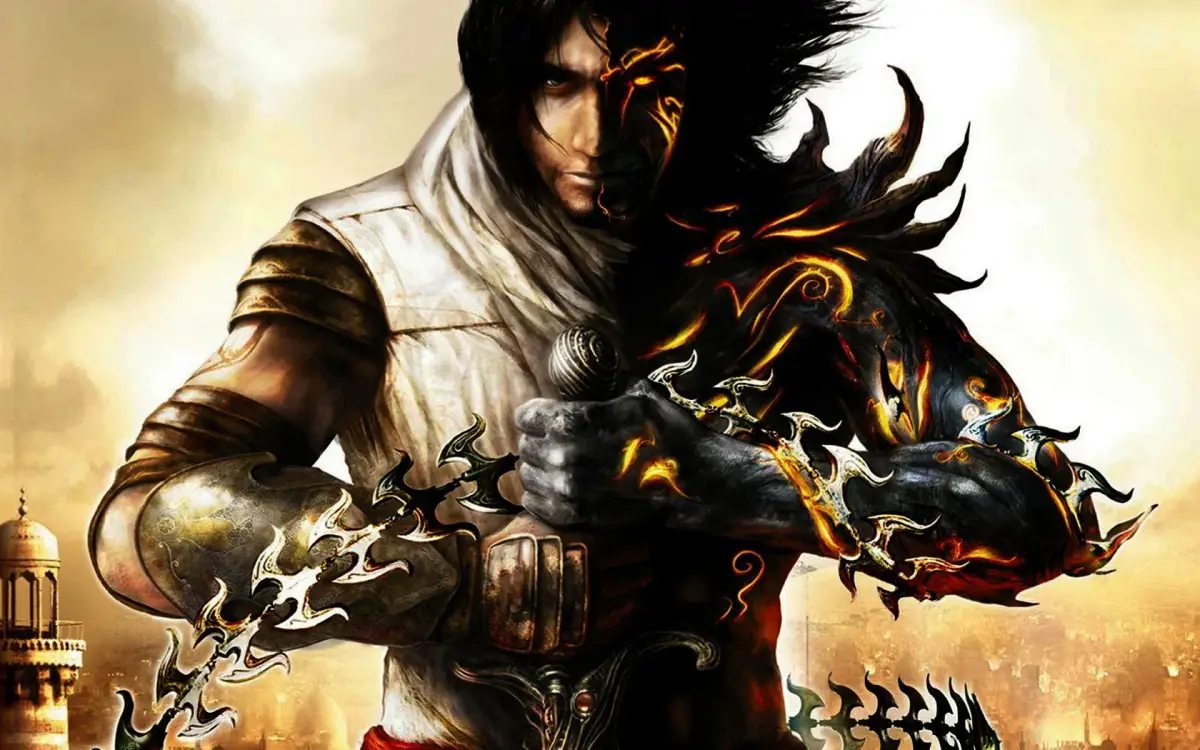
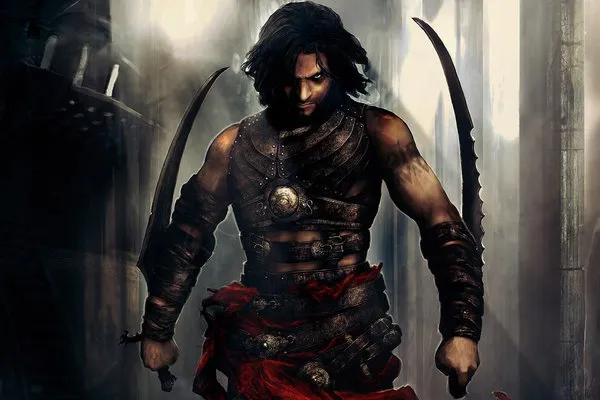
Welcome to Prince of Persia: The Two Thrones! This is the thrilling conclusion to the Sands of Time trilogy, where you'll once again leap, climb, and fight your way through a fantastical world. You’ll need to master the Prince’s acrobatic prowess and also wield the ferocity of the Dark Prince, navigating treacherous traps and battling hordes of enemies. It's a story-rich, third-person adventure perfect for those who love fantasy and a great soundtrack.
This guide is here to help you conquer every challenge. We’ll walk you through the entire game, ensuring you don’t miss any secrets or get stuck on tough boss fights. Whether you're aiming for a perfect run or just trying to see the ending, we've got you covered.
Part 1
Embark on your journey through Prince of Persia: The Two Thrones! This guide covers Part 1, helping you navigate the initial challenges and master the Prince's moves.
Hi, everyone! Welcome to my FAQ/Walkthrough of the third and final installment of the Prince of Persia: Sands of Time trilogy--Prince of Persia: The Two Thrones, for the Nintendo Gamecube! This is a terrific and challenging game that combines the greatness of the two previous titles to create what is, in my opinion, a masterpiece of gaming.
But I'm not here to wax philosophical about the game, I'm here to help you! So, without any further adieu, read on to the guide itself!
Part 2
Continue your Prince of Persia: The Two Thrones walkthrough with Part 2, covering 'The Beginning' and 'The Ramparts' sections. Learn controls, combat, and traversal.
- 1The Beginning: Start by moving forward and rolling through a doorway. Turn left, then around. Climb a wooden crate, jump to a stone, then another. Turn left at the wall and run along it to a wooden ledge. Turn right, run up the wall to a ledge, shimmy left, and drop down. Head to the ladder and descend. Move forward, turn right, jump onto and ascend a column. Jump to the next column, ascend, and jump back to the previous one. Turn left and jump to a wooden platform. Turn right, climb a raised platform, and move to the right rail to climb over. Jump to the central column, then to the ledge across. Shimmy right and drop. Turn around, run along the wall to the opposite ledge. Jump up to the higher ledge, shimmy left to an opening, climb up, and drop into the next room.
- 2The Ramparts: Upon entering, you'll find a water fountain to replenish health and save the game (press R near it). Other water sources replenish health but don't save. Turn left and proceed to the next corner. Here, you'll be introduced to the Landscape Camera (press Z when the gold icon appears). Use the C-Stick to zoom in/out in this view. Turn right and ascend the ladder. Go through the doorway to trigger a cutscene introducing the first enemy, the Guard, and the Speed Kill system. To perform a Speed Kill, approach an enemy undetected until the screen distorts, then press Y. Complete the Speed Kill by pressing B when the screen flashes and the dagger flares. Failure results in damage. This initial Speed Kill is a tutorial.
- Use the Landscape Camera (Z) for a better overview of the area.
- Mastering the Speed Kill timing (Y to initiate, B to complete) is crucial for efficient combat and avoiding damage.
- Point in the direction you want to go when jumping, especially for precise movements like using shutters.
Part 3
Follow this comprehensive walkthrough for Part 3 of Prince of Persia: The Two Thrones, covering combat, platforming, and enemy encounters.
- 1Begin by performing Speed Kills on two Guards.
- 2Slide down a column and perform another Speed Kill on a Guard.
- 3Head over a rail and jump to a column, slide down, and move behind the next Guard for a Speed Kill.
- 4Turn right, head to the platform edge, run along the left wall to a ledge across, shimmy right, climb up, shimmy right again, drop to the next ledge, shimmy right, and jump across the gap.
- 5Descend a ladder quickly, move behind the Guard ahead, and perform a Speed Kill.
- 6You will be introduced to the Free-Form Fighting system.
- 7Head around a pillar, descend a stairway, turn right, and head toward the alleyway.
- 8Engage your first Guard in Free-Form Fighting. Vault attacks and Aerial Landing Slices are effective.
- 9After defeating him, turn right, head forward to the next edge, run along the left wall, and jump to the ledge on the right.
- 10Climb up the ledge, jump to the next ledge, shimmy left, and climb up after turning the corner.
- 11Turn left and ascend a ladder.
- 12In the next room, run up the wall to reach the ledge above. Climb over it and head forward for a cutscene.
- 13After the cutscene, turn left, reach the platform edge, and run along the left wall to a curtain, which the Prince will slide down.
- 14Turn around, head forward, and engage three Guards in Free-Form Fighting. Vault attacks, Wall Rebound attacks, and Grab Throws are effective.
- 15After defeating them, head forward, turn left into the next room, and ascend the ladder.
- 16Jump backward to the other ladder, turn around on it, and climb up.
- 17Run up the wall on the right and jump at the apex to reach the ledge to the left.
- 18Climb up the ledge, jump to the right to reach a ladder, and climb it to the top.
- 19You will be introduced to the First Person Camera (activated by pressing Up on the D-Pad).
- 20Head forward off the platform and make a left. Head forward until you reach a door, and climb the ledge to the left of the door.
- 21Climb the ledge above that, move forward to the platform edge, and you will encounter Archers.
- 22Archers are weaker than Guards but have arrow attacks that can be blocked. They require one visual cue for a Speed Kill.
- 23Run along the wall on your left to reach the ledge across, wait for the screen to distort, and execute a Speed Kill.
- 24Head forward, descend the ladder, and sneak up on the Guard ahead for a Speed Kill.
- 25Alternatively, run up the wall on your right to a ledge, shimmy to the end, jump left to another ledge, shimmy to the end, and wait for the screen to distort for a Speed Kill.
- 26Approach the Archer ahead from the right and execute a Speed Kill.
- 27Move to the end of the next hallway and ascend the ladder. Head forward and drop to the next area (The Harbor District).
- 28Use the fountain if desired. Head forward to the wooden platform edge, run along the left wall, and jump to the next platform.
- 29Move to the left ledge, drop to hang, shimmy right along the ledge and around the corner, then climb up to the next platform.
- 30Use the beam on the right to reach the next ledge, move right along it to the next beam, and jump to the beam across to reach the next platform.
- 31Roll under the hole ahead to reach the next room.
- 32Turn left and break the weapon rack for a secondary weapon.
- 33Turn right, get on the beam, and jump forward to a set of beams. Drop from the first beam to the second.
- 34Wait until the Archer turns away, then execute a Speed Kill on the Guard.
- 35Move toward the Archer and Speed Kill him.
- 36Move forward, run up the wall, and jump at the apex to reach another beam. Jump up to the beam above that, then move left to the next platform.
- 37Jump to the next beam, move to the beam pointing at the center, and jump to reach a gap where the Prince will brace himself.
- 38Slide all the way down the gap and drop to the street below.
- 39Two Guards will attack; dispatch them both.
- 40Turn right, jump to the beam ahead, move along it to the right, and jump to the next beam.
- 41Jump to the gap on your left and use it to climb up to the next platform.
- 42Jump forward to the next beam, then slide down the gap.
- 43Turn around in the gap and execute a Speed Kill on the Guard below.
- Free-Form Fighting: Vault attacks and Aerial Landing Slices are effective against Guards. Wall Rebound attacks are also useful. Use the Grab Throw to toss enemies off cliffs or into fire if overwhelmed.
- Speed Kills: Guards typically require two visual cues, while Archers require one. Speed Kills can be initiated from anywhere as long as the screen distorts.
- First Person Camera: Activated by pressing Up on the D-Pad. Use the C-Stick to look around and press Up again (or any other button) to return to the normal camera.
- Enemies: Be aware of Guards and Archers. Archers have ranged attacks but can be blocked.
- Environment: Utilize ledges, walls, beams, and columns for platforming and positioning.
- Weapon Rack: Breaking the weapon rack in The Harbor District provides a secondary weapon.
Part 4
Complete walkthrough for Part 4 of Prince of Persia: The Two Thrones, covering The Streets of Babylon and The Palace Balcony areas. Includes Speed Kill strategies and platforming.
- 1Enter the next room and move to the edge of the right platform. Wait for guards to return to position, then jump to the beam ahead. Perform a Speed Kill on the Guard, then move to the Archer and Speed Kill him. Ascend the ladder next to the Archer.
- 2Move on the beam and jump to the rail across from you. Wait for the Archer to move left, then climb over when he moves right. Catch up and perform a Speed Kill. Roll under the hole ahead.
- 3The Streets of Babylon: Use the fountain if desired. Run up the wall to the right of it to reach the next platform. Run along the right wall and jump to a beam. Wait for the Guard to move below and the screen to distort, then perform a Speed Kill. Speed Kill the Archer. Run along the left wall to a beam, then jump right to the next building.
- 4Turn left and follow the stairway to a dead end. Run up either wall and jump. Jump again off the opposite wall and continue this process to ascend to a ledge. Get on the right ledge, then jump up to another ledge. Move right to the next platform, then climb up to another.
- 5Get on the right beam, then move up the center beam. Jump forward to the next beam, then again to another. Move right and jump forward to the next beam, then move left and jump forward to another beam. Jump forward once more to reach the next platform.
- 6Climb over the rail and move parallel with the ledge across from you. Drop to the ledge below. Wait for the Guard on the left to turn away, then Speed Kill the other Guard. Turn and Speed Kill the first Guard. Follow the alleyway to a beam, move along it, and jump to the opposite ledge. Shimmy left to another beam. Climb on it and jump to the parallel beam, then jump to the next platform.
- 7Move through the alley to the platform edge. Run along the right wall and jump to the center beam. Jump to the left or right wall and jump off it to the beam above. Move forward and jump to the next area.
- 8The Palace Balcony: Use the fountain if desired. Climb over the railing to your left and drop to the platform below. Run along the left wall and jump to the rail on the right. Climb up the rail. Run up the wall to reach a ledge above. Move left along the ledge to a beam. Wait for the Archer to move, then Speed Kill the Guard below. Move forward and turn right, staying behind the latticed wall. Wait for the Guard in the foreground to turn right, then move up and turn left into the next alcove. Move forward, climb the furniture, run up the wall, and jump to a beam. Move right along the beam until its edge. Wait for the screen to distort, then Speed Kill the Archer. Speed Kill the other Archer.
- 9Climb the raised statue to the left. Run up the wall and stab the dagger into the plate. Jump up and stab into the next plate, then jump to the platform across from you.
- 10At the edge of the next platform, run along the left wall and jump when parallel to the shutter to reach the next platform. Step on the pressure plate to open the door ahead, then run through before it closes.
- 11In the next room, climb the table on your right. Run along the right wall and stab the dagger into the plate. Drop to the beam below, then jump across and stab into another plate. Perform a Speed Kill on the Guard below.
- 12Jump to the column on your right and ascend. Jump to the beam to your right, then jump to the next platform. Run up the wall ahead to reach a ledge. Move right along the ledge to a beam, then move to its end to reach a gap. Jump to the gap, turn around, and Speed Kill the Archer below.
- 13Turn to the railing, climb over, and jump to the beam across from you. Wait for the screen to distort, then Speed Kill the Guard below. Move forward to a doorway barricaded by furniture. Destroy the furniture and wait for the Guard to return to position. Move through the doorway and run up the wall to the rail. Shimmy right past the Guard, then jump over the rail and Speed Kill him.
- 14Turn to the left wall and run up it, stabbing your dagger into the plate above. Jump and stab into the next plate, then run along the wall to the left and stab your dagger into the next plate.
Similar guides you might like


100% Human-Written. AI Fact-Checked. Community Verified. Learn how AntMag verifies content