Your expert guide to Paper Mario: Sticker Star's Part 41. Get ready for the Jungle World, Decalburg shops, and essential sticker tips to overcome tough challenges.
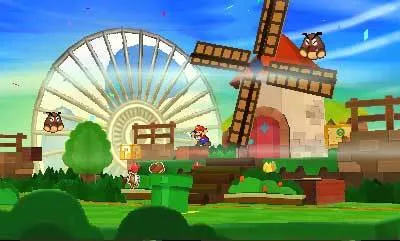
Alright, we're heading into what the guide calls Part 41, which is basically the start of Chapter 5 in Paper Mario: Sticker Star. This chapter throws us into the Jungle World, and let me tell you, it's a step up in difficulty. The guide mentions this is a favorite world for its creative levels, but also warns that the enemies are no joke and the last few levels are some of the hardest yet. Even the Chapter 5 boss isn't too tough, but the journey there is where things get intense. Get ready for some raft rides!
Before we dive into the Jungle World, we need to make sure we're prepared. The guide strongly recommends heading back to Decalburg to stock up. Nothing new has updated in the shops except for the 'Things' shop, but it's still a good idea to check out their inventory. You'll want to grab any stickers you think might be useful. Specifically, the guide points out that stocking up on Megaflashes (which you can find in World 4-6 and 2-2) and other 'flashy' stickers scattered throughout the game is a good idea.
Also, if you're a completionist and want to fill out your museum, now's a good time to revisit any spots you might have missed. The guide makes a specific note to return to 4-6 to claim the Megaflash Line Jump, which is located southeast of where you fought the boss there. It's easy to miss if you don't go back!
Now, for the absolute must-have item for the first level of this chapter (5-1): the Goat Sticker. If you don't have it already, make sure you grab it before heading out. It's crucial for what's to come.
Once you're all geared up, it's time to head to the Jungle World. But first, let's look at what Decalburg has to offer:
Decalburg Sticker Shop
| Stickers | Cost (Coins) |
| Jump | 3 |
| Iron Jump | 5 |
| Hopslipper | 5 |
| Line Jump | 12 |
| Hammer | 3 |
| Eekhammer | 5 |
| Hurlhammer | 20 |
| Slaphammer | 3 |
| Baahammer | 10 |
| Burnhammer | 20 |
| Chillhammer | 20 |
| Spike Helmet | 8 |
| POW Block | 30 |
| Shell | 20 |
| Shiny Shell | 40 |
| Mushroom | 15 |
| Shiny Mushroom | 30 |
| Flashy Mushroom | 50 |
| Big Shiny Jump | 25 |
| Big Shiny Iron Jump | 30 |
| Big Shiny Hopslipper | 35 |
| Big Shiny Line Jump | 55 |
| Big Shiny Hammer | 25 |
| Big Shiny Eekhammer | 35 |
| Big Shiny Hurlhammer | 55 |
| Big Shiny Slaphammer | 25 |
| Big Shiny Baahammer | 20 |
| Big Shiny Burnhammer | 30 |
| Big Shiny Chillhammer | 30 |
Decalburg Things Shop
| Things | Cost (Coins) |
| Hair Shears | 120 |
| Scissors | 90 |
| Bellows | 80 |
| Paper Fan | 120 |
| Fan | 130 |
| Cat-o-Luck | 140 |
| Upright Vacuum | 160 |
| Vacuum | 120 |
| Faucet | 120 |
| Trumpet | 90 |
| Violin | 100 |
| Soda | 80 |
| Squirt Gun | 130 |
| Newspaper | 100 |
| Bat | 300 |
| Lightbulb | 80 |
| Searchlight | 200 |
| Jackhammer | 300 |
| High Heel | 120 |
| Boom Box | 80 |
| Billiard Ball | 50 |
| Bowling Ball | 150 |
| Tape | 100 |
| Thumbtack | 130 |
| Sponge | 180 |
| Radiator | 250 |
| Pillow | 100 |
| Bed | 140 |
| Pocket Watch | 70 |
| Magnifying Glass | 200 |
| Matches | 120 |
| Lighter | 200 |
| Watch Battery | 50 |
Remember, stocking up is key, especially with the increased difficulty this chapter brings. Good luck, and have fun in the Jungle World!
100% Human-Written. AI Fact-Checked. Community Verified. Learn how AntMag verifies content