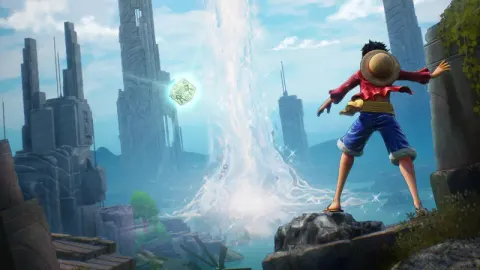
Discover all 7 cube locations in the Lake Shore Cave in One Piece Odyssey! Get step-by-step directions for Luffy, Nami, Zoro, Usopp, Chopper, and Robin cubes.
Alright, let's dive into the Lake Shore Cave in One Piece Odyssey and snag all those handy cubes! There are seven in total here, and most of them are pretty straightforward to grab as you go. Just keep an eye out, especially for those grapple points, because missing one can mean a bit of backtracking.
Luffy Cube 1: Right after you take down that Death Squirrel and the bridge crumbles, you'll get some powers back. Look around the edge of your platform for some destructible walls. Smash through them, and you'll find your first cube chilling where a wall used to be.
Nami Cube: Head north from where you found Luffy's first cube. You'll see some stone pillars sticking out of the water. You'll need to use your grapple to hop between these pillars. Aim for the tallest one in the middle, and from its top, you should spot the cube on the left edge, with a bat buzzing around it.
Zoro Cube: Before you hit that metal gate you need to break down, follow the grapple points over to the pillars in the water. If you climb up the northwest pillar, you can use Luffy's Gum-Gum Grab to snag it. Alternatively, if you head to the platform that leads to the ground on the northwest side of the cave, you can climb a ladder to get it.
Luffy Cube 2: Once you're done with all the pillar climbing and grappling and you're back on solid ground, climb the ladder and use Zoro to destroy that metal gate. Walk through, and you'll find another cube waiting for you, ready to be grabbed by Luffy.
Usopp Cube: As you make your way south back towards the Lake Shore Cave save point, there's a spot where you can drop down. Before you take the leap, look for a cube you can grab. Use Luffy's grab ability to snag it before you drop off the ledge. If you miss it, you'll have to go all the way around again to get back here.
Now, the next two are a bit trickier to spot, hiding near the beginning of the ruins. Head down the path to the cave's save point, then look up. You'll see glowing stalagmites you can grapple onto. These will take you to different cliff edges, stone arches, and pathways above. While you can find items and hidden chests up here, only one route leads to the final two cubes.
Chopper Cube: Grapple up to those stalagmites and make your way onto the stone arch pathway heading south and southeast. You'll find Chopper's cube on the right side of this archway, pretty close to an enemy.
Robin Cube: Continue further down the path you took to reach Chopper's cube. Robin's cube is a bit higher up in the sky, so you'll need to use Luffy's grab to snag it.
And that's it! You've now collected all seven cubes in the Lake Shore Cave. Great job, you're well on your way to powering up your crew!
100% Human-Written. AI Fact-Checked. Community Verified. Learn how AntMag verifies content