Guide to infiltrating the Imperial Command Base in Lost Sphear. Includes walkthrough steps, item locations like Camo Vest and Night Coat, and strategies for the Death Rattler boss fight.
- 1Head to the Imperial Command Base and drop down the ladder to the left of the main entrance.
- 2Move north for a scene where Van creates a distraction.
- 3In the northwest corner, find a chest containing a Camo Vest.
- 4Climb the ladder on the opposite side; a save point is at the top.
- 5Enter the doorway and proceed north, waiting for the guard to move before quickly running north, then left on a pipe, and dropping onto a lower pipe.
- 6Follow the pipe east, drop off (there's a sparkle item to the north), and enter the duct.
- 7Move north through the duct to fall into the cell area.
- 8Be cautious of a guard to the east. When he moves right, sneak into the open cell to grab an Illusion Memory.
- 9Wait for the guard to move up, then grab the item on the desk for artifact knowledge (Mysticism).
- 10Sneak down to the stairs. When the guard moves left, grab the chest at the top containing a Night Coat.
- 11Exit south, climb the ladder to the roof, and find the ledge in the northeast corner to drop off.
- 12Wait for the guard in the tower to look right before dashing across the pipe.
- 13At the end of the pipe, go south and drop off to find a treasure chest (VP Charger).
- 14Enter the door to the right to reach the top of a nearby roof, then drop back down to the right side of the same pipe.
- 15Follow the pipe north to a ladder, then another, leading to a roof with crates and guards.
- 16Navigate carefully to avoid detection. Enter the duct at the far eastern end.
- 17Continue right to initiate a scene where Sherra joins your party. Choose your party.
- 18Check the cell above your current location for a Dark Memory.
- 19Enter the room to your left and fight the two guards.
- 20Check the middle cell at the top for Torgo the merchant (upgrade Sherra's gear if possible).
- 21The cell next to Torgo contains the Heartless Memory.
- 22Follow the path to an elevator, then continue to a room with two chests containing 2 M Ethers and 2 M Potions.
- 23Proceed to another elevator, travel south, and a boss will appear.
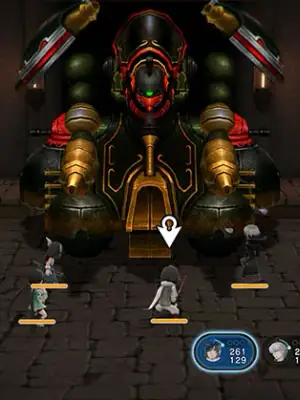
BOSS - Death Rattler:
The battle is split into three parts. The first phase features moves like Proton Beam (instant kill), Fusillade, Flamethrower, and Sleeping Gas. Use Barrier to reduce damage taken. Revive fallen allies and chip away at its health. The boss is weak to water; use Obaro's Aqua.
The second phase has stronger attacks and new moves: Hatch Open (spawns Soldiers), Toxic Gas (poisons), and Light Surge (fires lasers). Use area-of-effect attacks for Soldiers. Continue reviving and attacking.
- Being detected by guards forces you to repeat the current room, but it's not overly punishing.
- Utilize quicksave points when available.
- Upgrade Sherra's equipment at Torgo the merchant if you have enough money.
- The Death Rattler is weak to water-based attacks.
- Camo Vest
- Illusion Memory
- Mysticism (Artifact Knowledge)
- Night Coat
- VP Charger
- Dark Memory
- Heartless Memory
- 2 M Ethers
- 2 M Potions
- Defeating Death Rattler progresses the story.
100% Human-Written. AI Fact-Checked. Community Verified. Learn how AntMag verifies content