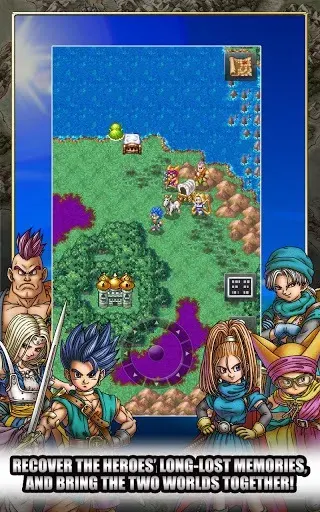
Welcome to Dragon Quest IV: Chapters of the Chosen, a classic RPG where you'll embark on an epic journey across a vibrant fantasy world. You'll assemble a party of diverse characters, each with their own unique story and abilities, to unravel a grand mystery and face down formidable foes. From the valiant knight Ragnar McRyan to the cunning thief Torneko, you’ll experience the adventure through their eyes before uniting them all to save the world.
This guide is here to help you conquer every chapter and master the game's challenges. We'll cover efficient gold farming strategies, provide detailed walkthroughs for each character's story, and offer tips for overcoming tough boss fights. Whether you're aiming to collect every treasure or simply want to experience the full story without getting stuck, we've got you covered.
Part 1
Navigate Dragon Quest IV: Chapters of the Chosen with this detailed table of contents, including chapter codes and section breakdowns.
- 1To use the table of contents, press CTRL + F to open a search box.
- 2Type the desired [code] from the table of contents into the search box.
- 3Press ENTER to jump directly to that section of the walkthrough.
Sections:
- Before Playing Dragon Quest IV: Includes Introduction [be001], Controls [be002], Main Characters [be003], Game Basics & Hints [be004], Battle System [be005], Stats & Ailments Explained [be006], and Frequently Asked Questions [be007].
- Main Walkthrough:
- Prologue: Training Dungeon [wa001], Village [wa002].
- Ragnar Mccryan and the Case of the Missing Children: King's Castle [wa101], Burland Town [wa102], Burland Cavern [wa103], Strathbaile Town [wa104], Back to Burland [wa105], Forest Well [wa106], Ragnar Returns to Strathbaile [wa107], Island Tower [wa108].
- Alena and the Journey to the Tourney: Tomboy in The Throne Room [wa201], Zalenagrad & Taborov [wa202], An Impostor in Vrenor [wa203], Vault of Vrenor [wa204], To the Desert Bazaar [wa205], Nectar Search in the Tower [wa206], A Quick Trip to Endor [wa207].
- Torneko and the Extravagant Excavation: A Fat Lakanabanian Salesman [wa301], Getting the Steel Strongbox [wa302], Ballymoral Castle [wa303], Sit Fido! My Lovely Dog! [wa304], Torneko's Very Own Shop [wa305], The King's Order [wa306].
- Meena and Maya and the Mahabala Mystery: No More Performances [wa401], Exploring the Western Cave [wa402], Palais de Léon & Havre Léon [wa403], Getting the Powder Keg [wa404].
- The Chosen: My Home Village! Zerged!! [wa501], Two Sisters on Your Team [wa502], Through the Desert [wa503], Struggle in the Lighthouse [wa504], Mintos [wa505], Icy Cave [wa506], Searching for the Magic Key [wa507], Optional: Red & Blue Doors [wa508], Teaming Up With Ragnar [wa509], Femiscyra's Zenithian Shield [wa510].
- Use CTRL + F for efficient navigation.
- Keep the table of contents handy for quick reference.
- The walkthrough is divided into distinct chapters and sections for clarity.
Part 2
Complete Part 2 of the Dragon Quest IV walkthrough, covering optional treasures, the Zenithian Armor, Liquid Metal Sword sidequest, Canalot's Zenithian Helm, Royal Crypt, and more.
- 1Optional: More Treasures - Explore for hidden riches.
- 2Getting the Zenithian Armor - Follow the steps to acquire this powerful armor set.
- 3Optional: Liquid Metal Sword Sidequest - Embark on a side quest to obtain the Liquid Metal Sword.
- 4Canalot's Zenithian Helm - Journey to Canalot to find the Zenithian Helm.
- 5Royal Crypt - Navigate the dangers of the Royal Crypt.
- 6Far South Colossus - Conquer the challenges of the Far South Colossus.
- 7Diabolic Hall, Where the Baddies Live! - Brave the Diabolic Hall.
- 8Back to Mamon Mine! Estark Must be Stopped! - Return to Mamon Mine to confront Estark.
- 9Air Balloon and World Tree - Utilize the Air Balloon and explore the World Tree.
- 10Island Adventure - Embark on an adventure to various islands.
- 11Zenithia Castle - Explore the legendary Zenithia Castle.
- 12Heaven's Haven and the Four Barriers - Discover Heaven's Haven and overcome the Four Barriers.
- 13Death Castle - Brave the perilous Death Castle.
- 14POST-ADVENTURE CONTENT - Access content available after completing the main story.
- 15Foo Yung & Chow Mein's Dungeon - Explore this post-game dungeon.
- Keep an eye out for optional treasures throughout this section, as they can provide valuable items and equipment.
- Prioritize obtaining the Zenithian Armor and Helm for significant defensive boosts.
- The Liquid Metal Sword sidequest is highly recommended for its powerful weapon.
- Be prepared for challenging boss encounters in areas like the Royal Crypt, Far South Colossus, Diabolic Hall, and Death Castle.
- Don't neglect post-adventure content for further challenges and rewards.
Part 3
Navigate Dragon Quest IV's Part 3! Learn character strengths like Ragnar and Alena, and master controller inputs for a smoother adventure.
Alright, let's dive into Part 3 of Dragon Quest IV! This section is going to cover some of the basics you'll need to know, like how to control your character and a quick rundown of some of the main heroes you'll be playing as. Think of this as your cheat sheet before we get into the real action.
Controller Layout:
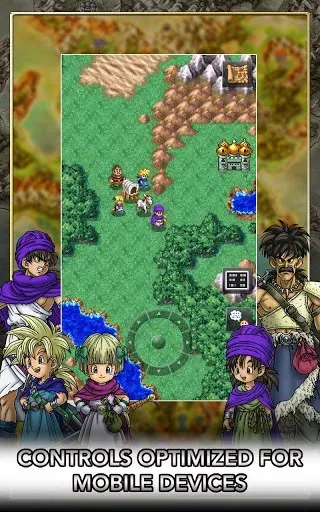
You'll be using the Directional Pad to move your character around. The L and R buttons let you rotate the camera, which is super handy for checking out your surroundings or lining up your next move. The A button is your go-to for confirming actions, interacting with things, or using items. Need to back out of something or talk to your party? That's the B button. For checking out the map or looking at shop inventories, hit Y. And X will bring up your main menu or let you view character stats.
| CONTROLLER INPUT | EFFECT |
| Directional pad | Move |
| L/R buttons | Rotate camera |
| A button | Confirm, use, examine |
| B button | Cancel, talk to party, back |
| Y button | View map, shop inventory |
| X button | Menu, view stats |
| Start button | --- |
| Select button | --- |
Main Characters:
Dragon Quest IV is cool because you get to play as different people in different chapters. Later on, in Chapter V, everyone comes back together. The main differences between them are their strength, what gear they can use, and what special abilities they learn. For the nitty-gritty on spells, we'll cover that elsewhere, but here's a quick look at two of them:
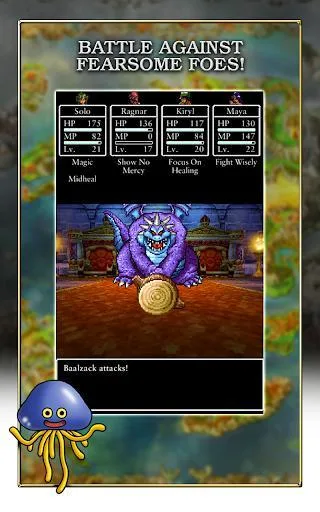
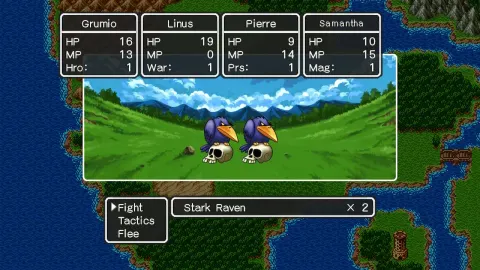
- Ragnar McRyan [Chapter I]: This guy is your first playable character in Chapter I. He's a soldier tasked with finding missing kids. Ragnar is super strong and hits hard with normal attacks. He's also got a ton of HP, making him a tank, but he can't use any magic. His raw power and durability make him a great asset in Chapter V. He's a real survivor!
- Alena [Chapter II]: Meet Alena, the princess from the castle east of Zalenagrad. She's all about adventure and action, which is why she broke out of her castle! She's incredibly fast, often getting the first move in battles, and deals good damage. Like Ragnar, she doesn't use magic. Her speed is perfect for taking down quick enemies that try to run away.
Part 4
Dive into Dragon Quest IV Chapter 4! Get the lowdown on Meena and Maya, two powerful magic users essential for your journey. Learn their strengths and how to best utilize them.
Alright, let's dive into Part 4 of our Dragon Quest IV adventure! This chapter really opens things up as we get to know some key characters who will be joining our party. We're focusing on two sisters here: Meena and Maya. They both bring some serious magical firepower, but in different ways, so understanding their roles is super important.
Characters Introduced in Chapter 4:
- Meena: She's a dancer by trade, but her real talent lies in her magical abilities. Think of her as your primary healer and support character. She's got a fantastic range of spells that can keep your party alive and kicking. Just keep a close eye on her MP (Magic Points), because without them, she's not much help. She and her sister are on a quest for revenge after their father's death, which sets the stage for their involvement in the main story.
- Maya: Meena's sister, and she's quite different. Maya is all about offense! If you need someone to blast enemies with powerful spells, she's your best bet. Her offensive magic can deal massive damage. However, just like Meena, her powerful spells drain MP very quickly, so managing her resources is key. A really neat trick Maya learns is
Similar guides you might like
100% Human-Written. AI Fact-Checked. Community Verified. Learn how AntMag verifies content