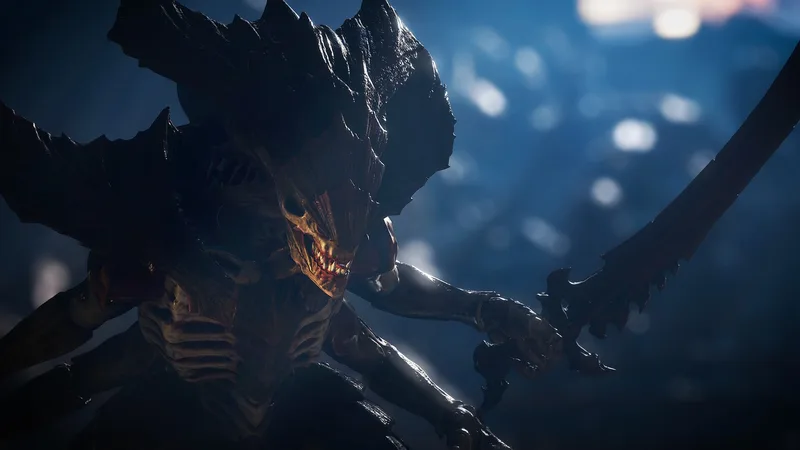
Welcome, brother! Warhammer 40,000: Space Marine 2 throws you into the ceramite boots of Lieutenant Titus, a veteran Space Marine fighting the endless Tyranid swarm. You’ll be blasting through hordes of xenos, executing brutal melee finishers, and wielding iconic Imperial weaponry across the galaxy. It’s a third-person shooter that lets you truly feel the power and fury of an Ultramarine.
This guide is your essential companion for conquering every challenge the game throws at you. We’ll detail the locations of all the pickups scattered throughout the missions, ensuring you don’t miss a single collectible. Get ready to experience the full might of Titus and his brothers in arms!
All Pickups & Effects: And
Explore all pickups and effects in Warhammer 40,000: Space Marine 2, including Ammo Boxes, Medicae Stimms, Armour Boosts, Guardian Relics, and Armoury Data. Learn how they function and where to find them.
This guide details all the pickups and their effects found in Warhammer 40,000: Space Marine 2, covering items that aid in combat and survival.
Weapons and Grenades
Picking up new weapons or grenades allows you to swap them for your currently equipped ones. You can equip one Primary Weapon, one Secondary Weapon, and one Melee Weapon. Newly acquired weapons and grenades come with full ammo. Discarded weapons can be picked up later if you don't pass a checkpoint. Heavy weapons (like Heavy Bolters and Multi-Meltas) are a tertiary ranged option with finite ammo in campaign mode; they are dropped when you switch to another weapon and cannot be reloaded.
Ammo Box
Ammo Boxes are the most common pickup, refilling most weapons' ammo moderately. Heavy weapons in campaign mode are excluded as they have finite ammo. Ammo Boxes do not replenish grenades, but they do refill grenades for the Bolt Rifle with Grenade Launcher. The amount replenished depends on the weapon's maximum ammo. On Easy/Normal difficulty, about four Ammo Boxes are needed to fully refill a weapon, while Veteran/Angel of Death difficulties require five. In Operations Mode, fewer Ammo Boxes spawn on higher difficulties.
Destructible crates can contain pickups like Ammo Boxes, Grenades, Medicae Stimms, and Armour Boosts.
Ammo Cache
Ammo Caches fully replenish all equipped weapons and can be used infinitely. They are typically found at checkpoints or before/during large battles. Using an Ammo Cache takes a moment, leaving you vulnerable. Like Ammo Boxes, they do not replenish grenades or heavy weapons in campaign mode.
Armour Boost
Primarily found in Operations mode, Armour Boosts instantly start Armour Regeneration and provide a temporary extra Armour bar that does not regenerate and is lost when depleted. They are often found in destructible crates and are most effective when grabbed during combat.
Medicae Stimm
Medicae Stimms act as first aid, instantly replenishing Health. The amount restored varies by difficulty, with lower difficulties restoring more. You can carry up to two Medicae Stimms. It is recommended to use them between battles or waves, after the window for Contested Health has closed, rather than during intense combat.
Guardian Relic
This artifact acts as a safety net, allowing self-revival if incapacitated and curing any Mortal Wounds sustained. You can only carry one Guardian Relic at a time.
Armoury Data
Exclusive to Operations mode, Armoury Data is found by interacting with Servo-Skulls in hard-to-reach areas. This data is used to unlock higher-tier weapon variants via the Armoury on the Battle Barge. The quality of Armoury Data (Master-Crafted, Artificer, or Relic) depends on the mission's difficulty and is required for unlocking weapon variants or obtaining Mastery Points.
All Pickups & Effects: Getting Started
Learn about all the pickups and effects in Warhammer 40,000: Space Marine 2, including Ammo Boxes, Medicae Stimms, Armour Boosts, Guardian Relics, and more. Get started with our guide.
This guide covers all the pickups and effects available in Warhammer 40,000: Space Marine 2, detailing their functions and how they aid you in combat and progression.
- Weapons and Grenades
- Ammo Box
- Ammo Cache
- Armour Boost
- Medicae Stimm
- Guardian Relic
- Armoury Data
- Dataslate
Weapons and Grenades
You can find new weapons and grenades in the environment. You can equip one Primary Weapon, one Secondary Weapon, and one Melee Weapon. Newly found weapons and grenades come with full ammo. Discarded weapons can be picked up later if you don't pass a checkpoint. Heavy weapons (like Heavy Bolters and Multi-Meltas) are a tertiary ranged option. Equipping a heavy weapon means you cannot use other weapons unless you swap, which drops the heavy weapon. Heavy weapons in campaign mode have finite ammo and cannot be replenished; they become useless once empty.
Ammo Box
Ammo Boxes are common pickups that refill most weapons moderately. Heavy weapons in campaign mode are excluded as they have finite ammo. Ammo Boxes do not replenish equipped grenades but do refill grenades fired by the Bolt Rifle with Grenade Launcher. The amount replenished depends on the weapon's maximum ammo. It typically takes over four Ammo Boxes on Easy/Normal difficulty and five on Veteran/Angel of Death to fully refill a weapon. In [Operations Mode], fewer Ammo Boxes spawn on higher difficulties, requiring reliance on upgraded weapons and perks.
Destructible crates can contain pickups like Ammo Boxes and Grenades, and sometimes Medicae Stimms and Armour Boosts.
Ammo Cache
Similar to Ammo Boxes, Ammo Caches fully replenish all equipped weapons and can be used infinitely. They are often found at the start of checkpoints or before/during large battles. Using an Ammo Cache takes a moment, making you vulnerable. Like Ammo Boxes, they do not replenish grenades or heavy weapons (in campaign mode).
Armour Boost
Primarily found in Operations mode, Armour Boosts immediately start Armour Regeneration and grant an extra, temporary Armour bar. This temporary Armour bar does not regenerate and is lost once depleted. They are often found in destructible crates and are most useful during combat, or to prepare for the next fight.
Medicae Stimm
Medicae Stimms instantly replenish Health when used (press ). The healing amount varies by difficulty, restoring two Health segments on lower difficulties and less on higher ones. You can hold up to two Medicae Stimms. It's generally better to deal damage and score executions for healing rather than relying solely on Stimms, especially since enemies can deplete Health quickly. Use Medicae Stimms when the window to recover Contested Health has ended, typically between battles or attacks.
Guardian Relic
This artifact acts as a safety net, allowing you to revive yourself if incapacitated and curing any Mortal Wounds sustained. You can only carry one Guardian Relic at a time.
Armoury Data
Exclusive to Operations mode, Armoury Data is found in Servo-Skulls in out-of-the-way locations. Interacting with them yields Armoury Data, used to unlock higher-tier weapon variants via the Armoury on the Battle Barge. The quality of data (Master-Crafted, Artificer, or Relic) depends on the mission's difficulty and is required to unlock weapon variants or obtain Mastery Points. Finding these is essential for upgrading gear in Operations mode.
Armour
Learn how to recover your armour in Warhammer 40,000: Space Marine 2 using finishing moves. Keep your defenses up and stay in the fight!
Hey there! So, you're looking to keep that shiny Power Armour intact, huh? Smart move. Losing your armour mid-fight can be a real pain, and you don't want to burn through your precious Medicae Stims unnecessarily. Luckily, there's a slick way to get it back!
Here's the deal: When you're wailing on those Tyranids, keep an eye out for enemies that start flashing red. That means they're vulnerable and ready for a special move. Get close to one of these flashing baddies, and you can trigger a finishing move. On PC, that's the E key, and on a controller, it's R1/RB.
This finishing move is your best friend for armour recovery. Depending on the enemy you take down, it can either completely refill your armour bar or give you a significant chunk back. It's usually more than enough to keep you protected. Plus, here's a pro-tip: while you're doing that super-cool finisher, you're totally invincible. Use those few seconds to catch your breath, get your bearings, and plan your next move. It's a great way to avoid taking unnecessary damage and stay in the thick of the fight.
Ballistic Engine Operation Dataslates
Find all Ballistic Engine Dataslates in Warhammer 40,000: Space Marine 2. This guide details the locations of Dataslate 01 and Dataslate 02 within the Operations mode mission.
This guide covers the locations of the two Dataslates within the Ballistic Engine Operation mission in Warhammer 40,000: Space Marine 2. The mission features Tyranid hordes and environmental hazards like dust storms that reduce visibility during outdoor segments. There are no Chaos enemies or bosses, except for potential random spawns on higher difficulties.
- 1Dataslate 01: Missing Servo-Hauler
- Start in an outdoor area with dust storms.
- 2Proceed inside the "Militarum Depot" by using a terminal to open doors.
- 3Once inside, head right, then left, then right again to find the first Dataslate on a desk in the rightmost room.
- 4This Dataslate is near the beginning of the mission. The point of no return is after dropping down a ledge to an area where you must complete the objectives "Awaken the Machine Spirit" and "Await Completion of Transfer Protocols" during a holdout segment.
- 5Dataslate 02: War Preparation, Avarax
- After completing the holdout segment in the depot, the objective becomes "Advance to the Train".
- 6Ride an elevator and fight your way out of the facility to another outdoor area with dust storms.
- 7Interact with a terminal to deploy and cross a bridge.
- 8Use another terminal to open doors and proceed to the control room overlooking the trainyard.
- 9In the control room, use a terminal to clear an obstruction for the Nova Cannon Warhead.
- 10Exit the control room and drop down two ledges to reach the trainyard.
- 11Follow the tracks to the left until you encounter rubble. Turn right and follow the rubble to find a tank.
- 12The second Dataslate is located on crates next to the tank.
- 13This Dataslate is near the end of the mission. To avoid missing it, do not drop down another ledge from the trainyard.
- 14After collecting the Dataslate, ride an elevator and complete another holdout segment to finish the mission.
- The dust storms in outdoor segments can significantly reduce visibility, but the Dataslates are not located within these storm-affected areas.
- Be mindful of ledges; dropping down often signifies a point of no return for certain collectibles or mission segments.
100% Human-Written. AI Fact-Checked. Community Verified. Learn how AntMag verifies content