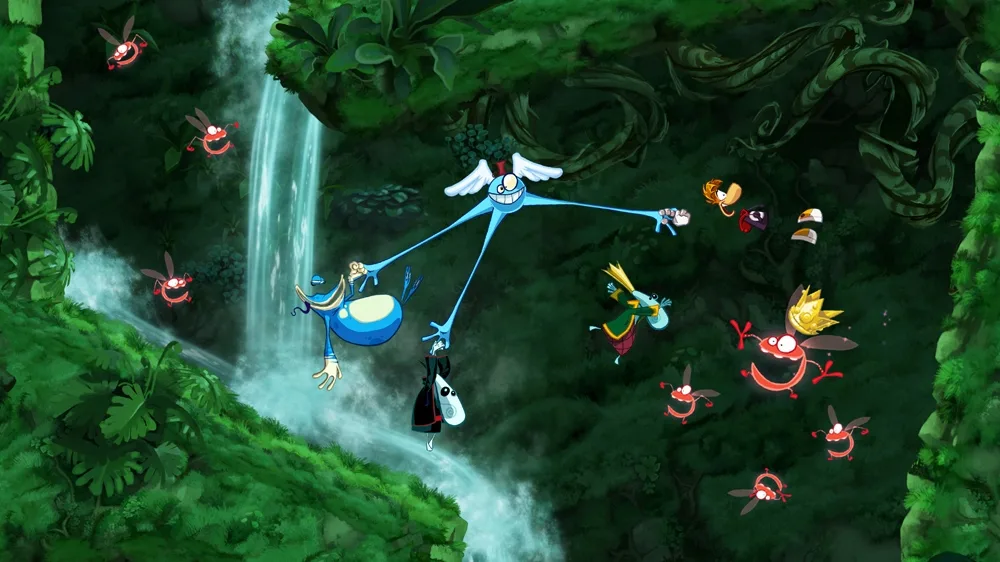
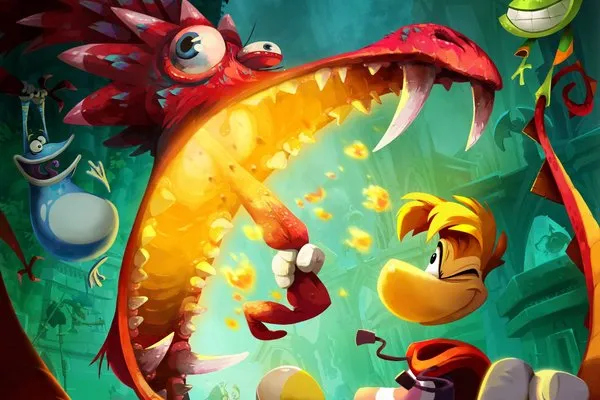
Welcome to Rayman Origins, a gorgeous 2D platformer where you play as Rayman and his friends, the Teensies, to restore the Glade of Dreams. You'll be running, jumping, and punching your way through vibrant, hand-drawn levels, collecting Lums and rescuing Electoons. It’s a pure, joyful experience with a fantastic soundtrack and cooperative play, perfect for anyone looking for some lighthearted fun.
This guide is here to help you find every hidden collectible, master the trickiest platforming sections, and achieve those coveted Gold Medals on every level. We’ll cover how to unlock new characters, discover all the secret areas, and overcome challenging bosses like Mr. Dark’s Dare. Get ready to dive into the Glade of Dreams and make sure nothing gets left behind!
```
Comprehensive walkthrough for Rayman Origins, covering all levels, boss fights, treasure challenges, hidden cages, and achievements. Master every challenge with our detailed guide.
This is the Table of Contents for the Rayman Origins FAQ/Walkthrough by DomZ Ninja. It outlines the different sections available in the guide, including version history, controls, a detailed walkthrough of all game worlds, boss strategies, treasure challenges, hidden cages, and achievements.
Sections:
- Version History [0100]
- Controls [0200]
- Walkthrough [0300]
- Jibberish Jungle [0301]
- Desert of Dijiridoos [0302]
- Gourmand Land [0303]
- Sea of Serendipity [0304]
- Mystical Pique [0305]
- Ticklish Temples [0306]
- Grumbling Grottos [0307]
- Luscious Lakes [0308]
- Angsty Abyss [0309]
- Moody Clouds [0310]
- Land of the Livid Dead [0311]
- Bosses [0400]
- Treasure Challenges [0500]
- Hidden Cages [0600]
- Achievements [0700]
- Thanks/Credits [0800]
FAQ/Walkthrough #59
Need help with The Snoring Tree in Rayman Origins? This guide covers everything from collecting Electoons to navigating the world map and using the Snoring Tree as a hub.
Alright, so you've just kicked off your adventure in Rayman Origins! The opening cutscene sets the stage perfectly – the Bubble Dreamer's in a slump, and it's up to you and your pals to gather Electoons and get him back to his chipper self.
Your first real task is to head out of the Snoring Tree. You'll want to jump onto that Magic Hat nearby; the Magician will pop up to give you a little nudge. He'll mention something about Skull Teeth being the key to getting past that grumpy guard blocking the tunnel. Don't sweat that for now, though! Just pop back inside the tree and take the exit on the east side. This will lead you to the world map.
Think of the Snoring Tree as your home base in the Glade of Dreams. You can swing by anytime to grab some helpful tips, check out all the cool stuff you've unlocked, and even swap out characters if you feel like a change. Plus, here's a neat trick: no matter where you are on the world map or a level map, just hit the [X] button, and *poof* – you'll instantly teleport back to the Snoring Tree. Super handy!
JIBBERISH JUNGLE [0301]
Complete walkthrough for the Jibberish Jungle level in Rayman Origins. Find all Electoons, Lums, and hidden cages with our step-by-step guide.
- 1Begin by moving right. Leap onto the red bulb to destroy land and cross to the other side.
- 2Jump on the second moving platform and wait for it to reach its peak. Collect the golden [SKULL COIN] (worth 25 Lums).
- 3Drop down and take the low road. Run through bushes and grass for Lums. Swing across the vine and collect the Heart. Avoid the crushing platforms underground.
- 4Jump on the sleeping Psychlops to bubble them, then use them as stepping stones. Pop them for Lums.
- 5Continue right, collecting Lums from grass. Hop across Psychlopes and onto a red bulb.
- 6Jump on the next red bulb to activate a geyser, then ride another geyser over a large gap.
- 7Grab the sleeping Lum King to make surrounding Lums turn red and worth double. Bounce on the blue mushroom to move to the background.
- 8Slide down rapids to a stone head. Jump on the two red bulbs on its head to open its mouth.
- 9Navigate past the stone head's teeth, jump on the Darktoon, and free Betilla the Head Nymph. You gain the punch ability.
- 10Bash the stone head's teeth to break free. Jump right and break the wooden wall to reach a bouncy blue mushroom.
- 11Punch down wooden barricades and attack the Lividstone. Punch it to bubble it, then attack the bubble.
- 12Punch the eye blocking the door to proceed.
- 13In the cave, attack the blue bulb to retract the angry spiked monsters. Grab Lums.
- 14Hit the green bulb on the ceiling to retract an island, sending a Lividstone into the water.
- 15Wall jump to a tall ledge. Punch the green bulb for an island, use it to reach a wooden gate, and smash it down.
- 16Use the blue bulb to defeat Lividstones. Jump to the Lum King, grab him, and collect Lums.
- 17Before the cave exit, carefully jump to the wall above the Spiked Eyeballs, slide down to collect the [SKULL COIN] between the wall and monsters.
- 18Punch the Lividstone and eyeball gate.
- 19To access the [HIDDEN CAGE], kill all enemies: two sleeping Psychlopes (use a running punch), a Lividstone, and another Psychlops. Ride the geyser to the upper level.
- 20Wait for the Hunter's missiles to activate the green bulb, creating an island. Use the island to reach the vine.
- 21Swing to the Hunter, defeat him, and smash the cage to free the Electoons and finish the level.
- Hold the Right Trigger to run.
- Hearts grant an extra hit before dying.
- Bubblized enemies can be used as stepping stones.
- Red Lums are worth double temporarily when a Lum King is collected.
- Wall jumping is required to reach higher ledges.
- The [SKULL COIN] before the cave exit requires precise platforming to avoid Spiked Eyeballs.
- The [HIDDEN CAGE] requires defeating all enemies in the area.
- The Hunter's missiles activate/deactivate the green bulb, so time your approach to the island.
- Freeing Betilla grants the punch ability.
- Completing the level earns Lums, potentially Electoons, and a Medallion if enough Lums are collected.
DESERT OF DIJIRIDOOS [0302]
Complete Rayman Origins Desert of Dijiridoos walkthrough for Crazy Bouncing and Best Original Score, including all 6 Electoons and 3 hidden cages.
- 1Jump into the tall dijiridoo on the right to slide down to the desert.
- 2Walk right and break open the flask for a Heart.
- 3Ground pound the giant drums to bounce higher.
- 4Defeat the Red Bird bouncing alongside you.
- 5Ground pound the second drum to bounce up to a ledge with a [SKULL COIN].
- 6Fall back down and continue right.
- 7Bounce on drums up to a Swingman and swing right.
- 8Collect Lums and step onto the string, avoiding the damaging red waves.
- 9Ground pound drums past the first string to land on a high Swingman.
- 10Swing over to a [SKULL COIN].
- 11Attack the Bulb-o-Lums below and go through the door.
- 12Bounce up to the flask above the entrance and kill another Red Bird.
- 13Bounce up a drum towards the string on the wall.
- 14Wait for the traveling wave to reach the top of the string, then bounce onto it.
- 15Wall jump off the string to grab a nearby [SKULL COIN].
- 16Use the next drum to bounce up to a high platform and walk through red feathers for Lums.
- 17When you reach three Red Birds, defeat them and ground pound the drum to find a hidden door.
- 18~~ HIDDEN ROOM ~~ Use drums to gain height and knock around the ten or so Red Birds flying in patterns above the [HIDDEN CAGE] to open it.
- 19Go right to find more hidden Lums and a flask.
- 20Deal with two Red Birds bouncing on switches that trigger strings.
- 21Manipulate the switches until the strings are safe to cross.
- 22Climb up the strings to find a Bulb-o-Lums, then another one below next to a doorway.
- 23Grab the flask at the entrance to the area and proceed across the strings.
- 24When you reach miniature drums and three strings, wait for red waves to move aside before bouncing through the middle.
- 25Quickly hop up to the pillar and pick up the [SKULL COIN].
- 26Pick up the Lum King and collect the nearby ring of Lums.
- 27Drop down the hole onto the long string instead of going right.
- 28Move right along the string, dodging moving waves, to find a [SKULL COIN] at the end.
- 29Jump to the upper level, attack Red Birds, and ground pound a drum to launch up to the doorway.
- 30Collect Heart flasks and Lums while swinging and bouncing after a Darktoon pursuing a Nymph.
- 31Pick up the [SKULL COIN] high up near the ceiling during the pursuit.
- 32Corner the Darktoon on four platforms, bounce up using drums, and whack it to free the Music Nymph: Holly Luya.
- 33Rayman gains the ability to fly, allowing you to hold A to glide through the air.
- 34Test gliding by floating over a river to the exit after a wall jumping section.
- 35In the next room, glide across a hole and grab Lums and Heart.
- 36Bounce along drums and perform a super bounce to reach a Swingman above.
- 37Swing left and glide over to a hidden door.
- 38~~ HIDDEN ROOM ~~ Use chain-bubblizings on the sixteen Red Birds flying in a square formation to open the [HIDDEN CAGE].
- 39Glide back to the Swingman and swing right through Lums.
- 40Ride water rapids to the last [HIDDEN CAGE], guarded by three sleeping Red Birds. Jump up platforms to smash the cage.
Best Original Score Level Walkthrough:
- Jump down onto the piano walkway and take down the Darktoon.
- As you jump on the ledge, staves emerge and green toucans fly down to rest on them, acting as platforms.
- Ground pounding drums causes you to bounce higher, similar to bouncy flowers.
- Red waves on strings can damage Rayman.
- The ability to fly (glide) is unlocked after freeing Holly Luya and is mainly used to cross long gaps.
- Crazy Bouncing: 6 Electoons, 3 Hidden Cages, 2 Lum Rewards, 1 Speed Run. Medallion: 350 Lums. Speed Run Time: 1:30. Speed Trophy Time: 1:08.
- Best Original Score: 6 Electoons, 3 Hidden Cages, 2 Lum Rewards, 1 Speed Run. Medallion: 350 Lums. Speed Run Time: 2:00. Speed Trophy Time: 1:32.
Similar guides you might like

100% Human-Written. AI Fact-Checked. Community Verified. Learn how AntMag verifies content