
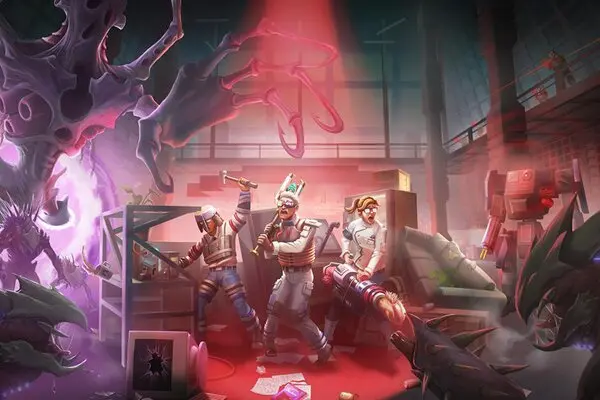
Welcome to the unforgiving Amazon rainforest in Green Hell. This is a hardcore survival game where you'll need to manage your hunger, thirst, sanity, and wounds while crafting tools, building shelters, and fighting off predators. You'll be exploring a vast open world, dealing with everything from venomous snakes to psychological horrors, all while trying to find your way back to civilization.
This guide is here to help you navigate the jungle's challenges, from the initial prologue and survival mechanics to locating vital objectives like ancient ruins and drug labs. We'll cover construction, combat, and advanced strategies to help you conquer the deadliest threats the Amazon has to offer.
Part 1
Embark on your Green Hell adventure! This guide covers the essential first steps, from crafting your first tools to understanding basic survival needs. Get ready!
Welcome to Green Hell! This is where your survival journey truly begins. Think of this first part as your initial crash course in staying alive in this unforgiving jungle. We'll cover the absolute basics you need to know right after you wake up with nothing but the clothes on your back. Don't worry, it's a lot to take in, but we'll break it down step-by-step so you can get your bearings and start making some progress.
In this section, we'll focus on:
- Understanding your immediate surroundings and identifying crucial resources.
- Crafting your very first essential tools to help you gather and defend yourself.
- Learning the fundamental mechanics of hunger, thirst, and fatigue.
- Making your first shelter to protect yourself from the elements and dangers.
Part 2
Complete walkthrough for Part 2 of Green Hell, including detailed steps to find all 10 servants in Mellow Hills and progress through the 'Evil/Good' path for the 'Zero Corruption' achievement.
- 1Starting Out: After a cutscene, head downstairs to your minions. You can practice on mushroom patches.
- 2Summoning Minions: Reach the spawning pit. Hold LT to lock onto the Minion Gate and B to summon minions. You start with three, upgradeable later.
- 3First Choice: You can either follow Gnarl to learn combat or go to the throne room.
- 4Follow Gnarl (Tutorial): Fight the Jester. Use A to attack, LT+A to lock on and attack, and RT to command minions. Follow paths and use the right thumbstick to direct minions. Hold B to recall them.
- 5Throne Room: The throne room is damaged. Your objective is to get the Tower Heart. You can fight the Jester here.
- 6Tower Heart: Summon minions. Attack sheep to gather lifeforce for more minions. Break jars with minions for potential equipment. Ensure all sheep are killed and lifeforce harvested. Ignore the item in the water for now. Return to the minion portal to summon more minions (now 5).
- 7Fallen Pillar: Target the fallen pillar with LT and use RT to have minions move it.
- 8Bob's Farm: Halflings have taken over. Use minions to break sunflowers, pots, and pumpkins. Minions may find new headwear. Approach the farmhouse, send minions in, and kill the halfling that emerges. Continue along the path, breaking objects.
- 9Tree Bridge: Sweep minions across the tree bridge to the left to break jars for equipment and money.
- 10Sleeping Halflings: Continue breaking mushrooms and kill the sleeping halflings.
- 11Tower Heart (Continued): A scene will show the Tower Heart. Clear pumpkins and have minions bring it home. Break the wall in their path with your axe. Follow them into the warp gate. You will gain the ability to summon 10 minions and the fireball spell (X button).
- 12The Crane: Before returning through the gate, go down the stairs. Interact with the Tower Heart (press A) to view minion information and your corruption level. Aim to keep corruption at 0% for the 'Zero Corruption' achievement. You can also check corruption via the back button (quests).
- 13Mellow Hills: Return to the throne room and head to Mellow Hills. Summon minions and gather lifeforce from sheep. Break jars near the sheep.
- To get the quest for 10 servants, suppress Spree by killing townsfolk and collecting their food from Halfling Homes. Then warp to Mellow Hills via your tower.
- Keep your corruption level at 0% to work towards the 'Zero Corruption' achievement.
- Minions upgrade their weapons and armor by killing enemies or breaking objects.
- Use minions to break jars and other objects to find items and money.
- Quest for 10 servants.
- Ability to summon 10 minions.
- Fireball spell (X button).
- Access to Mellow Hills.
Servant Locations in Mellow Hills:
- You get the first one when you receive the quest.
- At the sheep by the waypoint gate.
- Just past Bob's Farm.
- In Spree, to the left of the entrance.
- Near Archie in Spree.
- Near a house by the Castle Spree gate.
- By the sheep in the farm area of Spree (near the entrance to Evernight).
- Heading toward the Slave Camps, one is on the right side near the peasant farmer guys.
- Right before heading into the gate that heads to the Slave Camp, where the sheep are.
- Follow your minions as they carry number 9 back; you'll be ambushed by peasants. Kill them and carry both servant girls off.
Part 3
Follow this comprehensive Green Hell Part 3 walkthrough to navigate the farm, Slave Camp, and Halfling Homes, defeat enemies, and retrieve vital provisions.
- 1From the farm, follow the path to a fallen pillar requiring 10 minions to push.
- 2After a scene, set the wheat field aflame, then send minions to collect the remains.
- 3Proceed to another wheat field; before burning it, turn right into an alcove to break jars.
- 4Cross the bridge, burn the halflings, and collect the treasure. Have minions kill any surviving halflings.
- 5Gnarl will discuss killing innocents; for this walkthrough, do NOT kill anyone innocent.
- 6Walk past the people, break jars on the right, and barrels on the left.
- 7Locate the Blood Pit; sacrifice minions if you need life.
- 8Carefully proceed around the corner, summoning more minions if needed, and kill the approaching halflings.
- 9Deal with halflings throwing stones on the left, then kill those in front of the gate. Do not turn the wheel yet.
- 10Head right, loot barrels and chests, and harvest lifeforce from sheep.
- 11Return to the wheel and have minions turn it to open the gate.
- 12Slave Camp: Break mushrooms and barrels. Do not harm the people. Break more barrels in the top right and further on. Kill the halflings.
- 13In the next area, first eliminate the stone-throwing halflings on the left, then break crates.
- 14Go to the other side of the area and kill the remaining halflings.
- 15Release the prisoners by turning the wheel in the center.
- 16Head up, kill halflings on the right, and confront a troll. Use minions to assist in the fight.
- 17After the troll, go right and up the stairs to find a chest and barrels.
- 18Turn the wheel at the gate to activate the crane. Break boxes and use minions to move the crane to the waypoint.
- 19Go up the stairs near the crane and turn the wheel to free the slaves.
- 20Proceed through the Tower Gate to witness reconstruction.
- 21Head back through the gate to Meadow Hills and make your way to the city of Spree.
- 22Retrieve the Food: Return to Spree and break the barrier. Receive a new quest from Archie to go to the Halfling Homes.
- 23Head right and have minions turn the wheel to open the gate. Break barrels and kill halflings.
- 24Turn left for a chest and right for barrels.
- 25From the broken wall, head right to find a domination spell. Grab it.
- 26Turn the wheel to open the bridge and have minions bring it back to the waypoint.
- 27Return to the path leading to the halflings and proceed. Kill ground troops and rock-throwing halflings. Pillage barrels and jars.
- 28Enter the halfling house, send minions inside to loot and kill running halflings.
- 29Head down the stairs.
- 30Crash the Halflings' party: Continue down the stairs, kill halflings, and defeat another troll. Use the nearby spawning pit if needed.
- 31Break all jars and barrels, and loot the houses.
- 32Go between the houses to the large halfling house. Get the treasure outside and turn the wheel. Enter the house.
- 33Halfling Homes: Break the door, kill halflings, and break anything found.
- 34Go through the stairs on the left, kill sleeping halflings, and break jars.
- 35Return to the previous room, go down the stairs, and break down the door in the center.
- 36Kill the halflings behind the door. Head right as the gate ahead is closed and the wheel is upstairs.
- 37Break the bouncing pots to yield rats that attack halflings.
- Consider taking the shortcut from the farm if you don't need respawned items.
- Sacrifice minions at the Blood Pit if you need to replenish life.
- When fighting the troll, recall your minions if it prepares its belly jump attack to minimize losses.
- The spawning pit is nearby after the troll fight, so don't worry too much about losing minions.
- Break everything breakable in the Halfling Homes for loot.
- Domination spell
- Access to Halfling Homes for loot and further progression.
Part 4
Complete Green Hell Part 4 walkthrough, including how to get the sack of cash, find red spokes, and defeat Melvin Underbelly.
- 1Sweep your minions through the center to break objects up the ramp.
- 2Head right and around the corner. Destroy the small opening when a halfling emerges to prevent more from appearing.
- 3Turn the wheel on the left side of the room. Before going through the gate it opened, sweep your minions down the ramp on the right side and continue down the hall.
- 4Follow the linear path, killing stray halflings until you reach the other side of the entrance room.
- 5Pillage the room and have your minions grab the giant sack of cash. They will bring it back to the entrance (waypoint (a marker on your map you've manually placed as a destination)).
- 6After your minions are done, head to the gate you opened, which is up from the entrance area.
- 7Head left into the dungeon room with peasants in cages. Kill the sleeping halflings guarding them.
- 8Sweep your minions through the small opening by the entrance toward the halfling hole to close it.
- 9Turn the wheel. Once the peasants are free, they will mention the food. Pillage the rest of the room.
- 10Go back out and continue down the hall. Break down the door.
- 11Head through and go to the left side of the room. Plug up the halfling holes before smashing the pumpkins.
- 12Smashing the pumpkins reveals another tower object. Have your minions take it to the waypoint. You can now summon 15 minions.
- 13Return to the room where you found the tower object and examine the red wheel. Two spokes are missing.
- 14Smash the door on the right and kill the halflings behind it.
- 15Head up the stairs on the left side (ignoring the path forward for now) to find a room full of sleeping halflings. Kill them and loot the area.
- 16Break down the door in this room, kill more halflings, and find the first red spoke in the middle of the area. Send a minion to carry it back.
- 17Continue down the hall, breaking objects until you reach a wheel. Turn it.
- 18Go back to the path you skipped before and head through the gate you just opened.
- 19The second red spoke is in plain view. Sweep your minions around the room to get it. Plug up the halfling holes as well.
- 20Head back to the red wheel and turn it. Head through the door.
- 21Break the jars and objects. Head down the path and break the things on the sides of the door.
- 22When you go through the door, progress slowly through the room full of halflings, killing them little by little and plugging up their holes. Loot the area.
- 23Turn the wheel in this room and head through the door.
- 24Head around the path and kill the fat, tubby halfling chef. Head down the path he came from.
- 25In the kitchen area, break baskets to let rats out to weaken the chefs before engaging them.
- 26Keep heading down the hall, breaking jars and barrels. There is a mana pit if needed. Kill the halfling chefs.
- 27Proceed through the kitchen and grab the food. Turn the wheel before pillaging the rest of the room.
- 28Send your minions to pick up the food and follow them. Go to the platform and recall your minions. The people will take the food back.
- 29Head back to the Halfling Village and the gate you couldn't go through before. Loot the halfling house and turn the wheel.
- 30When you enter the party area, kill the fiddler to stop your minions from being bewitched.
- 31Find the first red spoke on the right side near some halfling houses. Kill, pillage, and grab it. Use the spawning pit and blood pit if needed.
- 32Head past the pits to an area with a giant barrier of fire. The next red spoke is on a platform here. Grab it.
- 33Head back to the red wheel and turn it. Get rid of any halflings that appear.
- 34Head into the house. Go left and kill sheep. Break objects.
- 35Head through the opening. Turn the wheel to fry the chefs.
- 36Go around the room breaking objects.
- Destroy small openings when you see them to prevent more halflings from appearing.
- Take your time to loot rooms thoroughly.
- Start on the left side of the halfling-filled room and work your way right.
- Use the spawning pit and blood pit if you need them.
- Break baskets in the kitchen area to release rats and weaken chefs.
Similar guides you might like


100% Human-Written. AI Fact-Checked. Community Verified. Learn how AntMag verifies content