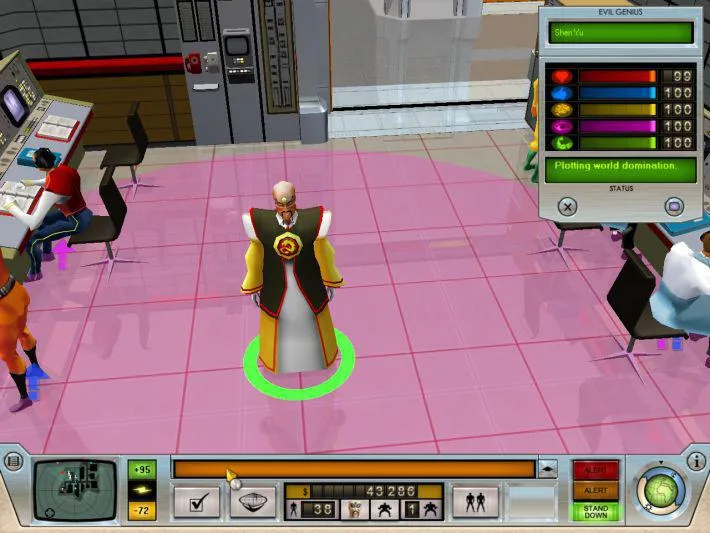
Welcome to Evil Genius, Elixir Studios' 2004 gem where you step into the shoes of a budding supervillain. This is a management and RTS game where you’ll build your secret lair, recruit a motley crew of minions, research diabolical devices, and execute world-threatening schemes, all while fending off pesky Agents of Justice. It’s a funny, classic take on the genre, perfect for anyone who’s ever dreamed of ruling the world from a volcano base.
This guide dives deep into mastering the art of world domination. We’ll cover everything from establishing your base and managing your minions to designing an effective lair and sabotaging enemy operations. Get ready to navigate the perilous world of supervillainy with expert strategies to help you achieve ultimate evil, whether you're aiming for specific mission success or just want to become the most notorious Evil Genius out there.
NAME - Price - Power - Size - Ht - Room
Learn about the essential facilities and equipment for your Evil Genius lair, from security cameras to advanced research machines, and their costs and power requirements.
Alright, let's talk about kitting out your evil lair! Building the right rooms and filling them with the best gear is key to running a successful operation. Think of this as your shopping list for maximum evil efficiency. We'll go through what you can build, how much it costs, and what kind of power it needs to run.
Corridor Essentials
| Item | Price | Power | Size | Height | Room |
| Fire Extinguisher | 2400 | 0 | 1W+1/0 | 0 | Corridor |
| Generic Door | 1200 | 2 | 2x1 | 0 | (Any) |
| Heavy Door (r) | 4000 | 6 | 2x1 | 0 | (Any) |
| Field Barrier Door (r) | 6400 | 7 | 2x1 | 0 | (Any) |
| Security Camera | 2400 | 1 | 1W | 0 | (Any) |
| Zoom Lens Camera (r) | 2400 | 3 | 1W | 0 | (Any) |
| Loudspeaker | 2400 | 1 | 1W | 0 | (Any) |
| HD Loudspeaker (r) | 4800 | 3 | 1W | 0 | (Any) |
| Radio Loudspeaker (r) | 4000 | 3 | 1W | 0 | (Any) |
Stronghold and Barracks Upgrades
| Item | Price | Power | Size | Height | Room |
| Briefcase Rack | 4000 | 0 | 2x1 | 0 | Stronghold |
| Gold Enhancer (1,r) | 80,000 | 7 | 2x1+0/1 | 2 | Stronghold |
| Bunk Bed | 400 | 0 | 1x1+0/2 | 0 | Barracks |
| Locker | 800 | 0 | 1x1+1/0 | 0 | Barracks |
| Equipment Storage (r) | 3200 | 0 | 2x1+2/0 | 0 | Barracks |
| Cryogenic Chamber (r) | 16,000 | 6 | 1x1+1/0 | 2 | Barracks |
| Multi Gym (r) | 4000 | 0 | 2x1+0/2 | 0 | Barracks |
Freezer and Control Room Tech
| Item | Price | Power | Size | Height | Room |
| Body Storage Rack | 4000 | 0 | 1x3+1/0 | 0 | Freezer |
| Time Clock | 4000 | 0 | 1W+1/0 | 0 | (2) |
| Control Panel | 8000 | 2** | 2x1+2/0 | 1 | Control Room |
| Memory Bank | 6000 | 1 | 1x1+1/0 | 1 | Control Room |
| Control Station (r) | 20,000 | 5* | 1x1+1/0 | 3 | Control Room |
| Stock Market Watchdog (1,r) | 20,000 | 15 | 2x2+4/0 | 2 | Control Room |
| Schematic Station (1,r) | 20,000 | 13 | 2x2+7/0 | 2 | Control Room |
| Comms Array (1,r) | 40,000 | 8*** | 3x1+3/0 | 5 | Control Room |
| Big Screen (r) | 40,000 | 3 | 6W | 5 | Control Room |
Armory and Mess Hall Facilities
| Item | Price | Power | Size | Height | Room |
| Holding Cell | 4000 | 0 | 2x2+2/0 | 10 | Armory |
| Death Chamber (r) | 24,000 | 5 | 2x2+2/0 | 10 | Armory |
| Disguised Holding Cell (r) | 12,000 | 0 | 2x2+2/0 | 10 | Armory |
| Interrogation Chair | 4000 | 0 | 1x1+1/0 | 2 | Armory |
| Security Desk | 2800 | 1* | 2x1+1/0 | 0 | Armory |
| Handgun Cabinet | 2000 | 0 | 1x1+1/0 | 10 | Armory |
| Rifle Cabinet | 4000 | 0 | 1x1+1/0 | 10 | Armory |
| Disguised Rifle Rack (r) | 8000 | 0 | 1x1+1/0 | 5 | Armory |
| Heavy Rifle Cabinet | 8000 | 0 | 1x1+1/0 | 10 | Armory |
| Flamethrower Cabinet (r) | 16,000 | 0 | 1x1+1/0 | 10 | Armory |
| Counter | 4000 | 0* | 2x3+1/2 | 0 | Mess Hall |
| Mess Counter | 12,000 | 0* | 2x3+1/2 | 0 | Mess Hall |
| Automat (r) | 16,000 | 5 | 2W+1/0 | 0 | Mess Hall |
| Salad Bar (r) | 6000 | 0 | 2x1+0/2 | 0 | Mess Hall |
Staff and Training Facilities
| Item | Price | Power | Size | Height | Room |
| Drinks Machine | 800 | 1 | 1x1+1/0 | 0 | Staff |
| Table Tennis | 1600 | 0 | 1x2+2/0 | 0 | Staff |
| Arcade Game (r) | 12,000 | 3 | 1x1+1/0 | 0 | Staff |
| Pinball (r) | 4000 | 1 | 1x1+1/0 | 0 | Staff |
| Widescreen TV (r) | 8000 | 4 | 2W+0/2 | 0 | Staff |
| Egg Chair (r) | 4000 | 0 | 1x1+0/1 | 0 | Staff |
| Mouse Maze | 2400 | 0 | 1x1 | 0 | Training |
| Training Punchbag | 4000 | 0 | 1x1+0/2 | 2 | Training (6) |
| School Desk | 4000 | 0 | 1x1+1/0 | 1 | Training (6) |
| Lab Workshop | 4000 | 0 | 2x1+2/0 | 1 | Training (6) |
| Chalkboard | 8000 | 0 | 3W+1/2 | 1 | Training (6) |
| TV Studio | 8000 | 5 | 3x2+1/2 | 3 | Training (6) |
| Heavy Shooting Range | 8000 | 0 | 4x2+2/0 | 10 | Training (6) |
| Biochem Lab | 16,000 | 3 | 2x1+2/0 | 5 | Training (6) |
| Electron Microscope | 16,000 | 5 | 2x1+1/0 | 5 | Training (6) |
| Dojo | 16,000 | 0 | 2x3+1/0 | 10 | Training (6) |
| Shooting Range | 16,000 | 0 | 8x1+1/0 | 5 | Training (6) |
| Playboy Training Equipment | 16,000 | 0 | 3x2+2/0 | 5 | Training (6) |
| Diplomat Trainer | 16,000 | 5 | 2x2+2/0 | 5 | Training (6) |
Laboratory and Archives Gear
| Item | Price | Power | Size | Height | Room |
| Fake research machine (1) | 4000 | 0 | 2x2 | 0 | Laboratory |
| Research machine (1) | 80,000 | 6 | 2x2+3/0 | 10 | Laboratory |
| Databank (1) | 4000 | 0 | 2x1+1/0 | 2 | Laboratory |
| AI supercomputer (1) | 80,000 | 12 | 3x3+1/0 | 5 | Laboratory |
| Environment Chamber (1) | 80,000 | 12 | 3x3+3/0 | 5 | Laboratory |
| Greenhouse (1) | 80,000 | 12 | 3x3+2/0 | 5 | Laboratory |
| Bio Tanks (1,r) | 40,000 | 10 | 2x3+3/0 | 2 | Laboratory |
| Giant Laser (1,r) | 40,000 | 5 | 1x4+2/0 | 2 | Laboratory |
| Centrifuge (1,r) | 40,000 | 5 | 2x2+3/0 | 2 | Laboratory |
| Impact Stress Analyzer (1,r) | 40,000 | 5 | 2x4+2/0 | 2 | Laboratory |
| Reading Table | 1600 | 0 | 1x2+0/2 | 0 | Archives |
| Microfiche Table (7) | 1600 | 0 | 1x2+0/2 | 0 | Archives |
| Multim. Educational Zone (r) | 20,000 | 3 |
- Don't skimp on security! Cameras and doors are your first line of defense.
- Research is crucial for unlocking better gear and abilities, so prioritize those lab machines.
- Keep your minions happy with a Mess Hall and Staff rooms; a well-rested minion is an effective minion.
- Remember that some items (marked with 'r') are 'required' for certain upgrades or functions, so plan accordingly.
NAME - Price - Pwr - Size - Ht - Room
Evil Genius traps and gadgets list including costs, power, size, and placement. Learn about Pressure Pads, Laser Trip Beams, Gas Traps, and more.
- 1Crash-Test Dummy: Costs 800, Power 0, Size 1x1, Height 0. Can be placed In or Out. This is a tool to test your trap system. When placed, 6 dummies walk out in a straight line with a 5-second delay between each. They trip any sensor in their path but will fall over and 'die' if they hit an obstacle, not changing direction.
- 2Pressure Pad: Costs 1600, Power 0, Size 1x1, Height 0. Can be placed In or Out. Trips when an agent steps on it. Ideal just inside a door, as agents will step on it again when trying to escape.
- 3Laser Trip Beams: Costs 6000, Power 1, Size 1W x2, Height 0. Can be placed In or Topside. Goes across to the next wall regardless of distance. Cannot be placed outside directly, but can be used between two topside shacks to link to outside traps, like detonating explosive trees.
- 4Motion Sensor: Costs 12,000, Power 2, Size 1W/1x1, Height 0. Can be placed In or Out. Covers a half-circle with a 3-square radius in front of it. If offset from a 2-width corridor by one square, it covers the corridor. In a 4-width corridor, it leaves a half-square gap. It is difficult to time for covering a corridor from the side due to its arc. Works well when placed to the side of a corridor with a long-range trap shooting down its length, and is good for setting off wide-area traps like bees.
- 5Gas: Poison (Health/Red): Costs 4800, Power 1, Size 2x2, Height 0. Can be placed In. A cage drops, filling with gas that attacks health.
- 6Gas: Knockout (Green/Endurance): Costs 8000, Power 1, Size 2x2, Height 0. Can be placed In. A cage drops, filling with gas that attacks endurance.
- 7Gas: Laughing (Purple/Attention): Costs 9600, Power 1, Size 2x2, Height 0. Can be placed In. A cage drops, filling with gas that attacks attention.
- 8Gas: Hallucination (Blue/Loyalty): Costs 8800, Power 1, Size 2x2, Height 0. Can be placed In. A cage drops, filling with gas that attacks loyalty.
- 9Gas: Nerve (Yellow/Smarts): Costs 12,800, Power 1, Size 2x2, Height 0. Can be placed In. A cage drops, filling with gas that attacks smarts.
- 10Bees (5 types): Costs 8000, Power 1, Size 1x1, Height 1. Can be placed In.
- 11Wind Machine: Costs 8000, Power 3, Size 1W, Height 1. Can be placed In. Blows anything in front of it up to 9 squares away, causing damage if they hit a wall. Useful for blowing agents into or past other sensors and traps.
- 12Giant Magnet: Costs 12,000, Power 4, Size 1W, Height 1. Can be placed In. Pulls agents towards the wall it's mounted in. More expensive and power-consuming than the Wind Machine, but can be placed further from sensors. Cannot be built or moved into topside shacks/hotels.
- 13Dreadmill: Costs 8000, Power 3, Size 1x2, Height 0. Can be placed In.
- 14Confusing Pop-Up: Costs 4000, Power 1, Size 1x1, Height 0. Can be placed In.
- 15Money Madness: Costs 20,000, Power 2, Size 1W/1x1, Height 0. Can be placed In or Out.
- 16Misdirection: Costs 6000, Power 2, Size 1x1, Height 0. Can be placed Out.
- 17Saw-Blade Trap: Costs 9600, Power 3, Size 1x3, Height 0. Can be placed In.
- 18Prometheus's Revenge: Costs 12,000, Power 3, Size 1W, Height 1. Can be placed In. A panel opens in the wall and a flame gout comes out extending 8 squares, damaging sensors or objects in its path. Can be used by setting multiple across a corridor or by offsetting a motion detector/laser one square to the side and having the flame shoot down the length of it. The last square of its apparent 9-square range is a visual effect.
- 19Pit Punisher: Costs 9600, Power 1, Size 1x1, Height 5. Can be placed In or Out.
- 20Satan's Chimney: Costs 9600, Power 2, Size 1x1, Height 5. Can be placed In or Out.
- 21Piranha Tank: Costs 16,000, Power 2, Size 1x2, Height 0. Can be placed In.
- 22ElectroShock Cannon: Costs 24,000, Power 6, Size 2x2, Height 10. Can be placed In or Out.
- 23Venus Man-Trap: Costs 16,000, Power 1, Size 2x2, Height 0. Can be placed Out.
- 24Explosive Palm-Tree: Costs 13,600, Power 1, Size 1x1, Height 10. Can be placed Out.
- 25Damned Damsel: Costs 8000, Power 2, Size 1x1, Height 0. Can be placed Out.
- 26Monkey-In-A-Box *BROKEN*: Costs 8000, Power 2, Size 1x1, Height 0. Can be placed Out. This trap is noted as broken.
- Agents do not keep walking once they trip a sensor; they may stop, leap over them, or jump to the side. A good trap combo will tag the agent if they stop where they trip the sensor or walk up to 2 squares past it. For pressure sensors, create a T-junction and have traps attack from the side.
- Most traps take a short time to activate, enough for an agent to walk two squares after tripping the sensor, but this is unpredictable.
- Wind Generators and Giant Magnets can damage agents by pushing/pulling them into walls, but are better used for dragging agents into other traps.
- Gas traps require a cage to drop and fill with gas. If the cage doesn't land on the agent, they can walk through it. If caught, they take the full effect. These traps have a high rate of missing.
- Giant Magnets cannot be built or moved into topside shacks/hotels.
- Laser Trip Beams can be used between two topside shacks to link to outside traps.
Name Rad Frq Loy Attn Smrt Endr aLoy aAtn aSmt aEnd
A comprehensive reference guide for Evil Genius, detailing item stats, aura effects, and buildable items to optimize your evil lair and minion management.
This section provides a detailed breakdown of various items and their associated stats in Evil Genius. It includes information on their aura effects (Radius, Frequency, Loyalty, Attention, Smarts, Endurance), as well as adjusted aura values. Some items are buildable (marked with '(b)') and some have special properties.
| Name | Rad | Frq | Loy | Attn | Smrt | Endr | aLoy | aAtn | aSmt | aEnd |
|---|---|---|---|---|---|---|---|---|---|---|
| Max's Aura | 6 | 1 | 0.5 | 0.5 | -- | -- | 0.50 | 0.50 | -- | -- |
| Alexis' Aura | 12 | 0.8 | 0.3 | 0.3 | -- | -- | 0.38 | 0.38 | -- | -- |
| Shen Yu's Aura | 4 | 1 | 1.5 | 1.5 | -- | -- | 1.50 | 1.50 | -- | -- |
| Codebreaker | 5 | 2 | 0.5 | -- | -- | -- | 0.25 | -- | -- | -- |
| Crown Jewels | 9 | 2 | 0.5 | -- | -- | -- | 0.25 | -- | -- | -- |
| Giant Diamond | 8 | 1 | 0.1 | -- | -- | -- | 0.10 | -- | -- | -- |
| Jetpack | 3 | 1 | 0.2 | -- | -- | -- | 0.20 | -- | -- | -- |
| Aztec Amulet | 10 | 4 | 1 | 0.2 | -- | 0.2 | 0.25 | 0.05 | -- | 0.05 |
| SpaceSuit | 7 | 2 | 0.5 | -- | -- | -- | 0.25 | -- | -- | -- |
| Rocket Plans | 6 | 2 | 0.5 | -- | 0.5 | -- | 0.25 | -- | 0.25 | -- |
| UL: Excalibur | 10 | 5 | 1.5 | -- | 0.2 | -- | 0.30 | -- | 0.04 | -- |
| UL: Eiffel Tower | 10 | 5 | 1 | 0.2 | -- | -- | 0.20 | 0.04 | -- | -- |
| UL: Bill | 10 | 5 | 1 | -- | -- | 0.2 | 0.20 | -- | -- | 0.04 |
| UL: Samurai Armor | 8 | 6 | 2 | -- | -- | -- | 0.33 | -- | -- | -- |
| UL: Sarcoph. (1) | 10 | 3 | 0.3 | -- | -- | -- | 0.10 | -- | -- | -- |
| UL: Ark | 10 | 5 | 1 | 1 | -- | 1 | 0.20 | 0.20 | -- | 0.20 |
| Totem Pole | 8 | 6 | 1 | 1 | 1 | 1 | 0.17 | 0.17 | 0.17 | 0.17 |
| Mercury Mirror | 4 | 1 | 0.2 | -- | -- | -- | 0.20 | -- | -- | -- |
| Ice Man | 6 | 2 | 0.3 | -- | -- | -- | 0.15 | -- | -- | -- |
| Sonic Generator | 6 | 1 | 0.2 | -- | -- | 0.2 | 0.20 | -- | -- | 0.20 |
| Chameleon Cloth | 5 | 1 | 0.4 | 0.1 | -- | -- | 0.40 | 0.10 | -- | -- |
| Antique Cannon | 7 | 1.5 | 0.3 | 0.1 | -- | -- | 0.20 | 0.07 | -- | -- |
| Roman Galley | 5 | 1.5 | 0.5 | -- | -- | -- | 0.33 | -- | -- | -- |
| Stolen Throne | 8 | 1 | 0.5 | -- | -- | -- | 0.50 | -- | -- | -- |
| Persian Rug | 5 | 3 | 1 | -- | -- | -- | 0.33 | -- | -- | -- |
| PAT. Doom. Piece | 12 | 4 | 1.5 | -- | 0.2 | -- | 0.38 | -- | 0.05 | -- |
| SABRE Doom. Piece | 14 | 5 | 1 | -- | 0.2 | -- | 0.20 | -- | 0.04 | -- |
| ANVIL Doom. Piece | 12 | 3 | 1.2 | -- | -- | 0.2 | 0.40 | -- | -- | 0.07 |
| Classical Statue | 6 | 1 | 0.4 | -- | -- | -- | 0.40 | -- | -- | -- |
| Babylonian Vase | 5 | 1.5 | 0.3 | -- | -- | -- | 0.20 | -- | -- | -- |
| Grecian Urn | 6 | 1 | 0.25 | -- | -- | -- | 0.25 | -- | -- | -- |
| Etruscan Vase | 7 | 0.8 | 0.15 | -- | -- | -- | 0.19 | -- | -- | -- |
| Painting (japan) | 4 | 1 | 0.2 | -- | 0.5 | -- | 0.20 | -- | 0.50 | -- |
| Painting (cuba) | 6 | 0.5 | 0.2 | -- | 0.4 | -- | 0.40 | -- | 0.80 | -- |
| Big Screen (2,b) | 12 | -- | -- | -- | -- | -- | -- | -- | -- | -- |
| Mouse Maze (b) | 8 | 1 | 0.2 | 0.2 | -0.05 | -- | 0.20 | 0.20 | -0.05 | -- |
| Body Bag | 6 | 1.5 | -0.2 | -0.2 | -- | -- | -0.13 | -0.13 | -- | -- |
| Totem Pole pc#1 | 10 | 5 | -1 | -- | -- | -- | -0.20 | -- | -- | -- |
| Totem Pole pc#2 | 10 | 5 | -- | -- | -1 | -- | -- | -- | -0.20 | -- |
| Totem Pole pc#3 | 10 | 5 | -- | -1 | -- | -- | -- | -0.20 | -- | -- |
| Totem Pole pc#4 | 10 | 5 | -- | -- | -- | -1 | -- | -- | -- | -0.20 |
Notes:
- (1) - The Sarcophagus also regenerates health at the rate of 0.1 every 3 seconds (adjusted rate: 0.03/sec). It is beneficial to place near diplomat trainers as they drain minion health.
- (2) - The Big Screen boosts the max attention stat of minions by 20% while they remain in range. It also boosts their current attention stat upon initial effect, which then decays normally.
- (b) - Indicates that the item is buildable.
TextDescription=WORLD_DOMINATION_MANAGER
Configure Evil Genius world domination settings like Plotting Decay, Looting Interval, and Henchman Return Delay. Includes trap cheat.
The World Domination Manager settings are controlled by specific values that dictate game behavior. These include:
- PlottingDecay: Set to 1.
- PlottingInterval: Set to 5.
- LootingInterval: Set to 60 seconds.
- ChanceOfJusticePresence: Set to 50.
- JusticePresenceCheckInterval: Set to 600 seconds.
- HenchmanReturnDelay: Set to 300 seconds.
- CharacterFocusDuration: Set to 1 second.
- AttritionFocusDuration: Set to 0.25 seconds.
- ActFocusDuration: Set to 0.5 seconds.
- HidingDuration: Set to 600 seconds (10 minutes). The default is 120 seconds if the file is not present. You can change this value in the configuration file.
Plotting Rating Thresholds: 1, 3, 4, 6, 9
Looting Rating Thresholds: 1, 3, 4, 5, 6
Toughness Rating Thresholds: 21, 31, 41, 61, 80
ChanceOfJusticePresenceModifier: 5, 1800
CHEAT/MOD (a community-made modification that changes the game): Enabling wall-mounted traps to be built inside topside shacks:
Create the following three files in the \config\ folder:
17204-Trap_Wind_Machine.desc
- ObjType=Trap
- ObjName=WIND_MACHINE_TRAP
- Filename=Traps_JetEngine_A.GR2
- Filename=AnimSet_WindMachineTrap.AS
Similar guides you might like


100% Human-Written. AI Fact-Checked. Community Verified. Learn how AntMag verifies content