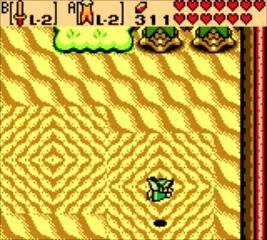
Welcome to Holodrum, adventurer! In The Legend of Zelda: Oracle of Seasons, you'll step into Link's green tunic once again to restore balance to the land. This action-adventure game tasks you with wielding the Rod of Seasons, a powerful artifact that lets you change the seasons themselves. You'll explore a vibrant world, delve into challenging dungeons, and battle formidable foes as you work to thwart the evil General Onox and rescue the Oracle of Seasons, Din.
This guide is here to help you conquer every aspect of Oracle of Seasons. We'll walk you through every dungeon, detail how to acquire every item, and provide strategies for defeating bosses like Onox. Whether you're aiming to find all the hidden secrets, master the Rod of Seasons' powers, or simply complete the main quest, this guide has the information you need to succeed on your epic journey across Holodrum.
Prologue
Learn how The Legend of Zelda: Oracle of Seasons begins with Din, Onox, and the sealing of the Oracle of Seasons.
- 1In North Horon, walk right and talk to Din, who is dancing.
- 2Talk to everyone else in the Performance Troupe.
- 3Talk to Din again.
- 4After dancing with Link, Din notices the Triangle mark on his left hand.
- 5The campsite goes dark, and lightning strikes, destroying most of the camp.
- 6A voice identifies itself as Onox and proclaims Din is the Oracle of Seasons.
- 7A tornado appears, sweeping Din away while Link is thrown aside.
- 8Onox traps Din, the Oracle of Seasons, into a crystal, sealing her powers.
- 9Onox sinks the Temple of Seasons into the underworld, weakening the power of nature.
- 10When Link wakes up, Impa will be by his side.
- 11Impa explains the situation to Link and tells him to deliver a message to the Maku Tree.
Level 1 - Gnarled Root Dungeon
Navigate the Gnarled Root Dungeon in The Legend of Zelda: Oracle of Seasons. Find the Seed Satchel, Dungeon Map, and defeat Aquamentus.
- 1From the entrance at F-4, head up to E-4.
- 2In E-4, move the top-right block to open doors, then go right.
- 3In E-5, defeat all Stalfos to collect a Small Key. Then, use a Small Key to go left two screens to E-3.
- 4In E-3, defeat all Stalfos and collect the Dungeon Map from the chest. Go up.
- 5In D-3, defeat the Zol (Blobs) and jump on the mine cart, which will take you to C-2.
- 6In C-2, defeat the Moblins. Move the middle block to open a door, then go left to C-1.
- 7In C-1, navigate the maze: walk left until you hit a block, push the block below down, push the block on your left to the left, walk up, left, down, move the block below down, push the block on your left to the left. Head up to collect a Gasha Seed from the chest. Jump down and exit the room.
- 8Return to C-2. Head up the steps on the right, then go right. Hit the switch and collect the Compass from the chest on your right. Go back left, down the steps, and jump in the mine cart to reach C-4.
- 9In C-4, go left and collect Bombs from the chest. Go back right, up the steps, then down the steps on the right. Follow the path to a switch, step on it to reveal a chest with a Small Key. Head back, go up the steps, then go left and Bomb the weak section of wall. Head up to B-4.
- 10In B-4, navigate the maze, using the alcove to avoid spikes. Use a Small Key to unlock the door and head up.
- 11In A-4, you will face the Mini-Bosses, the Twin-Minotaurs. After defeating them, go left.
- 12In A-3, move the far-left block up, then go down the stairs. Collect the Seed Satchel with Ember Seeds. Use Ember Seeds to light Torches. Go back up the stairs, move the block below the far-left one down, then go right and jump on the warp to D-3.
- 13In D-3, use Ember Seeds on the torches on the left to open the door, then go through.
- 14In D-2, defeat all Moblins and open the chest to get a Boss Key. Go right, down, right, push the top-right block, then go right. Light the torches and go up to D-5.
- 15In D-5, avoid the Wall Masters and open the chest to get a Magic Ring. Go right via the top path and use the Boss Key on the Boss Door to reach C-6 and Aquamentus.
- 16In C-6, fight Aquamentus the Unicorn Dragon. After defeating him, collect the Heart Container, then head right to collect the Fertile Soil.
- Use Ember Seeds to light torches and open doors.
- Remember to use Bombs to destroy weak walls.
- The Twin-Minotaurs are the mini-bosses in A-4.
- Aquamentus is the boss found in C-6.
Level 6 - Ancient Ruins
Navigate The Legend of Zelda: Oracle of Seasons' Ancient Ruins dungeon. Find the Magic Boomerang and defeat the mini-boss Vire.
- 1From 1F D-3, go up twice to 3F.
- 2From 3F B-3, go down and then right.
- 3In the next room (C-4), open the chest to get the Magic Boomerang.
- 4Kill all the Armos Knights with the Magic Boomerang. When the door opens, head left and drop down the hole in the bottom-left corner to 1F.
- 5From 1F C-3, go left, head up the steps and go up and then left.
- 6From 1F B-1, open the chest in the top-right corner for 10 Rupees. Make your way through the maze of traps to the button in the bottom right corner. Stand to the left of the spike, then quickly step on the button and head up through the newly opened door to 1F A-1.
- 7From 1F A-1, use the Magic Boomerang to curve around the statues to hit the crystal switch and then head up the stairs to 2F.
- 8From 2F A-1, go down to 2F B-1.
- 9From 2F B-1, use the Magic Boomerang to hit the moving crystal switch and then go down through the newly opened door and jump down the hole to 1F.
- 10From 1F C-1, head down, right a little, up and light all the torches with a Slingshot equipped with Ember Seeds. Head up the stairs that appear to 2F.
- 11From 2F C-1, go right to 2F C-2.
- 12Equip Pegasus Seeds on one button and the Roc's Feather on the other. Collect the Large Red Ruby. Run right, around, and left through the door before the room crushes you, using Pegasus Seeds and jumping over traps.
- 13From 2F C-1, collect the Boss Key and then exit the room and go up the stairs to 3F.
- 14From 3F C-2, kill all the Skull Knights and move the top-left block to open the door. Head up to 3F B-2.
- 15From 3F B-2, drop down the hole, head down and around, and open the chest to get a Small Key. Hop on the trampoline to get back up. Use the Small Key to head up to 3F A-2.
- 16From 3F A-2, you will fight the Mini Boss called Vire. Go right to 3F A-3.
- 17From 3F A-3, run right past the traps without stopping.
- 18From 3F A-4, jump over the rollers when they roll towards you, then step on the switch in the corner and head down to 4F.
- 19From 4F B-4, step on a switch.
- The Dungeon Map is located at 1F B-2.
- The Compass is located at 1F B-4.
- A Small Key is located at 2F B-3.
- Another Small Key is located at 1F A-2.
- The entrance to the dungeon is at 1F D-3.
- The boss is located at 5F A-3.
- Use the Magnetic Gloves to attract and repel Magnetic Balls to solve puzzles.
- When navigating the crushing room at 2F C-2, use Pegasus Seeds and the Roc's Feather to move quickly.
Quest for the Seed of Life
Guide to the Quest for the Seed of Life in The Legend of Zelda: Oracle of Seasons, including how to get the Pirate Bell and enter the Explorer's Crypt.
- 1Warp to Horon Village and exit east.
- 2Go down through the hollow log to reach Eastern Coast.
- 3Head right and talk to the Skeleton Pirate.
- 4Travel to a vortex leading to Subrosia. The one on Mt. Cucco is closest unless the bridge inside the Horon Village cave has been retracted.
- 5Enter the Pirate Skeleton House in the SW of Subrosia Cemetery.
- 6Talk to the Ship's Captain, who has lost his Pirate Bell.
- 7Go up the stairs and talk to the Pirate Skeleton on the right.
- 8Observe the sequence shown using the cupboards. If numbered 1 to 4 from left to right, the sequence is 33211444.
- 9Head up the stairs and enter the vortex back to the overworld.
- 10If you haven't already, hit the switch to retract the bridge. This vortex is accessible via the stairs in south Horon Village.
- 11Exit the cave and head to the Skeleton Pirate on Eastern Coast.
- 12Talk to the Skeleton Pirate and enter the sequence using the four skulls shown by the pirate, using the four cupboards.
- 13You can now head up onto Samasa Desert.
- 14Find and enter the buried Pirate Ship.
- 15Talk to the Red Skeleton Pirate inside.
- 16Exit the ship and head NE to an Oasis.
- 17Pick up the Red Skull at the Oasis.
- 18Carry the Red Skull around the sand whirlpools in the desert until its teeth chatter, indicating you should drop down the nearest sand whirlpool with it.
- 19Collect the Rusty Bell from down the sand whirlpool.
- 20Resurface via the stairs and exit the cave.
- 21Re-enter the buried Pirate Ship.
- 22Move the brown crate up and out of the way.
- 23Go up the stairs.
- 24Head to the Subrosian Smithy in Subrosia Village and talk to him. He will restore the Rusty Bell into the Pirate Bell.
- 25Take the Pirate Bell to the Ship's Captain and talk to him. He will take Link in his Ship to the other side of Western Coast.
- 26Depart from the ship and head up to enter the house.
- 27Open the chest for some Bombs.
- 28Throw a bomb over the hole at the crack in the wall.
- 29Go right and exit via the doorway below.
- 30Change the season to Summer.
- 31Go back into the house and out the other exit.
- 32Go down, down, left, left, up via the vine, up, and then down the stairs to enter the Explorer's Crypt.
- The vortex to Subrosia can be accessed from multiple locations.
- The cupboard sequence is crucial for progressing in the Samasa Desert.
- Using the Red Skull with sand whirlpools is necessary to find the Rusty Bell.
- Changing the season to Summer is required to access the Explorer's Crypt.
Similar guides you might like


100% Human-Written. AI Fact-Checked. Community Verified. Learn how AntMag verifies content