
Oxenfree is a supernatural thriller adventure game where you play as Alex, a troubled teenager who brings her new stepbrother Jonas to an overnight party on a remote island. What starts as a typical teenage hangout quickly turns sinister as a ghostly rift opens, forcing Alex and her friends to confront a terrifying entity tied to the island's dark past. You'll spend your time exploring the island, managing conversations with your friends through a unique dialogue system, and making choices that shape your relationships and the unfolding mystery.
This guide will help you navigate the supernatural mysteries of Edwards Island. We’ll cover how to find all the hidden anomalies scattered across the island, master the dialogue system to achieve the best outcomes for Alex and her friends, and understand the story progression to unravel the secrets of the island and its spectral inhabitants. Get ready to master controls, character interactions, and story progression to uncover everything Oxenfree has to offer.
Overview
Master the narrative adventure Oxenfree. This guide details mechanics and island mysteries, helping you uncover every secret and dialogue choice.
Overview
Master the narrative adventure Oxenfree. This guide details mechanics and island mysteries, helping you uncover every secret and dialogue choice.

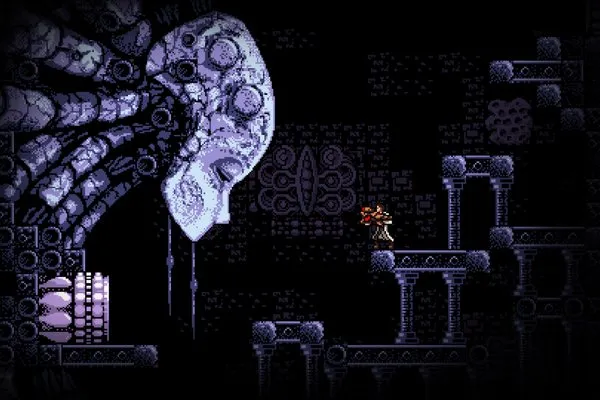
Investigating the Military Base
Oxenfree: Investigate the Military Base. Solve radio puzzles, find audio logs, and reach the Communications Tower using precise frequencies.
Following your unsettling discoveries at the Adler Estate, your journey continues westward towards the ominous Military Base Entrance. This section of Edwards Island presents a significant shift in gameplay, introducing more complex environmental puzzles that demand keen observation and precise radio manipulation. The atmosphere here is heavy with the echoes of past experiments and forgotten secrets.
Navigating to the Military Base
The path to the Military Base is linear but punctuated by obstacles. Keep your radio handy and your eyes peeled for visual cues. As you approach the main gate, you'll encounter your first major radio-based puzzle.
- Military Base Gate Puzzle: To open the initial gate, you'll need to tune your radio to a specific frequency. Listen for the distinct, rhythmic static that indicates a frequency related to a mechanism. The correct frequency for the main gate is typically around 104.7 MHz. Hold the frequency steady until the gate fully retracts.
Once inside the perimeter, the path will lead you through dilapidated barracks and overgrown research facilities. The air grows colder, and the whispers of the island's past become more pronounced.
Exploring the Abandoned Facilities
The Military Base is a labyrinth of interconnected structures, each holding clues to the island's dark history. Your primary objective here is to locate the Communications Tower, but a thorough exploration will reward you with invaluable lore and progress the narrative significantly.
Key Locations and Puzzles within the Base:
- Barracks A (First Building on Left):
- Radio Puzzle - Locked Door: Inside Barracks A, you'll find a locked door blocking access to a small office. To open it, you'll need to find a frequency that resonates with the old electronic lock. Scan the dial carefully; the frequency is often around 98.1 MHz. Holding this frequency will unlock the door.
- Collectible - Audio Log (Barracks Log 1): Inside the unlocked office, on a dusty desk, you'll find an old reel-to-reel tape player. Interact with it to play Audio Log #3: "Project Echo - Initial Findings." This log details the early, unsettling results of the military's experiments with dimensional rifts and resonance.
- Research Lab (Central Building):
- Environmental Puzzle - Power Conduit: The main research lab is dark. To proceed, you'll need to restore power. Locate a flickering power conduit on the wall. Tune your radio to a frequency that stabilizes the conduit's energy flow. This frequency is usually around 102.3 MHz. Maintaining this frequency will illuminate the lab.
- Collectible - Audio Log (Research Log 1): Once the power is restored, a console in the center of the lab becomes active. Interact with it to play Audio Log #4: "The Anomalies of Edwards Island." This log provides crucial information about the entities' nature, their connection to specific frequencies, and the military's attempts to weaponize them. This is a particularly important lore piece.
- Collectible - Message in a Bottle: Near a broken window in the research lab, you might spot a glint. Interact with it to pick up Message in a Bottle #2, offering a cryptic personal account from a former base resident.
- Storage Depot (Rear Building):
- Radio Puzzle - Automated Crane: To clear a path through the storage depot, you'll need to activate an old automated crane. The control panel is broken, but your radio can override it. The frequency to activate the crane and move the obstructing crates is typically around 106.9 MHz. Hold it until the path is clear.
- Collectible - Audio Log (Storage Log 1): On a shelf near the crane controls, you'll find another tape player. This contains Audio Log #5: "Evacuation Order." This log details the chaotic final moments of the base's abandonment, hinting at a sudden and violent incident.

Reaching the Communications Tower
After navigating the various facilities, your path will converge towards the imposing Communications Tower, visible in the distance. As you approach, the radio static will intensify, indicating a strong presence of the entities.
- Communications Tower Access: The final approach to the tower is often guarded by a locked gate or a malfunctioning elevator. The frequency to bypass this final obstacle is usually around 108.0 MHz. This frequency is particularly volatile and may require more precise tuning and holding.
Upon reaching the Communications Tower, a significant narrative event will trigger. Prepare for a tense encounter and revelations that will deepen your understanding of the island's supernatural phenomena and your role within it. The tower acts as a focal point for the entities' influence, and your interaction here will have lasting consequences.
Important Considerations and Tips:
- Radio Sensitivity: The radio puzzles in the Military Base often require more precise tuning than earlier sections. Listen carefully for the distinct sounds associated with each mechanism – a steady hum, a rhythmic pulse, or a high-pitched whine.
- Environmental Clues: Always look for visual cues. Flickering lights, sparking wires, or subtle shifts in the environment often indicate a nearby radio puzzle or an interactable object.
- Dialogue Choices: Your conversations with Ren, Nona, Jonas, and Clarissa continue to shape your relationships. Pay attention to their reactions, especially during the more unsettling discoveries within the base.
- Missable Lore: The audio logs and messages in a bottle are easily missed if you rush through the area. Take your time to explore every room and interact with all glowing objects. These provide critical backstory and context for the game's events.
The Military Base is a pivotal location in Oxenfree, rich with lore and challenging puzzles. A thorough investigation will not only advance the plot but also provide a deeper, more unsettling understanding of Edwards Island's dark secrets.
Finding Ren and Jonas
Oxenfree guide to finding Ren and Jonas after the cave. Get step-by-step navigation advice from the cave exit to the General Store and managing Ren's emotions.
Following the unsettling events within the cave, Alex finds herself separated from the group, alone with Jonas. Your immediate objective is to locate Ren, who has also become separated. This section will guide you step-by-step from the cave exit to reuniting with Ren near the General Store, offering crucial navigational cues and advice on managing Ren's emotional state.
Phase 1: Navigating from the Cave to Main Street
Upon exiting the cave, you'll find yourself on a narrow path. Jonas will be by your side, and dialogue will naturally flow as you both process the recent supernatural encounter. Pay close attention to your surroundings and your radio for signs of paranormal activity.
- Starting Point: Cave Exit
- From the cave mouth, head directly east (right) along the winding dirt path.
- Jonas will initiate conversation, expressing his unease. Your dialogue choices here primarily affect your relationship with Jonas, but for now, focus on reassuring him and staying calm.
- First Screen: The Overlook Path
- This area is characterized by dense foliage and a slight incline. Continue following the path eastward.
- Navigational Cue: You'll pass a distinctive, gnarled tree on your right.
- Keep your radio tuned. You might pick up faint static or distorted voices as you traverse this area, hinting at the island's supernatural presence.
- Second Screen: The Crossroads
- The path will widen slightly, presenting a subtle fork. Take the path that continues east (right). The other path leads to a dead end for now.
- Navigational Cue: Look for an old, weathered signpost, though its text may be illegible.
- Jonas may comment on the eerie quietness or the strange atmosphere.
- Third Screen: The Coastal Trail Entrance
- This screen transitions from dense woods to a more open area with glimpses of the ocean. Continue heading east.
- Navigational Cue: You'll see a small, dilapidated wooden fence running parallel to the path on your left.
- You are now approaching the Main Street area.
- Reaching Main Street
- The path will open up into a wider, more established road. This is Main Street.
- Navigational Cue: You'll immediately notice the distinct architecture of the island's buildings, including the prominent General Store ahead.
- Continue walking east (right) along Main Street.
Phase 2: Locating Ren and Managing His Fear
As you proceed down Main Street, keep an eye out for Ren. He will be visibly distressed, leaning against the side of the General Store building, near its entrance.

Upon approaching Ren, a dialogue sequence will automatically trigger. Ren is profoundly shaken by his own encounter with the supernatural entity. Your dialogue choices here are critical, as they directly influence his emotional state and your relationship with him. Aim to reassure him to foster a stronger bond and potentially unlock different dialogue options later in the game.
Dialogue Choices and Their Impact on Ren:
Ren's fear level is a hidden stat that can be influenced by your responses. A more reassured Ren will be more cooperative and less prone to panic, while an increasingly fearful Ren may become withdrawn or even hostile.
- Reassuring Ren (Positive Impact):
- Example 1: "It's okay, Ren. We're here now."
- Impact: Lowers his fear. Shows empathy and support.
- Strategy: Choose options that validate his feelings but also offer comfort and a sense of security.
- Example 2: "We'll figure this out together."
- Impact: Lowers his fear. Emphasizes teamwork and shared responsibility.
- Strategy: Focus on collective action and problem-solving, rather than dismissing his experience.
- Example 3: "What did you see? Tell us." (If offered as an option)
- Impact: Can be neutral to slightly positive. Shows you're listening and taking him seriously, which can be reassuring.
- Strategy: Active listening is key to making him feel heard.
- Example 1: "It's okay, Ren. We're here now."
- Exacerbating Ren's Fear (Negative Impact):
- Example 1: "Stop being such a baby, Ren."
- Impact: Significantly increases his fear and resentment. Damages your relationship.
- Strategy: Avoid dismissive, mocking, or critical remarks.
- Example 2: "You're just imagining things."
- Impact: Increases his fear and makes him feel invalidated.
- Strategy: Do not deny his experience, even if you don't fully understand it yourself.
- Example 3: "We're all going to die!" (If offered as a panic-driven option)
- Impact: Dramatically increases everyone's fear, including Ren's.
- Strategy: Avoid choices that amplify panic or hopelessness.
- Example 1: "Stop being such a baby, Ren."
After a brief but intense conversation, Ren will join Alex and Jonas. The group will collectively decide that the strange occurrences warrant further investigation, and the Adler Estate becomes your next destination, as it is believed to hold clues to the island's mysteries. This decision marks the successful completion of your mission to find Ren.
Summary of Key Actions:
- Travel East from the Cave Exit.
- Navigate through the Overlook Path, Crossroads, and Coastal Trail Entrance.
- Reach Main Street and proceed East.
- Locate Ren near the General Store.
- Engage in dialogue, choosing reassuring options to manage Ren's fear.
- Formulate a plan to head to the Adler Estate.
Act 1: The Beach and the Cave
Navigate the initial events of Oxenfree, from the ferry to the beach bonfire and the mysterious cave encounter.
Your adventure begins on the ferry to Edwards Island. After some initial dialogue with Ren and Jonas, you'll arrive at the beach. Your first objective is to find a good spot for a bonfire. Follow Ren and Jonas up the path. You'll soon encounter Nona and Michael. Engage in dialogue to establish initial character relationships. Remember, your choices here can set the tone for future interactions.

Once the bonfire is lit, Ren will suggest exploring the nearby cave. Follow the group into the cave. Inside, Ren will discover a strange radio signal. This is your first introduction to the core radio mechanic. Tune your radio to the frequency Ren indicates (around 140.0 MHz) to hear distorted voices. This will trigger the first supernatural event, causing the group to be separated and transported to different locations on the island. Your immediate goal is to find your friends.
Similar guides you might like


100% Human-Written. AI Fact-Checked. Community Verified. Learn how AntMag verifies content