Master Marathon Infinity's gameplay mechanics, from weapon management to secret hunting. Learn strategies for survival against the Pfhor threat.
Mastering Marathon Infinity requires a deep understanding of its core mechanics. Unlike its predecessors, Infinity often throws players into scenarios with limited resources and unexpected twists. This section will break down essential gameplay elements, from weapon management to secret hunting, providing actionable strategies to help you survive and conquer the Pfhor threat.
Weaponry and Ammunition Management
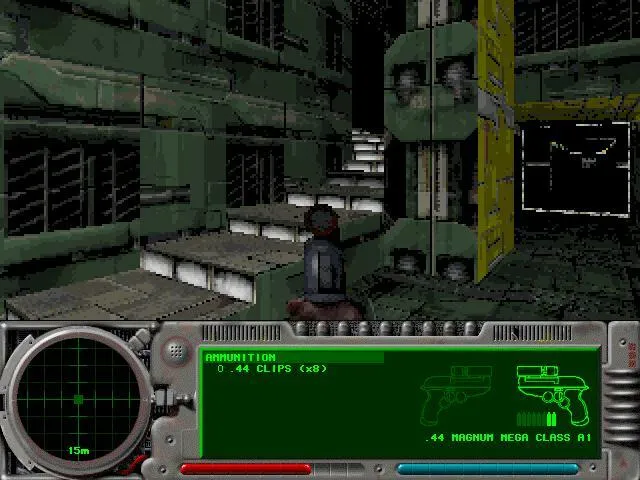
Your arsenal in Marathon Infinity is diverse, but ammunition is frequently scarce. Efficient weapon use is paramount.
- Magnum (.44 ACP): Your starting pistol. While not powerful, its infinite ammunition for the primary fire (single shot) makes it a reliable last resort. The secondary fire (burst) consumes ammo quickly but can be effective against weaker enemies or for finishing off damaged foes. Conserve its limited burst ammo for critical situations.
- Assault Rifle (MA-75B): A versatile weapon with both projectile and grenade launcher capabilities.
- Primary Fire (Projectiles): Good for sustained fire against most enemies. Aim for headshots on Pfhor for quicker takedowns.
- Secondary Fire (Grenades): Excellent for clearing groups of enemies or damaging heavily armored targets like Hunters. However, grenades are scarce. On levels like "Aye Mak Sikur," you might find a few extra grenades near the initial spawn point or hidden in alcoves. Use them judiciously.
- Shotgun (M.75): Devastating at close range. Ideal for clearing tight corridors or dealing with charging F'lickta. Its spread makes it less effective at a distance. Look for shotgun shells in crates or dropped by specific Pfhor troopers.
- Fusion Pistol: A powerful energy weapon.
- Primary Fire (Single Shot): Good for precise, damaging shots.
- Secondary Fire (Charged Shot): Consumes more energy but delivers a high-damage blast, capable of one-shotting many standard enemies. Essential for dealing with Juggernauts or groups of Hunters. Energy cells are often found near security terminals or in more challenging areas.
- Flamethrower (TOZT-7): Excellent for crowd control and area denial. Effective against F'lickta and other organic enemies. Fuel is often limited, so use short bursts to conserve.
- Rocket Launcher (SPNKR): The ultimate heavy weapon. Rockets are incredibly powerful but extremely rare. Save these for bosses, Juggernauts, or situations where you are heavily outnumbered. On "La Cosa Nos," a hidden cache of rockets might be found behind a destructible wall or a cleverly concealed switch.
Shields and Health Management
Your shields are your primary defense. Understanding how they recharge and how to find health is crucial.
- Shield Recharge Stations: These glowing panels are your best friend. They come in two varieties:
- Standard Recharge: Slowly replenishes your shields. Step onto them and wait.
- Rapid Recharge: Found less frequently, these recharge your shields much faster. Prioritize these when available.
- Health Canisters: Small, green canisters that restore a portion of your health. Often found in less obvious locations or dropped by specific enemies.
- Health Stations: Similar to shield stations but restore health. These are rarer and often found in critical areas or after major combat encounters.
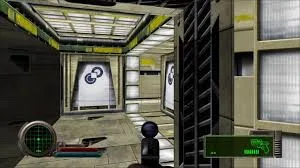
Terminal Interaction and Story Progression
Terminals are not just for lore; they often provide critical mission objectives, hints, and even activate switches.
- Reading Terminals: Always read every terminal you encounter. They frequently contain vital information about your current objective, enemy weaknesses, or the location of hidden items. For example, on "Fatum Iustum Stultorum," a terminal might hint at a specific sequence of switches required to open a locked door.
- Activating Switches: Some terminals require activation to open doors, extend bridges, or disable traps. Pay attention to the text for clues on what has been activated.
- Double Aught Terminals: These are particularly important in Infinity. They often contain cryptic messages or trigger unique events. For instance, on "Aye Mak Sikur," locating and interacting with a specific Double Aught terminal might reveal a secret passage or an unexpected enemy ambush, so be prepared.
Secret Hunting and Exploration
Marathon Infinity is renowned for its secrets. Many levels contain hidden passages, weapon caches, and even alternative routes.
- Look for Discolorations: Walls that look slightly different, have unusual textures, or show subtle cracks often indicate a secret door or a destructible surface.
- Listen for Clues: Sometimes, a faint hum or a different sound when walking near a wall can indicate a secret.
- Press Every Switch: Even seemingly innocuous switches can reveal hidden areas. Don't be afraid to experiment.
- "Thing What Kicks...": This level is notorious for its secrets. A common strategy is to meticulously check every wall section, especially those that seem out of place. Sometimes, shooting a specific wall panel will reveal a hidden compartment.
- "La Cosa Nos": This level often features hidden areas accessible by activating specific switches in a particular order, or by finding pressure plates that temporarily open secret doors.
100% Human-Written. AI Fact-Checked. Community Verified. Learn how AntMag verifies content