Defeat Marathon Infinity's toughest bosses. Master the Juggernaut and other formidable Pfhor units with detailed strategies and tactical precision.
Conquering the formidable bosses in Marathon Infinity requires more than just raw firepower; it demands tactical precision, resource management, and an understanding of their unique attack patterns. This section provides detailed strategies to help you overcome the most challenging encounters.
The Juggernaut
The Juggernaut is a massive, heavily armored Pfhor combat unit, often encountered in tight corridors or open arenas. Its primary attack is a devastating plasma cannon, capable of quickly depleting your shields and health.
- Preparation: Before engaging, ensure you have full shields and at least 100% health. Stock up on Fusion Pistol ammunition and SPNKR rockets. A good supply of Health Canisters and Shield Chargers is crucial.
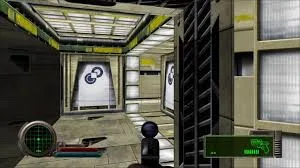
- Location: Juggernauts frequently appear on levels like "All Roads Lead to Sol...". Look for them guarding critical objectives or at the end of particularly challenging sections.
- Strategy:
- Initial Assault: As soon as you spot a Juggernaut, unleash a volley of SPNKR rockets. Aim for its central mass. Three direct hits with rockets will significantly soften it up.
- Maneuver and Evade: The Juggernaut's plasma cannon fires slowly but with high accuracy. Continuously strafe and move, using cover whenever possible. Do not stand still.
- Fusion Pistol Barrage: Once your rockets are depleted or the Juggernaut is damaged, switch to the Fusion Pistol. Its sustained fire is excellent for chipping away at its health. Aim for the glowing red vents on its back if you can get behind it, as these are weak points.
- Environmental Hazards: On some maps, you can lure the Juggernaut near explosive barrels or energy conduits. A well-timed shot to these environmental elements can deal significant bonus damage.
- Health Management: If your shields drop below 50%, retreat to cover and use a Shield Charger. If your health is low, use a Health Canister immediately. Do not try to out-damage the Juggernaut while critically wounded.
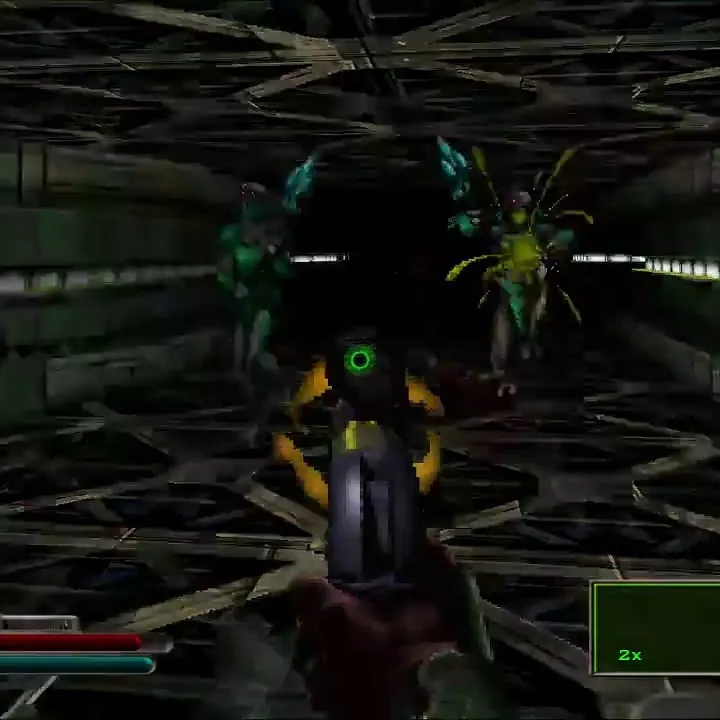
The S'pht'Kr Enforcer
These advanced S'pht'Kr units are faster and more agile than standard Enforcers, equipped with powerful energy weapons and the ability to teleport short distances. They often appear in pairs or with supporting Pfhor infantry.
- Preparation: The Toz-55 "Kip" Shotgun and the Assault Rifle are your best friends here. Ensure you have ample ammunition for both. Shield Chargers are also vital.
- Location: S'pht'Kr Enforcers are common on levels with heavy S'pht'Kr presence, such as "Aie Mak Sicc" and "Where Some Rarely Go".
- Strategy:
- Prioritize: If they appear with other enemies, focus fire on the S'pht'Kr Enforcers first. Their high damage output makes them the primary threat.
- Shotgun Blasts: When an Enforcer teleports close, hit it with a double-barreled blast from the Toz-55 "Kip" Shotgun. This will stagger them and deal massive damage.
- Assault Rifle Suppression: For Enforcers at medium range, use the Assault Rifle's sustained fire to keep them suppressed and prevent them from teleporting effectively. Aim for headshots if possible.
- Cornering and Trapping: Try to lure them into narrow corridors or rooms where their teleportation ability is less effective. This allows you to close the distance and use the shotgun.
- Shield Management: Their energy weapons can quickly drain your shields. If you take heavy damage, disengage briefly to use a Shield Charger before re-engaging.
The W'rkncacnter (Final Boss)
The ultimate antagonist, the W'rkncacnter is a being of immense power, capable of manipulating the environment and unleashing devastating psychic attacks. This battle is a true test of all your skills.
- Preparation: Max out your health and shields. Gather every SPNKR rocket you can find, and ensure your Fusion Pistol and Assault Rifle are fully loaded. Locate any nearby Health Canisters and Shield Chargers before initiating the fight. On the final level, these resources are often strategically placed around the arena.
- Location: The W'rkncacnter is encountered in the final chamber of "Aye Mak Sicc".
- Strategy:
- Phase 1: Environmental Manipulation: The W'rkncacnter will initially manifest as a series of environmental hazards, such as crushing walls, energy fields, and spawning Pfhor. Focus on survival and clearing the immediate threats. Use the Assault Rifle to quickly dispatch any Pfhor that appear.
- Phase 2: Direct Manifestation: After a period, the W'rkncacnter will materialize as a large, ethereal entity. This is your primary target.
- Rocket Barrage: Immediately unleash all your SPNKR rockets. Aim for the center of its mass. Each direct hit will cause it to recoil and briefly disrupt its attacks.
- Fusion Pistol Precision: Once rockets are expended, switch to the Fusion Pistol. The W'rkncacnter has a pulsating core that is its main weak point. Continuously fire at this core.
- Evade Psychic Attacks: The W'rkncacnter will launch powerful psychic projectiles and create localized energy bursts. These are telegraphed by visual cues. Learn their patterns and continuously move to avoid them. Strafe and jump frequently.
- Utilize Cover (Sparingly): While there is limited cover in the final arena, use it to briefly break line of sight and recharge shields if necessary. However, prolonged hiding is not an option as the W'rkncacnter's attacks can penetrate some obstacles.
- Patience and Persistence: This is a battle of attrition. Do not get discouraged by its high health pool. Maintain constant fire on its core, manage your health and shields, and keep moving. The W'rkncacnter will eventually fall.
100% Human-Written. AI Fact-Checked. Community Verified. Learn how AntMag verifies content