Navigate Castlevania III: Dracula's Curse Level 3, the Forest of Darkness. Learn enemy patterns, find hidden items, and choose your path through this challenging stage.
NOTE: You can only play this block if you came here from the World Map screen. If you played Level 2, you'll arrive later in this stage. We'll note where.
Grab the candle at the start of this stage and head forward. There are Spike Traps here, but you can wait for them to drop down and ride on top of them, getting the candles on the way. To the right is a Ghost who may take a couple hits. Walk right until he comes down. You can also find a Double Trouble Icon by breaking the wall to the lower right here.
Grab it and head upstairs to the next screen.
Here, head left and kill the Skeleton you find (this one throws bones). Keep going left up the steps but note there is a Red Gates of Death that jumps down at you. Past him is another bone-throwing Skeleton that can jump at you too. Just be ready to jump up and whip as you go left, heading up the stairs at the end.
NOTE: You will begin Level 3 from the beginning of this stage (skipping BLK 3-00) if you opted to go through Level 2 – Clock Tower of Untimely Death.
Ideally taking control of Trevor at this point, venture right, whipping a couple of torches for Hearts. A little further on you'll notice some glowing eyes in the dark background; these are the eyes of Owl enemies, who will come to the foreground and make swooping attacks when you get near, so time your whips/stabs well (if quick enough, you can jump and attack them as soon as they appear before they have the chance to move). The fourth torch along also contains the Banshee Boomerang sub-weapon – which can be handy for taking out multiple air-based enemies like the Owls here – but our recommendation would be to keep hold of the Sacred Water (if you have it), which is generally more useful anyway, particularly for the Cyclops boss at the end of this level (if you take the Surface Route).
A few more Owls and torches later you'll then get to a couple of small water pits – just be sure to take out the Owl positioned in the middle before you jump across them! Continue right, keeping your distance so you can get some well-timed attacks in to take out the Owls and whip the torches for more Hearts, before eventually reaching some brown-coloured brickwork in the background. Whip some hard-to-see floating candelabras there, claim the goodies, then head through the door at the end to reach the next block of this level.
Look out for one of those annoying little Hunchback enemies coming in from the right; take it out first and whip the candles here for goodies, then climb the stairs. On the next level up is a Red Skeleton enemy; he can only be momentarily knocked down with the whip and will get back up again a few seconds later; bear this in mind if you're going for the contents of the candle just over on the right. Whip him again and take the stairs leading up to the next screen.
When you enter the next screen, you'll notice just to the right of the top of the stairs a ' Pillar of Bones', a familiar enemy from previous Castlevania games, who attacks with fireball projectiles, usually in bursts of three. Don't walk to the very top of the steps just yet, but wait for the enemy to shoot its fireballs (which should pass right over your head) before approaching to attack. Ideally with Trevor, by standing just far enough away to hit it with the tip of your whip and lashing rapidly, you should take the enemy out, and any fireballs it shoots will also be destroyed by your whip.
Continue right, and a Hunchback appears to attack in this lowered segment of the path; a well-timed whip will kill it with little trouble. Further right, another Pillar of Bones and Hunchback later, drop down onto the lowered, detached stone ledge, and walk down the steps to the screen below. Once at the bottom of these stairs, just walk right and drop down to ground level, and head through the door on the right to finish this block.
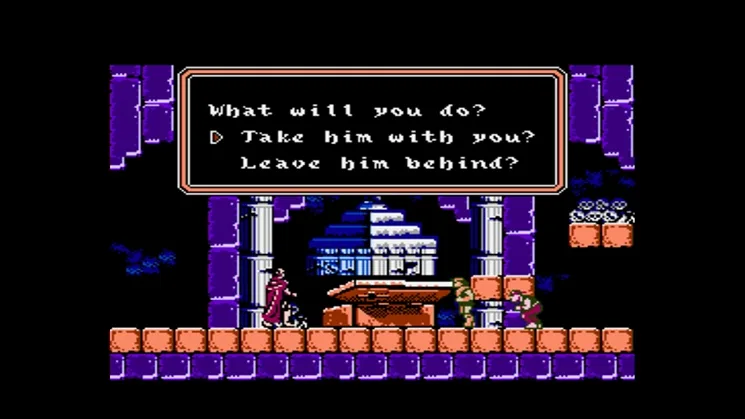
Once again, we come to a fork in the road; the path you opt to take deciding which block you go to. This is what is the game's "major path split"; as the following sets of stages you take from this point on are very much different, depending on whether you take the "Surface Route" (easier), or the "Underground Route" (harder). Both paths reconvene at Level 8 – The Main Hall.
- If you choose to take the upper path, continue from BLK 3-03. Ryan will cover the Surface Route section of the walkthrough.
- If you choose to take the lower path, continue from BLK 4-01. Greg will cover the Underground Route section of the walkthrough.
The stage starts with a Crow, positioned to the upper-right, making an immediate swoop at you, so jump and hit it before it gets the chance to harm you. The first torch here contains a Heart, while the second has an Axe – we'd recommend skipping it and keeping hold of your Sacred Water if you already have that, otherwise it's up to you if you want to pick it up. From the top ledge, jump right to land on the lower-right ledge and destroy another torch for a Heart, then head down the stairs to the screen below.
Now, the moment you appear in this screen, you'll be approached by floating jellyfish-looking enemies known as Spook Spores, and these are a pain to deal with, as whipping results in them breaking up into smaller versions that scatter around in arc patterns. We'd recommend whipping them only if really necessary, otherwise try to avoid them. From the bottom of the stairs you just came down, go right and drop down to ground level, heading right. Try to avoid the Spook Spores floating in from the right (there's little point in fighting them; they may drop the occasional Heart, but they infinitely respawn), and if you walk right without stopping, well-timed jumps over the Spook Spores on the ground should see you get past them without taking damage as they burst. Jump over a small pit that follows, then walk down the steps on the next led
100% Human-Written. AI Fact-Checked. Community Verified. Learn how AntMag verifies content