Guide yourself through Chapter 2: Shield Brethren in Ys X: Proud Nordics. Learn how to handle Balta Island, Lecto Island, and the Cavern of the Rite, including boss strategies and item locations.
Alright, let's dive into Chapter 2: Shield Brethren in Ys X: Proud Nordics! This chapter will have you exploring Balta Island, Lecto Island, and the mysterious Cavern of the Rite. We'll cover everything you need to know, from scrounging for supplies to mastering new combat techniques and taking down tough bosses.
Walkthrough
- 1Balta Island: You'll start on Balta Island and are initially guided by red markers. You won't have free rein to explore just yet. Phylleia will task you with gathering equipment and resources for yourselves and the ship. Head right to get 800 gold from some ladies, then speak to Segun up ahead for 1200G. Visit the Holger (Blacksmith) for an event, and consider buying weapon pieces and armor. Hugill is down by the beach. Talk to Ulvar twice (choose the first option) to get three choices for strengthening parts of your ship. Finally, report back to Phylleia and select the first option. You'll be blocked from further exploration, so just make your way towards the next red marker. Keep an eye out for drops in the water you can collect. You'll then face three Griegr ships. After this naval encounter, you'll gain access to the Action Menu on board (press the touchpad), though most options are story-locked for now. The 'Chats' function is available, and conversations will be logged even if you don't listen to the whole thing. You'll also earn the 'Shoot the Breeze' trophy.
- 2Lecto Island: Head towards the next red marker and choose to dock around the back of the island. Enemies here are around level 10-12. You'll find a Heal Formula (for Heal Potion), an empty bottle, and the Lunch Box Recipe: Plain, along with a Plain Lunch Box. There's a nearby trunk for Adventure Preparations. Keep an eye out for Crystal Clusters; breaking the large ones contributes to your Total Discovery Rate. Chests on this island contain Basic Ingredients x10, Stimulant x2, and an Arion Charm. When you reach the red marker, Igi will appear in a frenzied state and run past you into a cave.
- 3Cavern of the Rite: Inside the cave, you'll go through a tutorial for the 'Release Line'. You'll also find Hewnstone. Navigate through a corridor filled with booby traps into the next room. Here, you'll have a Battle tutorial on 'Speed Attack' (indicated by a blue aura), which can collapse Duo Guard. The game teaches you that if you use Dash [L1] against a Speed Attack, you'll automatically dodge and can counterattack with [X]. Be cautious of floor traps as you exit this area; jump over them with [Circle]. You'll find a chest containing an Armor Seal. Next up is a tutorial for 'Mana Burst'. Adol's is fire-based, while Karja's is water-based. Since you're in water, switch to Karja, hold [X], and release a Mana Burst to create an ice foothold. Then, swap back to Adol and use his Mana Burst to burn away vines. Watch out for another floor trap as you enter the next hallway. You'll encounter another Hewnstone, and a tutorial on 'Refining Mana Seeds' and 'Mana Abilities'.
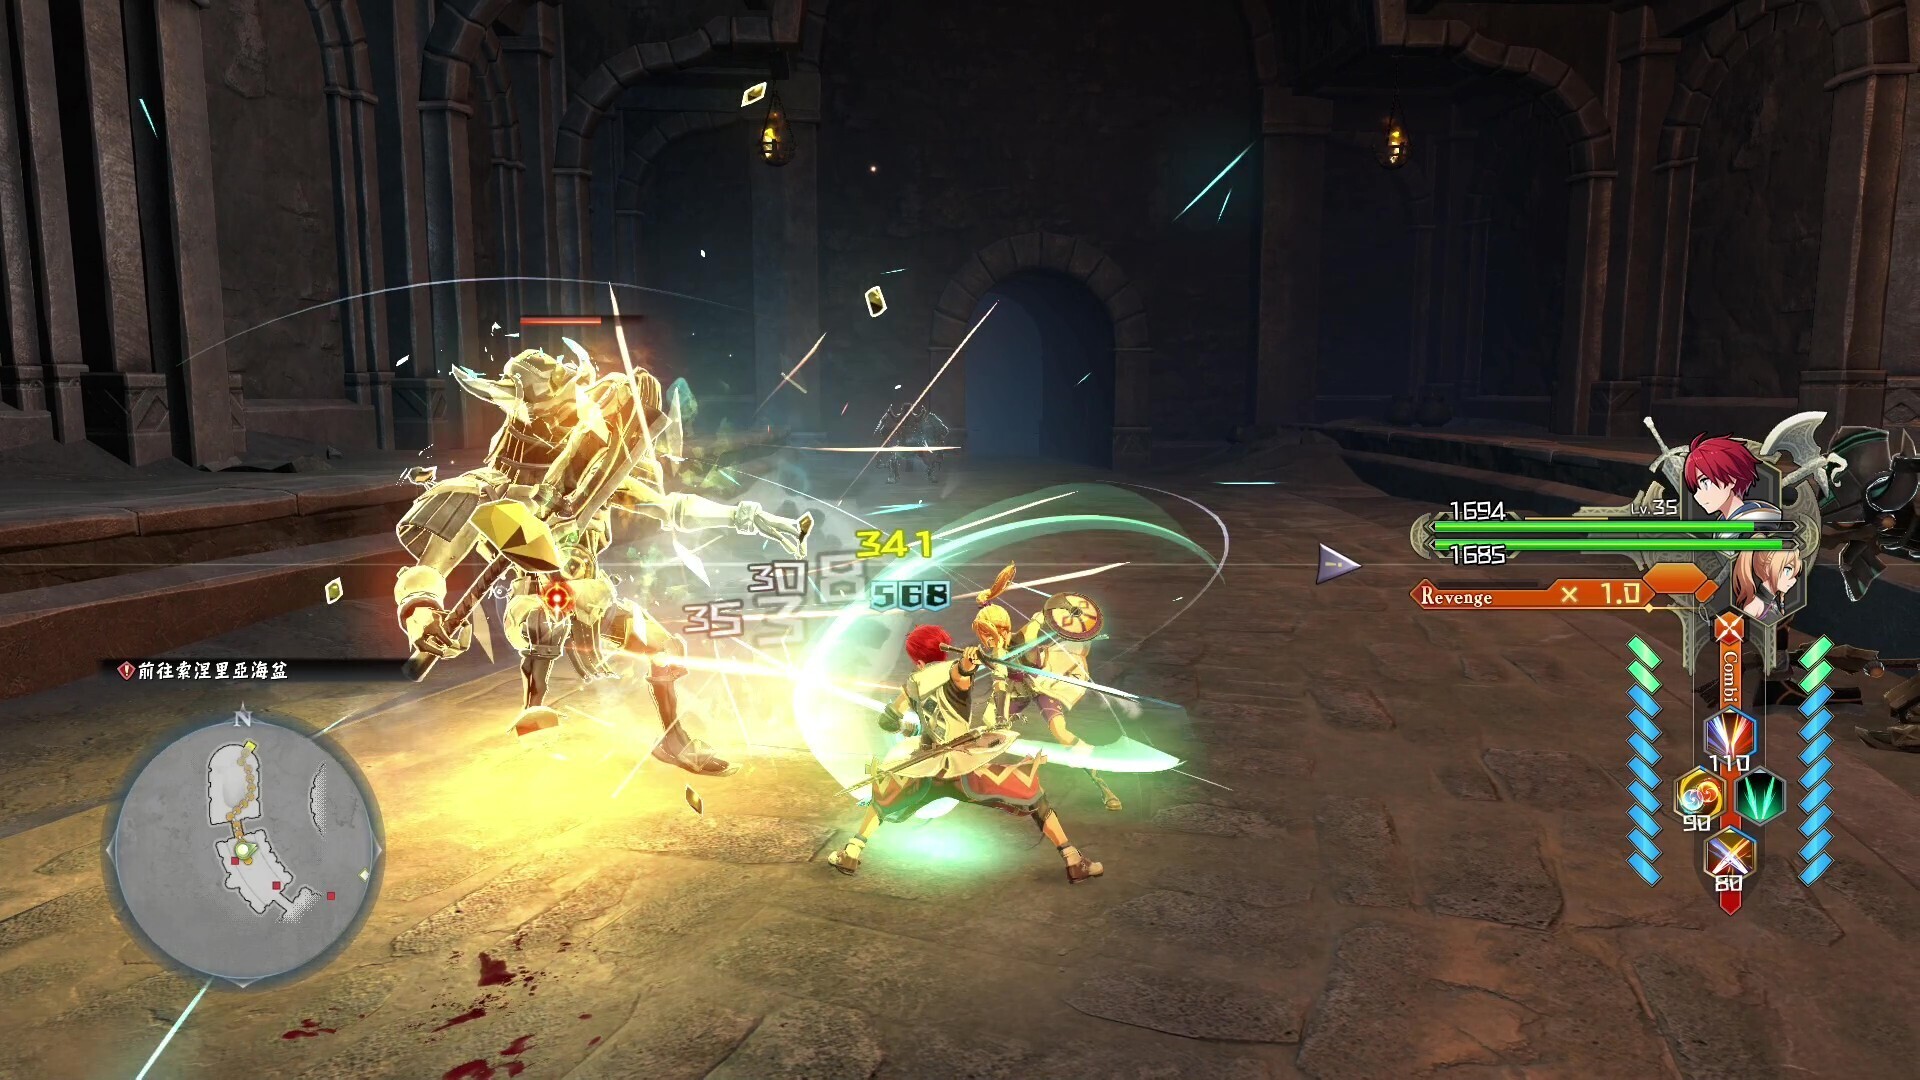
- 4Boss: Ziomander: Save and prepare to face Ziomander (Base Lvl: 12). This boss can protect itself with vines, which you can remove using Adol's Mana Burst. It can also summon water bubbles and spray attacks (Speed Attack). Be aware of when it electrifies the field (it will start to spark); jump back onto the ledge using [Circle] to avoid it. Ziomander can also chomp at you and will attempt a Power Attack by jumping to flatten you. Near the end of its HP, an [X] button prompt will appear for a finishing blow.
- 5Post-Ziomander: Use the Hewnstone to heal up and proceed. In the next room, you'll encounter bomb-throwing Griegrs. Watch out for plant monsters on the broken ledges to the left; their Speed Attack homes in on you. You can jump onto ledges to reach higher areas, using Karja's ice step if needed. Destroy vines to find a chest with Breath Formula (for Breath Water). Back on the main level, use Karja's Mana Burst to reach a higher level in the back, then go up stairs, destroying vines with Adol's Mana Burst. A chest here contains a Warrior Bandana. Pull the nearby lever, drop down, and head through the open doorway. Destroy the second set of vines while dodging a wrecking ball and enemy bombs. If you're quick, enemies might jump forward to their deaths as you run past their bombs. Grab the chests containing an Axe Seal and Cureleaf. Be mindful of a floor trap as you exit.
- 6Boss: Igi: After the red marker event, head to the next Hewnstone. Save and advance. Examine the Rune Stone, and you'll immediately fight Igi. To deal with Igi's Durability Meter, hold [R2] for Cross Guard; its Power Attack will fill your Revenge Gauge by 2.0x. Igi can recharge its Durability Meter multiple times. Its attacks include stomps, sweeps, and jumping across the room. When it jumps back, it's preparing a Speed Attack, so use Dash [L1] instead of Cross Guard. You'll get two chances for an [X] button Quick Time Event (QTE) to finish it off.
- 7Viewpoint Isle: You'll find yourself back on Viewpoint Isle with the Nameless Old Man. After your conversation, leave and head west, burning vines. Ignore the Mana String going west; instead, drop to the lowest level and open a chest for a Lyre Seal. Make your way back up and take the first Mana String points you encountered, then the south set. Open a chest for a Red Strong-Arm (this introduces the 'Strong-Arm Mana Seeds' tutorial). Burn vines and enter the room. A red chest here contains a Blessed Paper Scrap (used to increase Accessory slots); other chests are locked. Exit at the top and return to the Old Man at the (!) marker.
- 8New Skill & Next Mission: Approach Igi to unleash your new mana skill. Grimson will then task you with gathering information about the Griegr's movements around Obelia Gulf.
Tips
- Always keep an eye on your map and follow the red markers when they appear, as they often guide you through critical story points or objectives.
- Don't underestimate the usefulness of the Action Menu on board the ship, even if most options are locked early on.
- Pay attention to enemy attack patterns, especially the blue aura for Speed Attacks and the telegraphs for Power Attacks. Mastering the dodge and counter mechanics is key.
- Utilize Adol's and Karja's Mana Bursts strategically, especially for traversal and environmental puzzles.
- Heal up at Hewnstones whenever possible, especially before boss encounters.
- Remember to check chests and break Crystal Clusters for valuable items and to contribute to your discovery rate.
- New Mana Skill
- New Mission from Grimson
- Various items and equipment found throughout the chapter
- 'Shoot the Breeze' Trophy
100% Human-Written. AI Fact-Checked. Community Verified. Learn how AntMag verifies content