Navigate Super Meat Boy's toughest levels. This guide offers specific strategies and character insights to conquer precision platforming challenges.
Welcome to the most crucial section of this guide! Super Meat Boy is all about precision, timing, and understanding each level's unique challenges. While Meat Boy is the default and often the most versatile character, some levels can be made significantly easier with specific unlockable characters. This section will break down key levels, offering detailed walkthroughs, strategies for collecting Bandages, and tips for navigating Warp Zones.
World 1: The Forest
1-5: The Tricks
This level introduces you to the concept of wall-jumping between two closely spaced walls. Mastering this is essential for later levels.
- Initial Ascent: Immediately wall-jump up the narrow shaft to the first platform. Don't rush; focus on consistent, rhythmic jumps.
- Bandage Location: The Bandage in this level is located directly above the starting point, requiring a precise series of wall-jumps. To reach it, you'll need to gain maximum height from the initial wall-jump sequence. Once you reach the top of the first shaft, instead of moving right, perform a high jump off the right wall and immediately wall-slide down the left wall, then jump back to the right to gain enough height to grab the Bandage. This often requires a slight pause at the peak of your jump before initiating the wall-slide.
- Navigating the Sawblades: After the Bandage, you'll encounter your first set of moving sawblades. Observe their pattern. Typically, they move in a predictable back-and-forth motion. Wait for a sawblade to move away from your path, then quickly slide or jump past it.
- Final Stretch: The last section involves a series of short wall-jumps over a pit of sawblades. Take your time and ensure each jump is deliberate.
1-7: Caged
Caged is a vertical gauntlet filled with tight spaces and rotating sawblades.
- First Vertical Shaft: Wall-jump up the initial shaft. Be mindful of the small, stationary sawblades embedded in the walls. Aim for the gaps between them.
- Bandage Location: The Bandage is cleverly hidden in a small alcove to the right, about halfway up the level. To get it, you'll need to reach a specific height in the main shaft, then perform a precise jump and slide into the alcove. It's often easier to overshoot slightly, then slide back down into the opening.
- Rotating Sawblades: The main challenge here is timing your movements around the rotating sawblades. These require you to anticipate their rotation and move into the safe zones as they appear. A common strategy is to wait until the sawblade has just passed your intended path, then quickly move.
- Character Suggestion: While Meat Boy can clear this, characters with slightly less friction like Goo Ball (unlocked in World 2) can make the wall-slides feel more controlled, which is beneficial in tight vertical spaces.
1-12: The Gap
This level tests your long-jump and wall-slide precision over a massive chasm.
- Opening Jump: The first jump is a long one. You need to run, jump at the very edge of the platform, and hold the jump button for maximum height and distance.
- Bandage Location: The Bandage is located on a small, precarious platform far to the left of the main path, after the initial long jump. To reach it, you'll need to land on the first wall, wall-slide down, and then perform a difficult mid-air jump to the left, aiming for the tiny platform. This often requires a "wall-kick" off the main wall to gain the necessary horizontal momentum.
- Wall-Sliding and Jumping: After the Bandage, you'll be navigating a series of wall-slides and jumps between distant walls. The key is to maintain momentum and not over-correct. Use short, controlled wall-slides to adjust your position.
- Warp Zone: The Warp Zone for this level is usually found by falling down a specific gap or by reaching a hidden area. For "The Gap," after the initial long jump, instead of continuing right, look for a hidden passage or a breakable wall on the lower left side of the first large wall you encounter. Often, falling into a seemingly fatal gap will reveal the Warp Zone entrance.
World 2: The Hospital
2-3: Operation
Operation introduces moving platforms and more complex sawblade patterns.
- Moving Platforms: These platforms move on a set path. Your goal is to time your jumps to land on them and then jump off before they carry you into danger. Pay attention to their cycle.
- Bandage Location: The Bandage is often found above or below the main path, requiring a detour using the moving platforms. For "Operation," it's typically in an upper alcove accessible by riding a specific moving platform to its highest point, then jumping off.
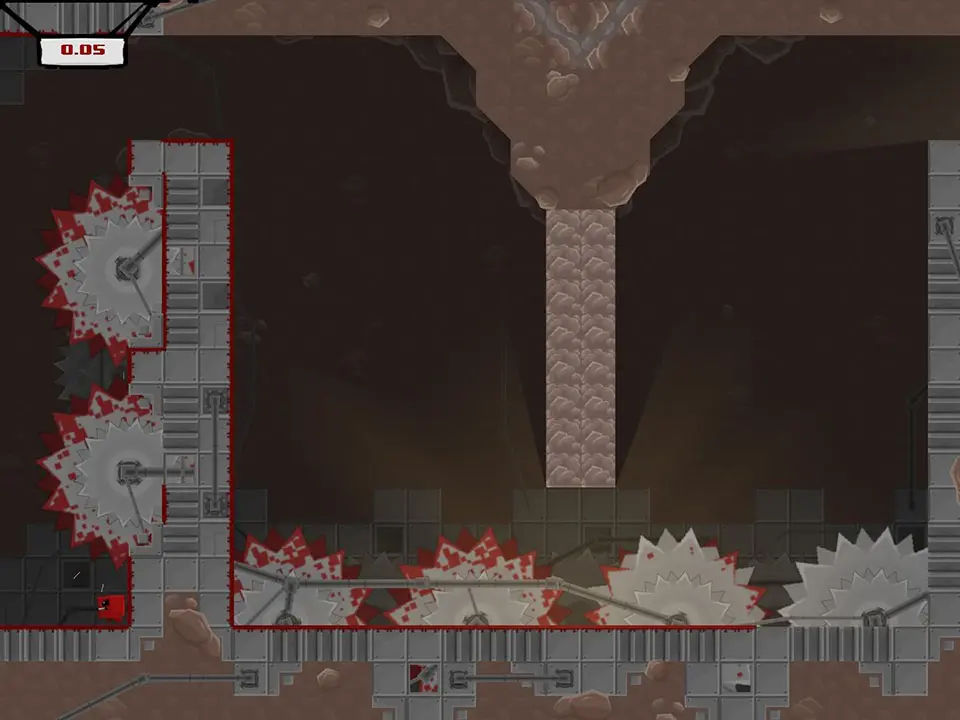
- Sawblade Gauntlet: The latter half of the level features a series of closely packed, often rotating, sawblades. Patience is key. Wait for the perfect opening and execute your moves quickly.
2-7: Spinal Tap
This level is a masterclass in wall-sliding and precise vertical movement, often featuring "sticky" walls that require quick changes in direction.
- Sticky Walls: These walls allow you to stick to them briefly without sliding. Use this to your advantage for precise positioning before a jump.
- Bandage Location: The Bandage is usually in a side passage that requires a tricky wall-jump sequence. In "Spinal Tap," it's often located in a small, enclosed space that you need to wall-jump into from a narrow opening. This might involve a quick slide down one wall, then an immediate jump across to the Bandage.
- Vertical Precision: The level demands constant vertical adjustment. Don't be afraid to use short wall-slides to control your descent or ascent.
2-10: The Doctor's Office
This level combines many elements learned so far, often with a focus on speed and momentum.
- Momentum Management: Maintain your speed through the level. Many jumps require a running start.
- Bandage Location: The Bandage in "The Doctor's Office" is frequently placed in a high-risk area, such as directly above a series of sawblades or requiring a blind jump. Look for opportunities to use the level's layout to your advantage, perhaps by bouncing off an enemy or a small platform to reach it.
- Warp Zone: The Warp Zone here is often found by taking an unconventional path or by falling into a specific pit that looks like a death trap. Explore areas that seem too dangerous to be part of the main path.
100% Human-Written. AI Fact-Checked. Community Verified. Learn how AntMag verifies content