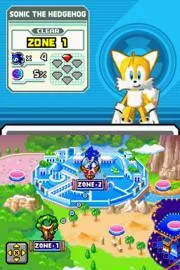
Sonic Rush, released in 2005 for the Nintendo DS, is a high-speed 2D platformer developed by DIMPS. You'll be mastering Sonic's signature speed and unleashing powerful boost moves as you navigate vibrant zones like the Emerald Coast and Water Palace. The game challenges you to defeat bosses and achieve S-ranks, making it a thrilling experience for any fan of fast-paced action.
This guide is here to help you conquer every aspect of Sonic Rush. We'll cover everything from mastering the controls and movement to unlocking Sonic's full potential. Whether you're aiming for those elusive S-ranks, struggling with specific boss encounters, or just want to understand the game's mechanics better, this guide provides expert tips to ensure you achieve the best possible performance.
Part 9
Explore zones like Mirage Road, Night Carnival, Huge Crisis, Altitude Limit, and Dead Line in this Sonic Rush zone guide.
Mirage Road Zone:
This Egyptian-themed zone, Sonic and Blaze Zone 3, features slower-paced gameplay. You'll encounter rooms that trap you until you defeat enemies like the multi-hit Egg Hammers. Near the end of both Acts, a golden platform section requires you to dodge falling enemies and rocks; use Tension Boost to zip through them. In Act 2 of this section, you can move up and down on the platform. The boss style is a Dung Beetle Mecha.
Night Carnival Zone:
Sonic Zone 4 and Blaze Zone 1, this carnival-style zone involves platforming and slight puzzles with switches. You'll need to use R tricks to progress and are chased by a large rolling object in both acts, requiring you to run and use Tension, especially with Blaze, to avoid instant death. Several large pits of doom are present. The boss style is Merry-go-round like.
Huge Crisis Zone:
Sonic Zone 5 and Blaze Zone 6, this zone features Military Ships and GUN enemies. Gameplay involves platforming, obstacles, and enemy battles, with rooms that trap you until all enemies are defeated. Watch out for crushing traps and pits of death, especially toward the end of Act 2. The boss is the Same Egg Viper Boss from Leaf Storm with different attacks.
Altitude Limit Zone:
Sonic Zone 6 and Blaze Zone 5, this sky level features rails and tricks. Expect large holes of death, some with purple lasers. Parachutes require ducking enemies, and rocket platforms need getting used to. Both acts have a hang glider section where you follow rings to avoid enemies. Act 2 begins with a rail section with spikes; use Tension Boost to plow through them, but be careful not to miss the next rail. The boss style is Bird-style, similar to Egg Albatross from Sonic Heroes.
Dead Line Zone:
Sonic and Blaze Zone 7, this is a typical Eggman spaceship zone with reversed gravity. The Giant Rockets are tricky to control: they go straight if no buttons are pressed. If facing right, use up and down to steer; if facing left, controls are reversed. The boss battle is Sonic Vs. Blaze.
- In Mirage Road Zone, use Tension Boost to quickly get through the falling rocks and enemies in the final sections.
- In Night Carnival Zone, use Tension when being chased by the rolling object, especially if playing as Blaze.
- In Altitude Limit Zone, use Tension Boost on the spiked rails at the beginning of Act 2, but be mindful of speed to land on the next rail.
- Master the controls of the Giant Rockets in Dead Line Zone to navigate the reversed gravity sections effectively.
Part 11
Learn how to defeat the bosses in Part 11 of Sonic Rush, including the Water Palace and Mirage Road bosses.
Water Palace Boss:
This Lock Ness Monster-like boss is defeated by attacking the top of its head when it blinks. You will be running around a circular track, making the fight more 3D than previous encounters.
Overall Strategy: After each hit, wait for the boss to move to the other side of the stage. Position yourself slightly closer to the boss's tail than its head. If the boss moves quickly towards the center, it's performing a head-smashing attack. If the boss turns around and slowly approaches, it will perform a belly slam. If the water drains, prepare for a specific attack.
8-6 Hits Left:
When the boss is in the middle and its head comes back, Eggman will say "Take This!". This is your chance to hit the boss. Your jump will be slower underwater, similar to the head-smashing attack of the Leaf Storm Boss.
When the boss is near you, rises in the air, and Eggman says "Take This!": This is a belly slam attack. The boss may first try to hit you low before the belly slam. Run away from the boss. When it lifts up to belly slam, spin-dash underneath it to avoid the attack. You cannot hit the boss during this move.
5-1 Hits Left:
The boss may get slightly faster, but the core mechanics remain the same. There is one new attack.
When the water drains out of the area: This is a two-part attack and a chance to hit the boss. First, the head moves slowly towards you with its mouth open, forcing you towards its tail, which is a propeller that damages you. Then, it will suddenly charge, and Eggman will say "Get Ready to Be Schooled!". To avoid this, stand close to the propeller without touching it, which may help you avoid the mouth. The head retreats, and the top blinks, allowing you to hit it before it fully retreats or by chasing it down. The water will then return. Getting hit during this attack can cause you to lose Rings that end up under the boss, which cannot be retrieved as the boss remains stationary.
Mirage Road Boss:
This Dung Beetle Boss is more complex. It rolls a ball around a circular path. When the ball is spiky, do not touch it. When the ball is smooth and blinking, you can hit it. To hit the boss, you need to get the ball to strike the back of the bug.
Overall Strategy: Keep running away from the boss. Initially, wait for the beetle to turn around before it releases the ball. Later, it turns around quickly. Run away from the bombs it throws.
8-6 Hits Left:
When Eggman says "He he!" and the bug is rolling the ball: Run from the ball. If you get too close, it will turn around and chase you. Hitting the blinking ball can make the boss stop, but you cannot hit the boss directly.
When Eggman says "He he!" and the bug releases the ball towards you: This is a chance to hit the boss. The bug releases the ball and then turns around to catch it. If you jump over the ball or hit it incorrectly, the bug will catch it, and nothing will happen. To hit the ball correctly at the back of the bug, first run away from the bug. When it releases the ball, continue running a short distance in the direction you were coming from. Watch for the bug to turn around. Hit the ball when it is smooth (not spiky) so it rolls towards the bug's rear. Do not jump over the ball after the bug releases it. Hit the ball, and it will roll in the correct direction. Do not hit the ball too soon; allow the bug to turn around first.
5-1 Hits Left:
The boss and ball get faster, and the ball changes from smooth to spiky more quickly. The bug turns around faster, allowing you to hit it sooner after it releases the ball. Towards the end, it becomes even quicker.
When you hit the ball towards the boss, it may jump over it. Hit the ball again; do not jump over it. The ball will not turn spiky and will hit the boss.
When Eggman Says "Get Ready to
Part 12
Master Part 12 of Sonic Rush with our guide! Learn strategies to defeat the Night Carnival and Huge Crisis bosses, including attack patterns and weak points.
This section covers boss fights in Part 12 of Sonic Rush, specifically the Night Carnival Boss and the Huge Crisis Boss.
9.d. Night Carnival Boss
This boss fight takes place on a circular platform with a central boss machine featuring two spinning arms. One arm holds Eggman (or Eggman Nega), and the other is a ball that can become electrified or shoot energy balls downwards.
Overall Strategy:
Start by running right to grab high rings. When the electrified ball is safe, run back the other way and hit it. This lowers Eggman for a direct hit and spawns a springy vehicle. Use the vehicle to jump up and hit Eggman while he's high, but wait for the ball to pass you first. After hitting Eggman, stand your ground as the ball is usually safe. Watch out for the boss slamming the ball down or swinging it low.
8-6 Hits Left:
The boss and ball spin around. The ball flashes red before becoming electrified. Hit the non-electrified ball to lower Eggman and spawn a springy vehicle. Jump on the vehicle to reach Eggman when he's high, or hit the ball again to bring him down. Avoid the vehicle that tries to hit you.
Ball Swings Low:
The ball swings very low; press down to duck. If the ball isn't electrified when this attack starts, it may become electrified without warning.
5-3 Hits Left:
The ball stays electrified longer, and the boss moves faster.
When Eggman says "Get Ready to be Schooled!":
The ball slams the ground, sending out two shockwaves. Jump over them. Blaze can use her hover to stay above them. This attack can be instantly lethal if the ball lands directly on you. There is no chance to hit the boss during this attack.
2-1 Hits Left:
The boss is even faster, and the ball is almost always electrified. Use the springy vehicle to hit Eggman, timing it carefully to avoid hitting the ball on the way up.
9.e. Huge Crisis Boss
This boss is a recolored version of the Leaf Storm boss with some attack differences.
Overall Strategy:
Avoid staying at the edges of the platform to prevent being trapped by the head-slamming triple attack.
8-6 Hits Left:
After Eggman says "Take this!", the boss slams its head down one or three times. Wait a moment longer before attacking.
The "Get Ready to be Schooled" attack is faster and tracks you more closely, even when the head is thrown back.
The attack where the boss moves to the side of the platform is removed.
5-1 Hits Left:
The boss twists and moves into the background. Eggman puts his head down and fires missiles. These are easy to avoid by observing their trajectory. There are four patterns:
- Slow and directly at you: Walk back and forth on the platform.
- Slow and random: Stand mostly still, moving only if a missile is aimed directly at you.
- Fast and directly at you: Run back and forth across the platform quickly.
- Fast and random: Stand in one spot and move only when necessary, as most missiles won't hit you.
There is no chance to hit the boss during this phase.
9.f. Altitude Limit Boss
This bird-like boss is hit on the top of its blinking head, similar to Egg Viper-like and Nessie-like bosses. It is on a 2D platform, but its attacks differ.
Overall Strategy:
When the bird is about to attack, start spin-dashing back and forth.
Part 13
Master the bosses in Part 13 of Sonic Rush! Learn strategies for the Dead Line Boss (Sonic vs. Blaze) and the Final Zone Boss, including attack patterns and weak points.
Walkthrough:
- 8-6 Hits Left (General Boss):
- When the boss shoots from its wings, try running back and forth quickly or jumping through bullets. Spin-dashing can also be effective.
- When the boss lands and jumps to stomp, run or jump out of the way, then hit its bowed head. Alternatively, walk away and turn around when it lands.
- When the boss swoops in for a peck attack, jump out of the way to avoid being trapped, then hit its blinking head.
- 5-1 Hits Left (General Boss): Attacks are faster.
- When the boss creates wind and prompts A/B/Up button presses, stay close to the boss and press the buttons quickly to avoid being blown off the platform.
- 9.g. Dead Line Boss (Sonic vs. Blaze): Fought on a 2D platform.
- Overall Strategy: Hit Sonic or Blaze when they are standing still, not spin-dashing or jumping. Jumping into them or running towards them and pressing down can be effective. The best time to hit is after they complete an attack.
- Beneficial Glitch: The characters can sometimes get stuck on the platform edge, allowing for easy hits.
- 8-6 Hits Left:
- Character Revs Up (Dashing): Jump out of the way and be ready to hit them when they stop spinning.
- Character Floats Up: Jump to avoid their high-speed homing attack and be ready to hit them after they land.
- 5-2 Hits Left: Same as above, but characters stand still for shorter periods and have an additional attack.
- Special Attacks:
- Sonic: Creates a Blue Tornado; run or jump away from it. Watch Sonic carefully as he may hover and create another tornado directly above you.
- Blaze: Summons flame pillars. Watch for small fire circles on the ground indicating where pillars will appear. Try to avoid corners, but look for gaps if trapped.
- Special Attacks:
- 1 Hit Left (Final Hit): A cutscene plays, and the battle changes. Sonic and Blaze push each other off the platform. Press A and B rapidly to win. Use both hands for best results. Winning is indicated by flashes of light mostly towards the opponent and the characters moving towards the opponent's side.
- 9.h. Final Zone (F-Zone) Boss: Fought on a 2D platform.
- General Strategy: The boss is usually behind you. To hit it, make it move to the right of the platform. Hit its blinking hands on the ground after some of its attacks, or dodge its laser/electric attacks.
- Attack Pattern: Once the boss is on the right, Eggman says
Similar guides you might like


100% Human-Written. AI Fact-Checked. Community Verified. Learn how AntMag verifies content