Your go-to guide for all recovery items in Shin Megami Tensei IV Apocalypse. Learn what each item does, how much it heals, and its buy/sell price to keep your demons fighting fit!
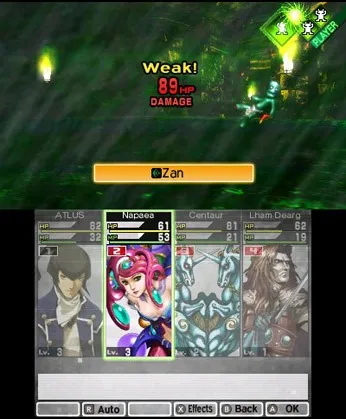
Hey there! So you've made it through the main story of Shin Megami Tensei IV: Apocalypse, huh? Or maybe you're just stocking up for the tough fights ahead. Either way, knowing your recovery items is super important. Let's break down what you can use to keep your demons in fighting shape. Think of these like your party's first aid kit. You've got your basic healing for HP and MP, ways to revive fallen allies, and even items to clear those annoying status effects. Here's a rundown of the recovery items you'll find: | Item | Effect | Stack | Buy | Sell | |---|---|---|---|---| | Healing Water | Heals a small, set amount of HP, 1 ally | 50 | - | 25 | | Medicine | Heals a small, set amount of HP, 1 ally | 50 | 50 | 25 | | Ox Bezoar | Heals a medium, set amount of HP, 1 ally | 30 | 300 | 150 | | Hustle Drink | Heals a large, set amount of HP, 1 ally | 20 | 2,000 | 1,000 | | Life Stone | Heals a small amount of HP, 1 ally | 50 | - | 5 | | Bead | Fully heals HP, 1 ally | 10 | 4,000 | 2,000 | | Bead Chain | Fully heals HP, all allies | 5 | 5 Emerald | 5,000 | | A5 Demoloin | Demon meat. Eat to heal HP, 1 ally | 99 | - | 2,000 | | Chakra Drop | Heals a small, set amount of MP, 1 ally | 30 | 1,000 | 500 | | Chakra Pot | Heals a large, set amount of MP, 1 ally | 10 | 6,000 | 3,000 | | Great Chakra | Heals a large, set amount of MP, all allies | 5 | 5 Garnet | 5,500 | | Soma Drop | Heals a small, set amount of HP/MP, 1 ally | 10 | - | 2,250 | | Soma | Heals a small, set amount of HP/MP, 1 ally | 3 | - | 4,000 | | Bead of Life | Heals a large, set amount of HP/MP, all allies | 2 | - | 10,000 | | Revival Bead | Revive from KO, 1 ally | 20 | 300 | 150 | | Balm of Rising | Revive from KO with full HP, 1 ally | 10 | - | 3,000 | | Dis-Poison | Heals Poison/Sick, 1 ally | 25 | 150 | 75 | | Patra Stone | Heals Sleep/Panic/Bind/Charm/Mute/Daze, 1 ally | 50 | 100 | 50 | | Me Patra Stone | Heals Sleep/Panic/Bind/Charm/Mute/Daze, all allies | 20 | 300 | 150 | | Amrita Soda | Heals all status ailments, 1 ally | 10 | ? | 5,000 | | Amrita Shower | Heals all status ailments, all allies | 10 | ? | 5,000 | | CompleteRestoration Gem | Completely heals all allies, all allies | 99 | 5 Diamond | 1 | | Relic of Revival | On defeat, revive +8 [Press turn](https://megamitensei.fandom.com/wiki/Press_turn "Press turn") icons, all allies | 99 | 5 Diamond | 1 | | Prime Demon Meat | Heals a small amount of HP. High sell price, 1 ally | 99 | - | 3,000 | | Flowering Branch | Heals Panic. High sell price, 1 ally | 99 | - | 8,000 | | Beer of Paradise | Heals a small amount of MP. High sell price, 1 ally | 99 | - | 12,000 | A Few Things to Keep in Mind: * Full Heals: Beads and Bead Chains are your best friends for getting your party back to 100% HP quickly. The Bead Chain is especially great for wiping out damage across your whole team. * Status Ailments: Don't underestimate how dangerous status effects can be! Patra Stones and their stronger Me Patra Stone counterpart are essential for clearing things like Sleep, Panic, and Mute, which can really mess up your strategy. Amrita Soda and Shower are the ultimate cure-alls for any ailment. * Revival: When a demon falls, you'll want a Revival Bead or Balm of Rising ready. Balm of Rising is the premium option, bringing them back with full HP. * Special Cases: The Complete Restoration Gem and Relic of Revival are pretty unique. The Gem fully heals everyone, while the Relic is a lifesaver on defeat, bringing everyone back and even giving you extra [Press turn](https://megamitensei.fandom.com/wiki/Press_turn "Press turn") icons. These often require rare materials like Diamond to purchase, so use them wisely! * High Sell Prices: Notice items like Flowering Branch and Beer of Paradise? They have really high sell prices, making them great for a quick cash injection if you're in a pinch, even though their healing effects might be less critical. Always keep a good stock of these items, especially if you're heading into a boss fight or exploring a new, dangerous area. It's better to have too many than to run out when you need them most!
100% Human-Written. AI Fact-Checked. Community Verified. Learn how AntMag verifies content